


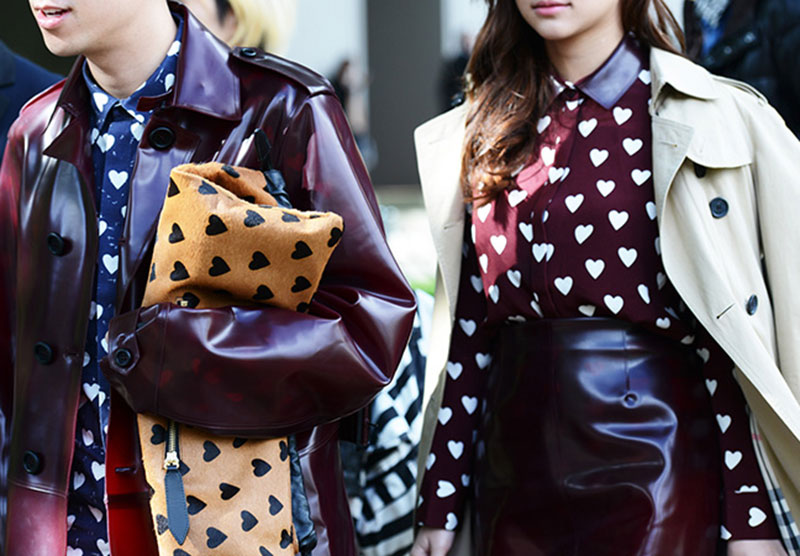
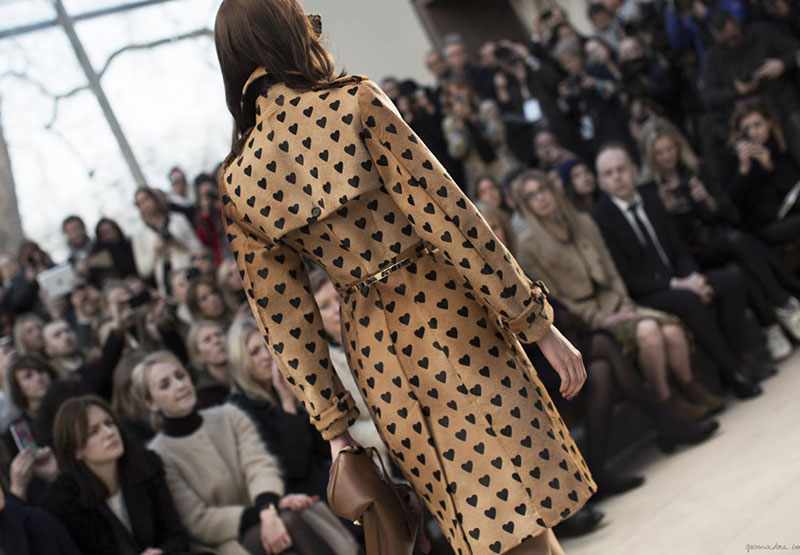
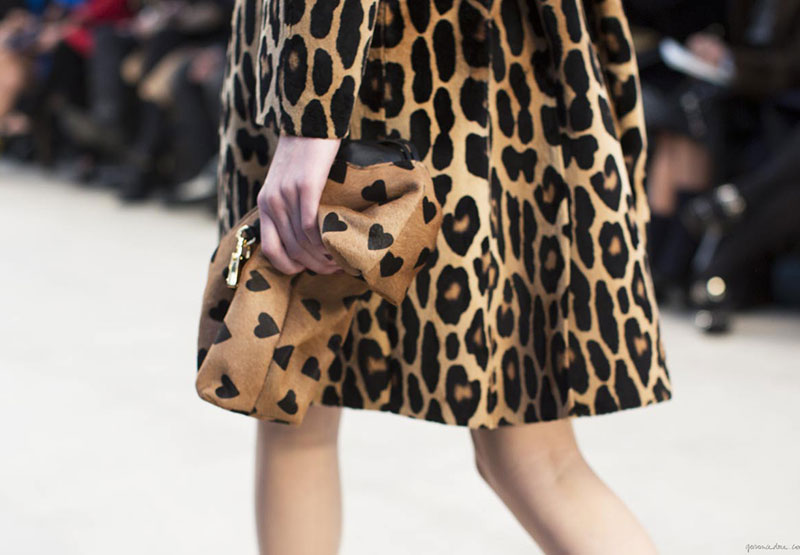
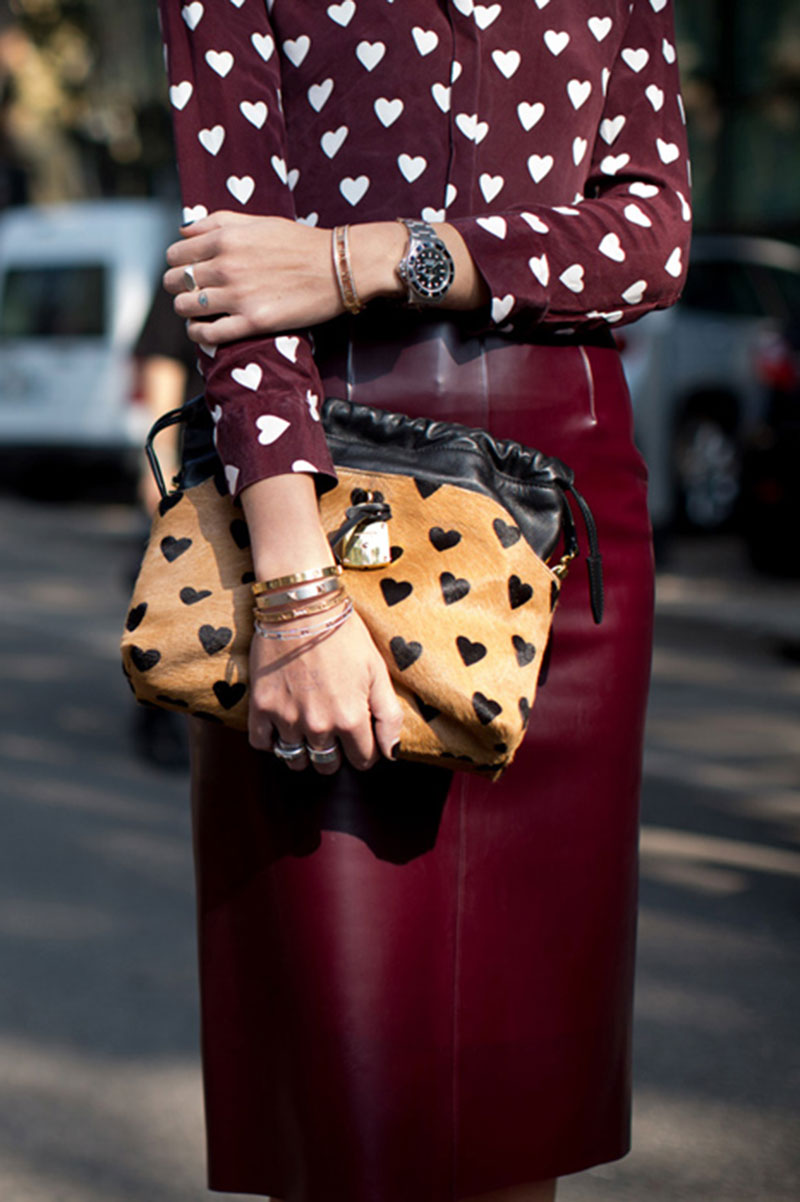
 Absolutely adore this Burberry heart print. How easy would it be to recreate with a simple heart stencil and some fabric paint?
Blog
DIY Día de los Muertos Skull
10.31.13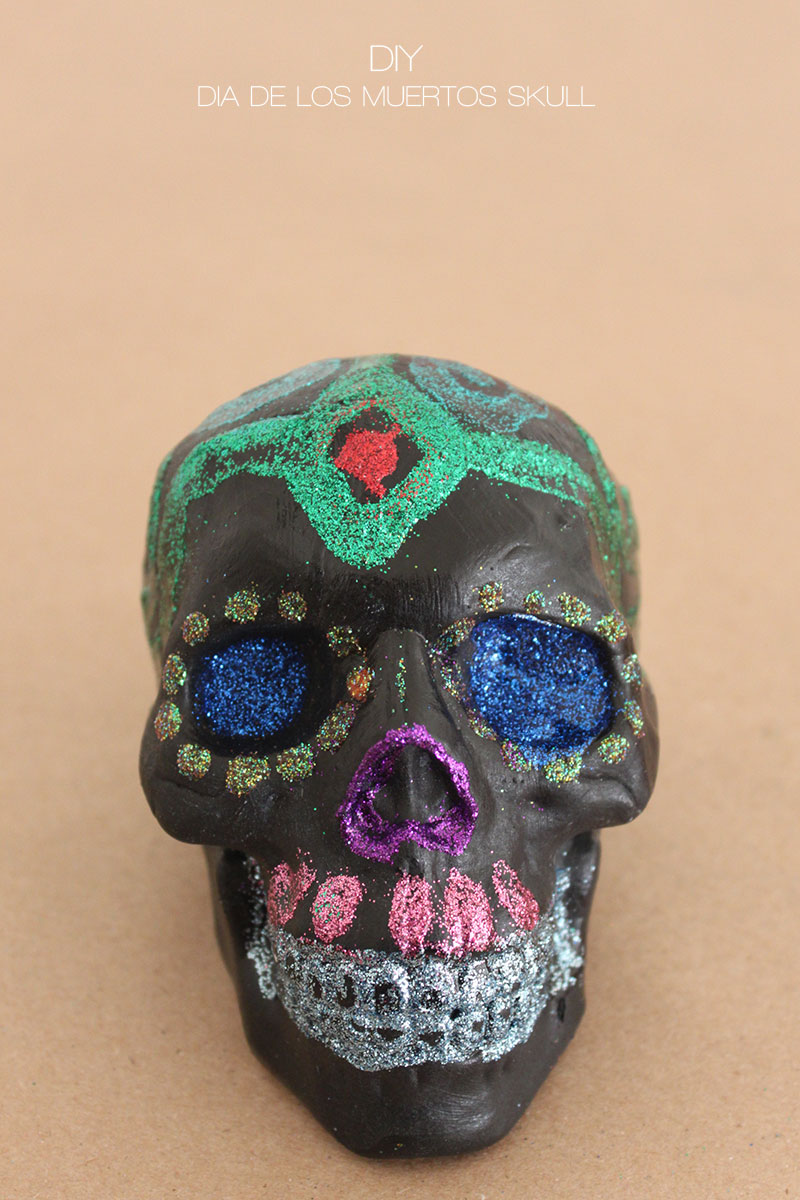
Ok, I know the Day of the Dead is not the same as Halloween, but I couldn’t resist the amazing imagery of the holiday. Happy Halloween and Día de los Muertos!!
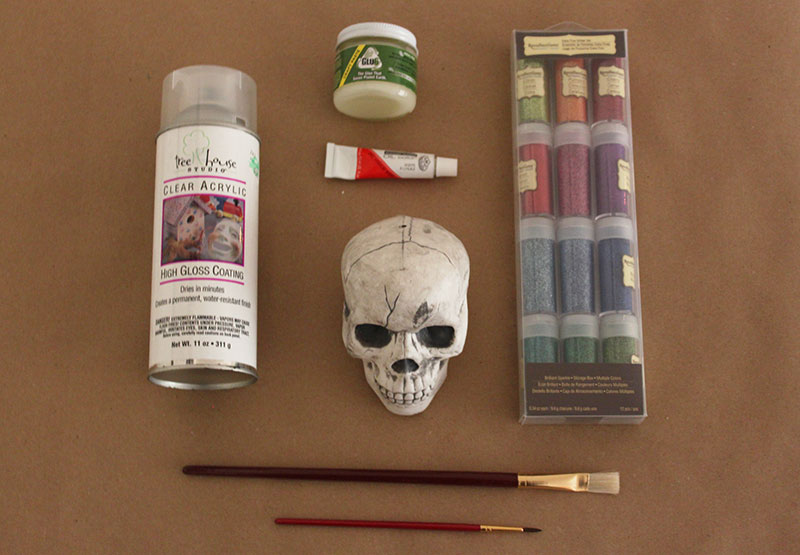
Materials
– Skull
– Glitter
– Glue
– Paintbrush
– Paint
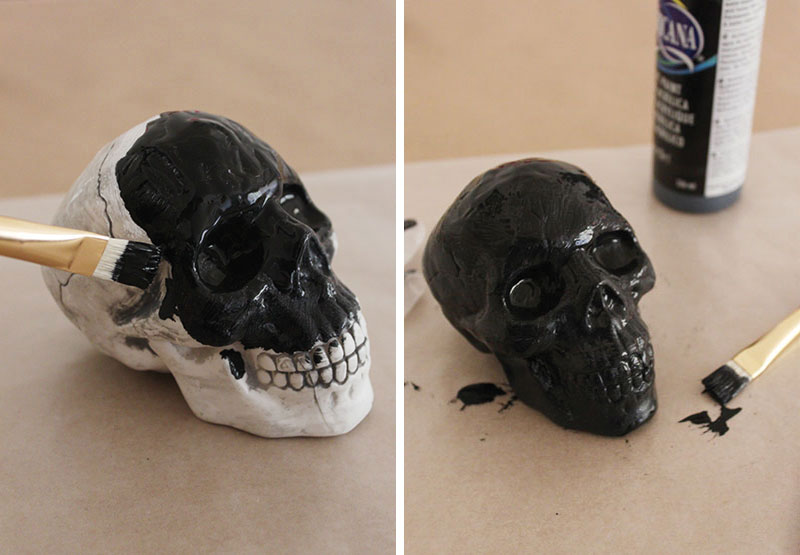 1. Paint your skull any color you want!
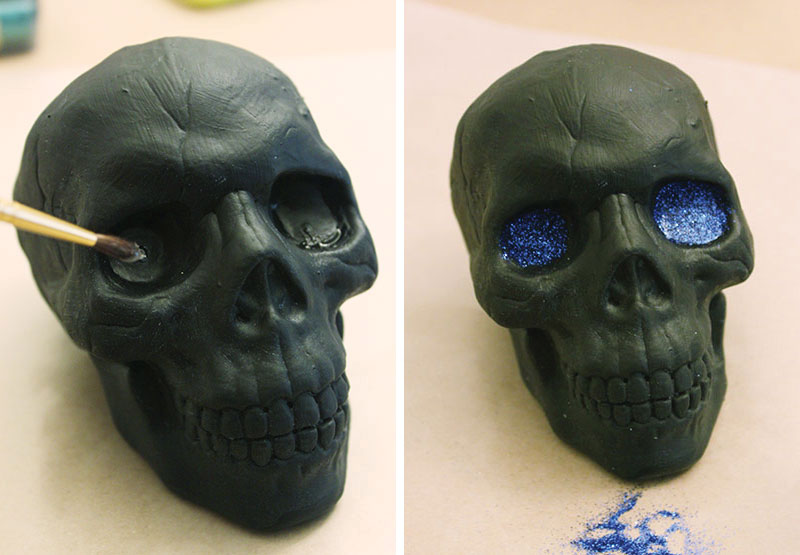 2. Use glue to design the pattern for the glitter. You can plan this out beforehand, or make it up as you go.
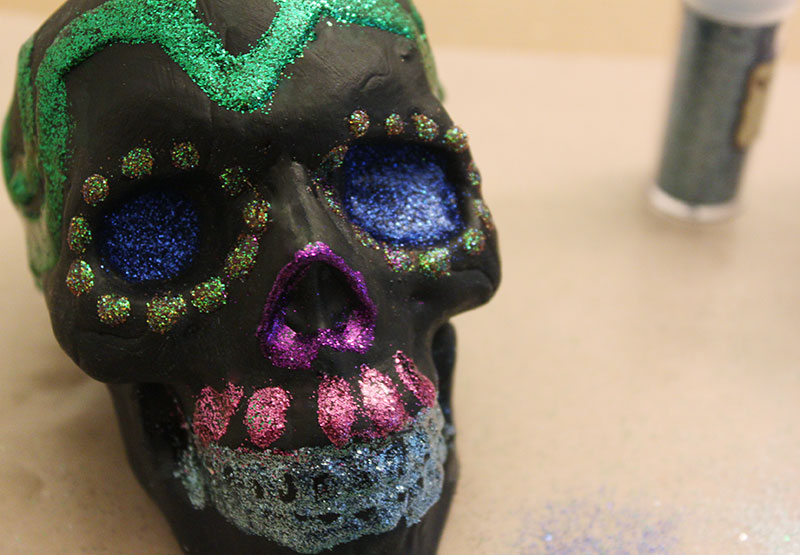 3. Fill the areas around the eyes, mouth, and top of skull. I tried to use as many colors as possible!
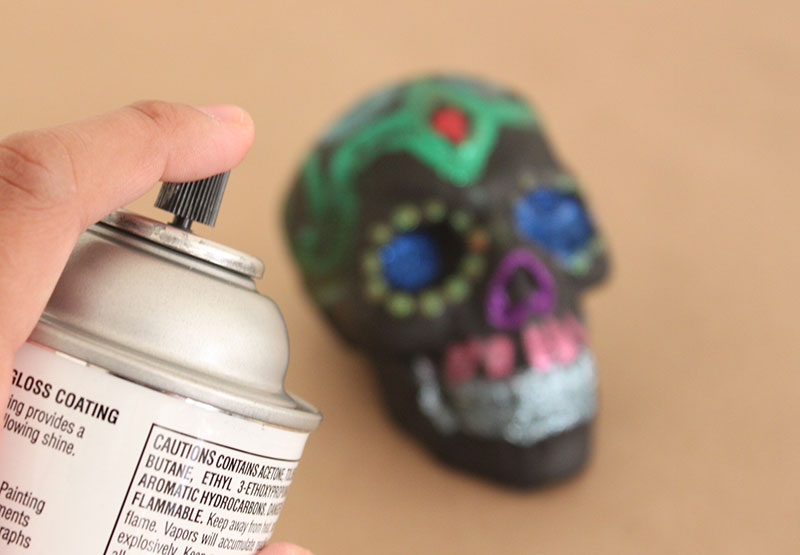 4. Spray with a gloss coat to keep glitter in place.
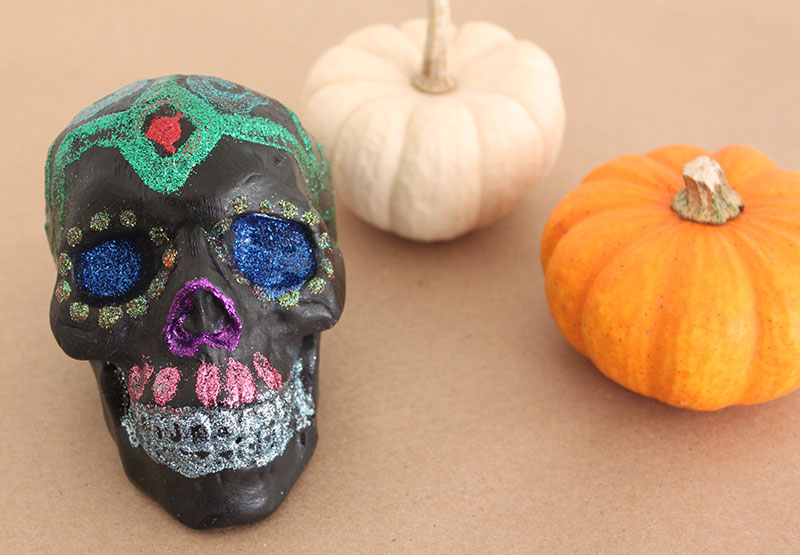 Enjoy!
DIY Skull Bracelet
10.29.13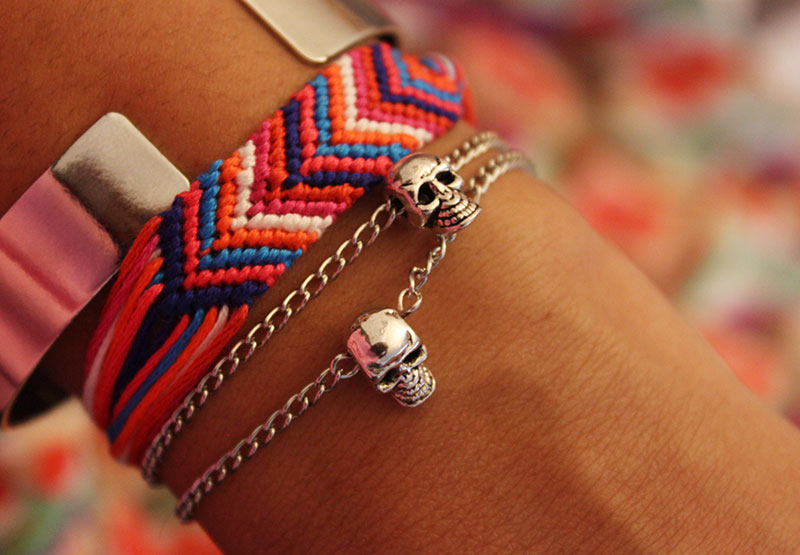
I wanted to make something in honor of the upcoming holiday. I found these cute little skull beads at Michaels and decided they would make the perfect bracelet. It is dainty and punk rock all at the same time. While I won’t be dressing up for Halloween this year, this bracelet will definitely keep me in the spooky spirit!
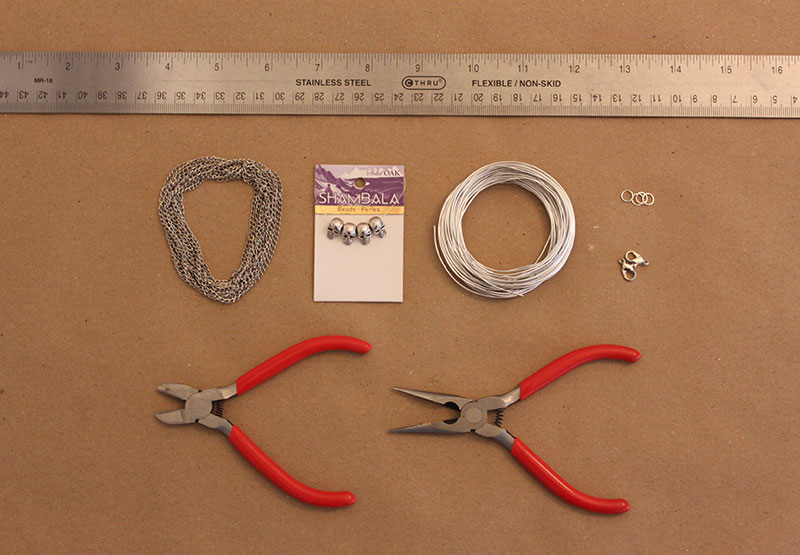
Materials
– Skull Beads
– Chain
– Wire
– Ruler
– Wire Cutter
– Pliers
– Jump Rings & Fasteners
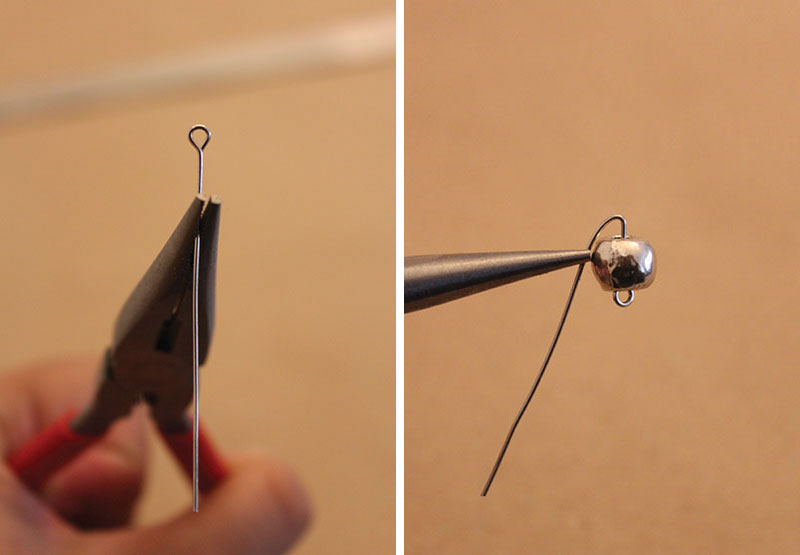
1. Cut a piece of wire to about 3″. This is longer than you need but it’s good to leave room for error. Using the pliers, make a small loop on one end of the wire. Make sure the skull bead doesn’t pass through. Loop the opposite side to hold the bead in place.
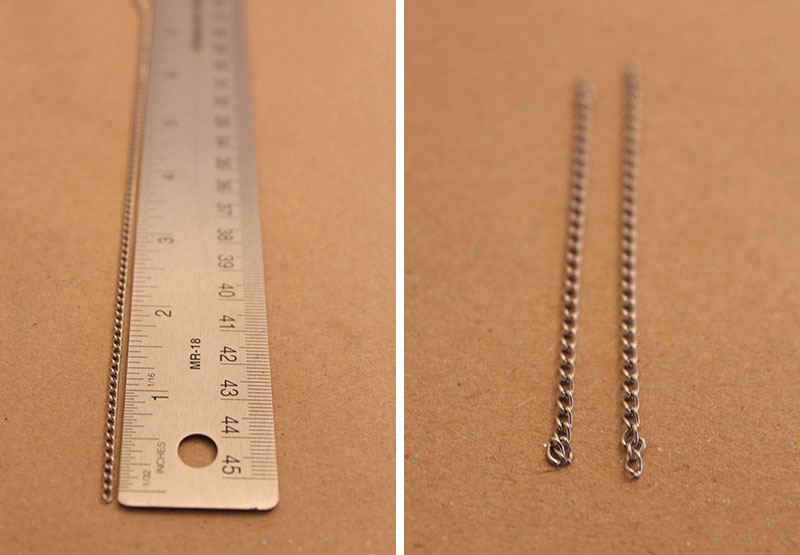
2. Measure the chain to cut two separate pieces approximately 3″ in length.
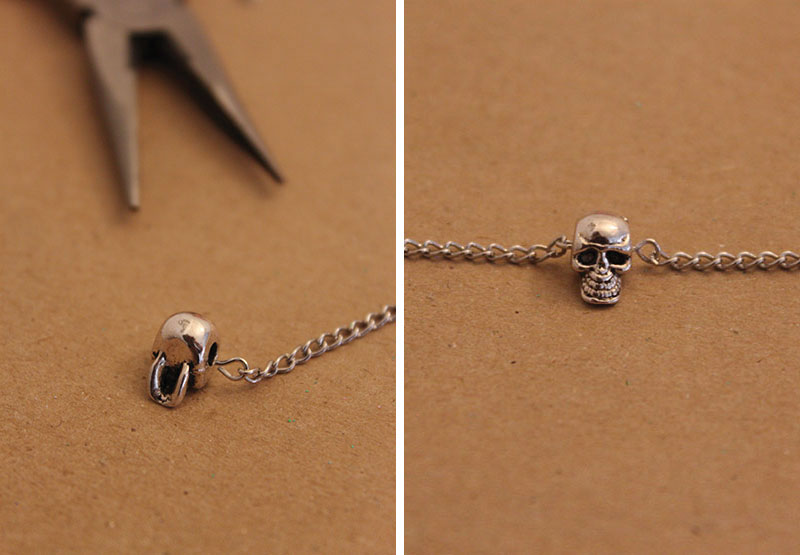
3. Attach on piece of chain to one end of the wire loops you just made on the bead. Attach the second chain to the opposite side.

4. Attach one jump ring on the end of one chain. Attach a jump ring and fastener to the second chain.

5. And you’re done! Enjoy your skull bracelet!!
DIY TO TRY: Halloween Projects
10.28.13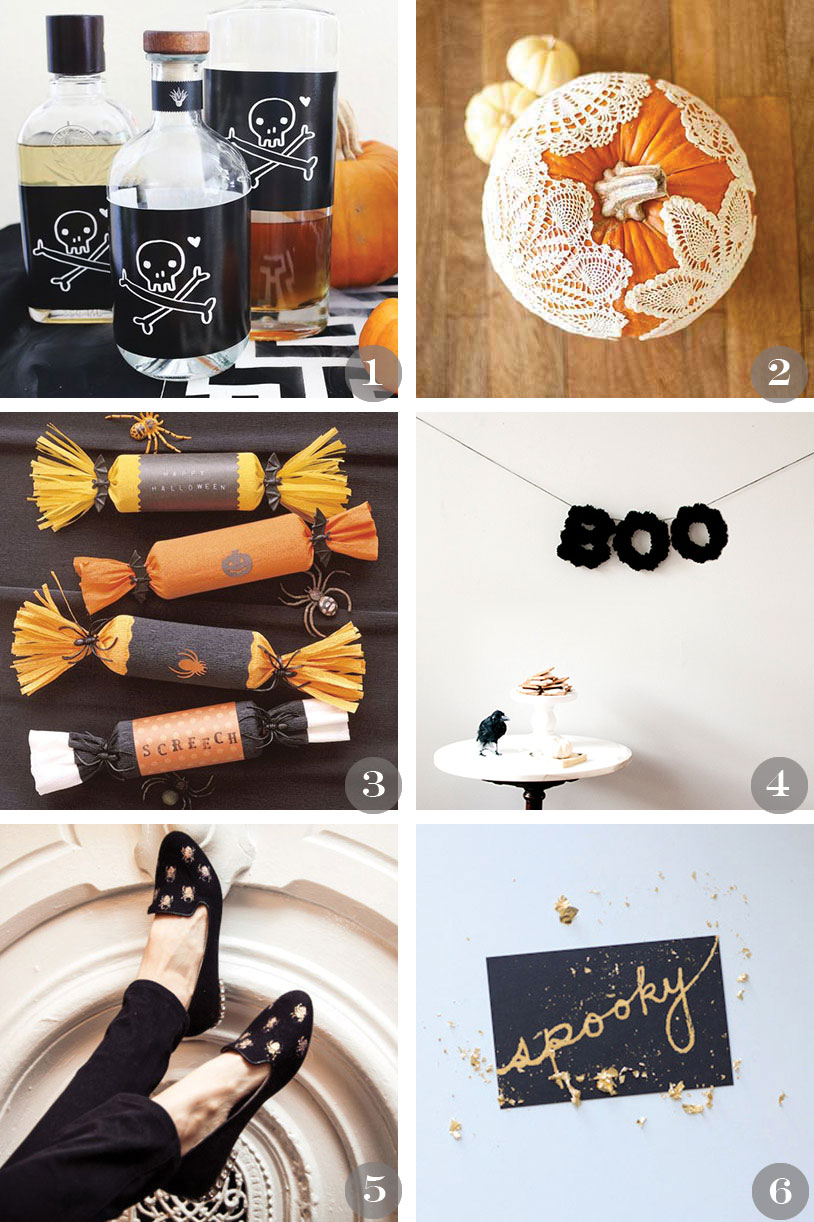
Since Halloween is just around the corner, I’ve collected some of my favorite fall/Halloween DIY projects. Happy Crafting, makers!
1. Halloween Printables / A Beautiful Mess | 2. Doily Pumpkins / Allyson Baker Design | 3. Halloween Crackers / Martha Stewart| 4. Pom Pom Letter Banner / House of Earnest | 5. Spider Loafers / Trinkets in Bloom | 6. Gold Leaf Postcards / Lovely Indeed
DIY Bubble Letter Necklace
10.28.13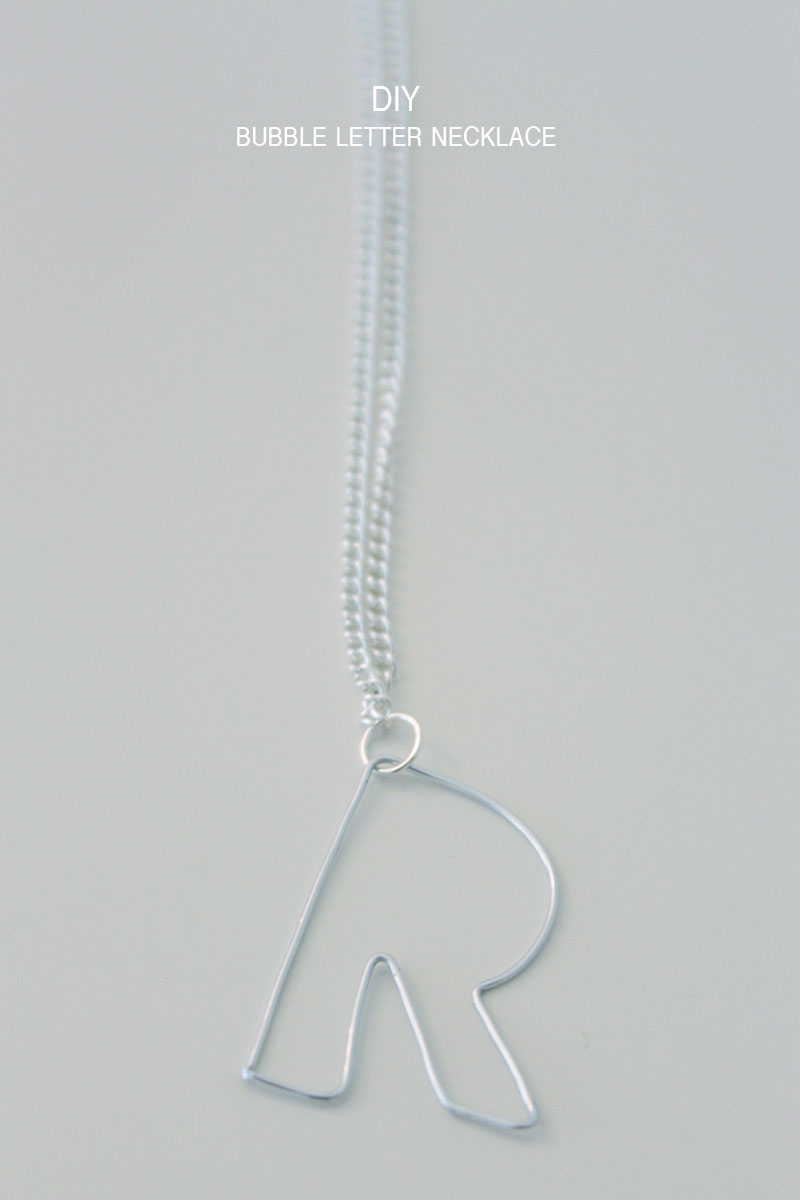
This project is the result of another inspirational Pinterest find. If you have been following my blog, you already know how much I love wire jewelry. I’m obsessed with writing out words, seen here and here, so I love this new twist of writing out just one letter. This project was super easy and quick!
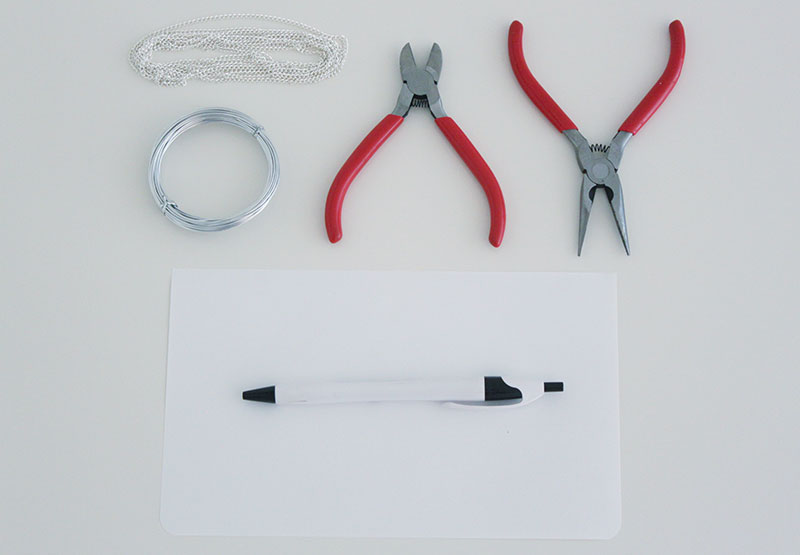
Materials:
– Wire
– Chain
– Pliers
– Wire Cutters
– Paper & Pen
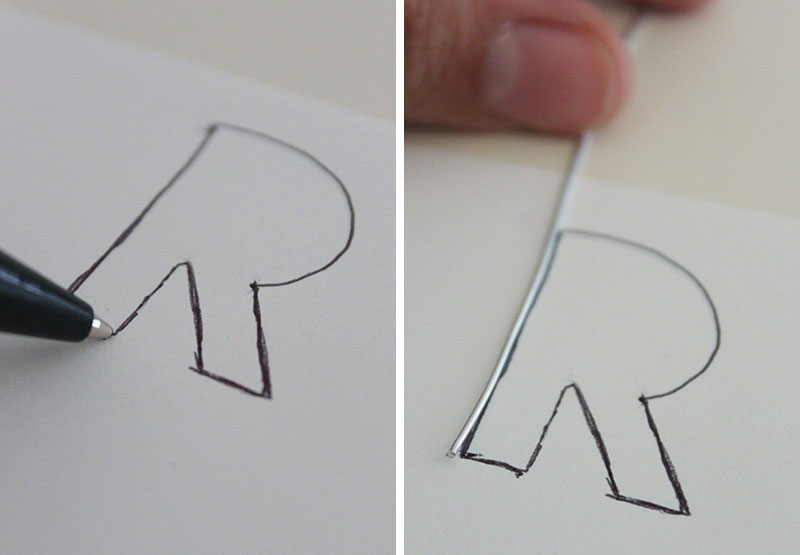 Step 1: Write out the letter you want to make in bubble form. *Do a quick image search if you’re not sure how to draw out your letter!* Choose one point on the letter that will serve as a starting point for the wire.
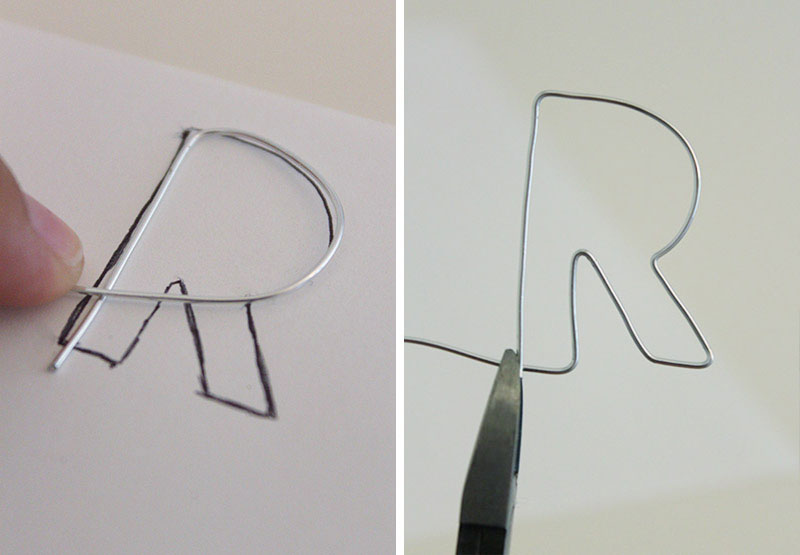 Step 2: Trace out the drawn letter with the wire. Continue until you have reached your starting point. Cut off the excess wire.
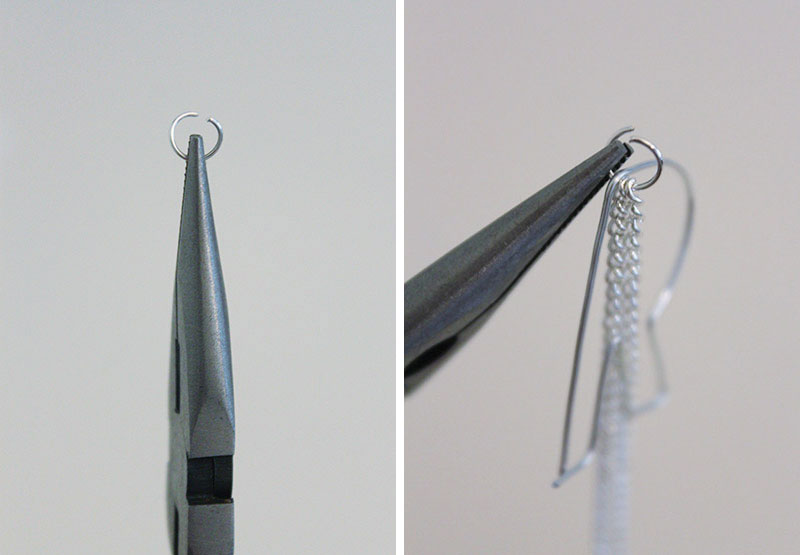 Step 3: Measure and cut a piece of chain however long you want your necklace to be. Use a jump ring to attach the letter to the chain.
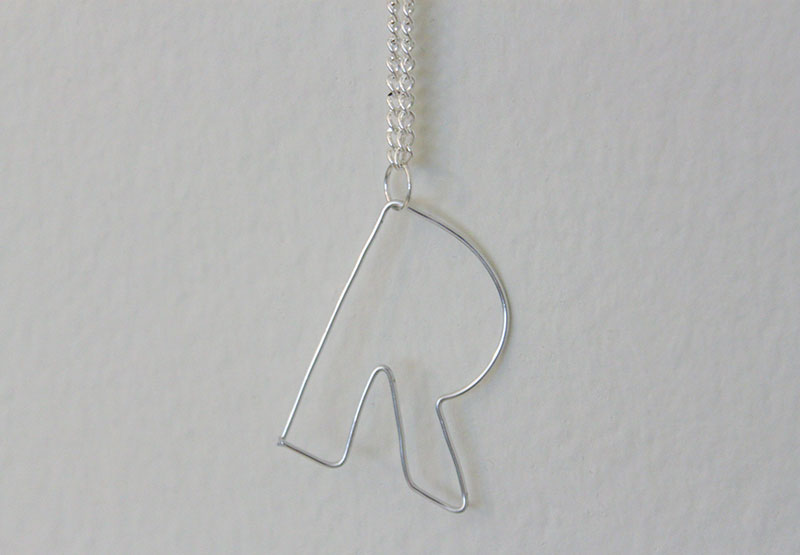 And you’re done! How simple was that? Enjoy!