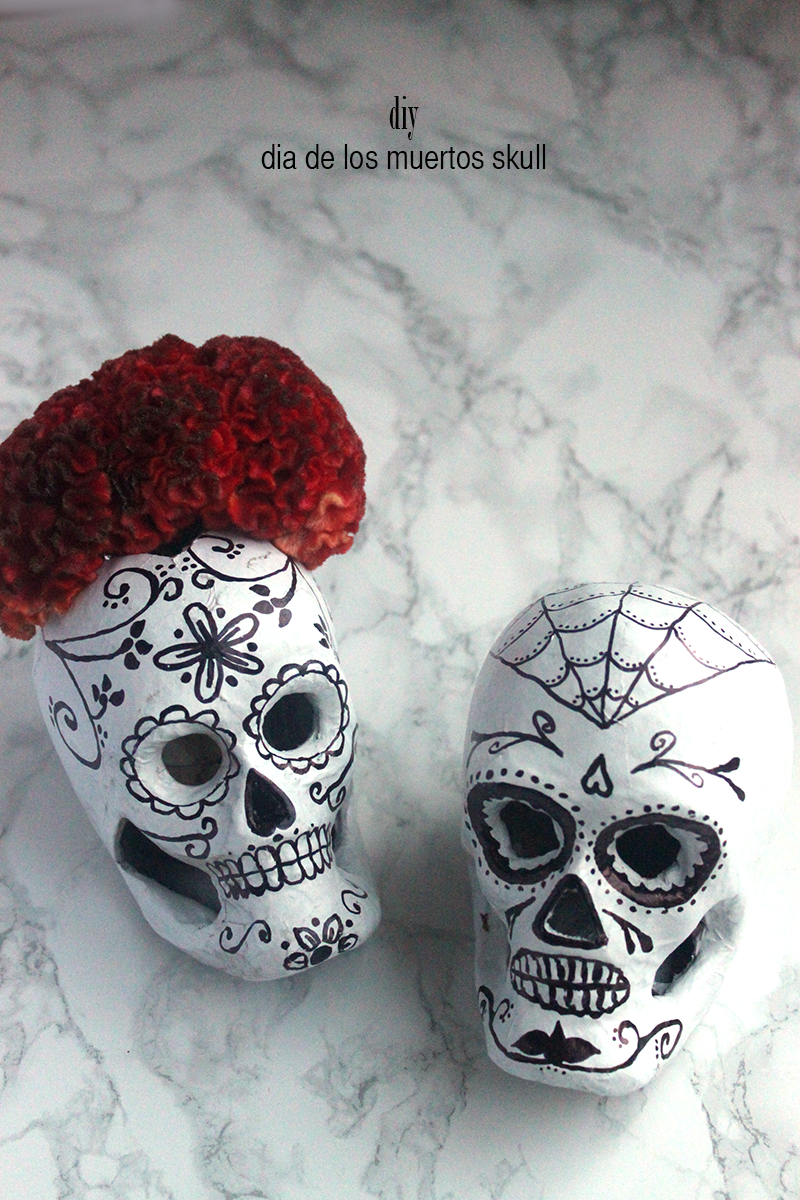
Dia de los Muertos (And Halloween!) is right around the corner. Last year I made these colorful skulls using glue and glitter. This year, I thought I’d keep it simple (and lazy) by sticking to a black and white color scheme and utilizing a sharpie marker. My best friend, and event designer/florist had some leftover coxcomb and offered it to me for whatever DIY I could think up. Since coxcomb slightly resembles a brain, I thought it would be fun to turn my skull into a vase!
Materials:
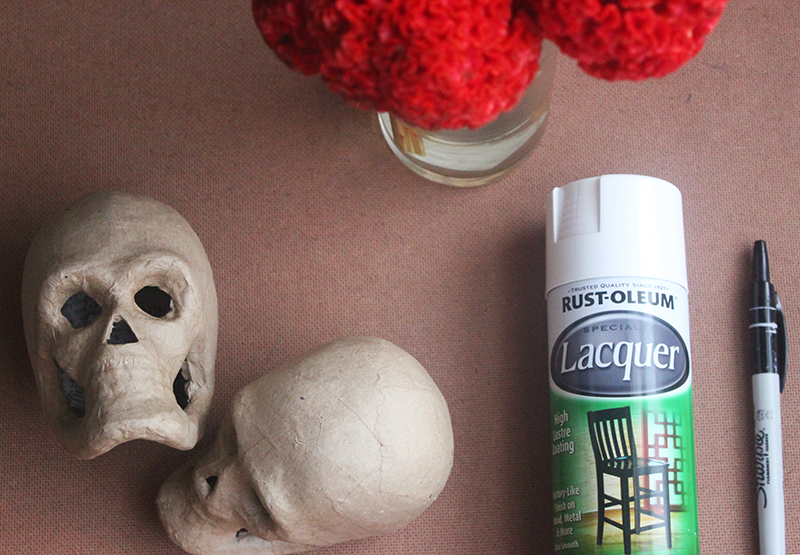
– Paper Mache Skulls (bought at Michaels)
– White Spray Paint
– Black Sharpie Marker
– Tea Light Holder
– Scissors
– Coxcomb
1. Spray paint your skulls white in a well ventilated area. Let them dry completely.
2. Look up Dia de Los Muertos skulls for design inspiration. Use the sharpie to start drawing out your design.
Draw a different design on the second skull.
They look great as is so you can always stop at this step. I wanted to test my vase theory though!
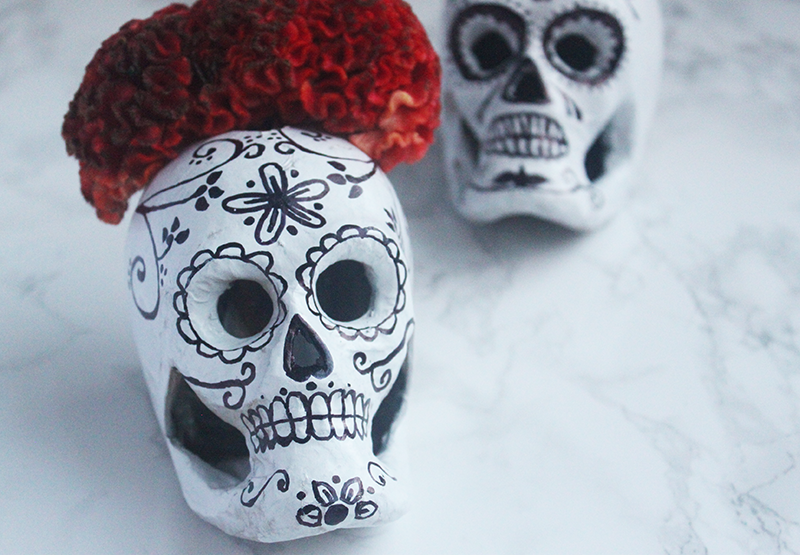
3. To make the skull into a vase, use a pair of scissors to make a small hole at the top of the skull. Twist the scissors to enlarge the hole. Then carefully cut off pieces of the skull until the hole is large enough for the small vase. Insert the vase and fill with water.
Add the coxcomb and you’re done! Happy Halloween!!
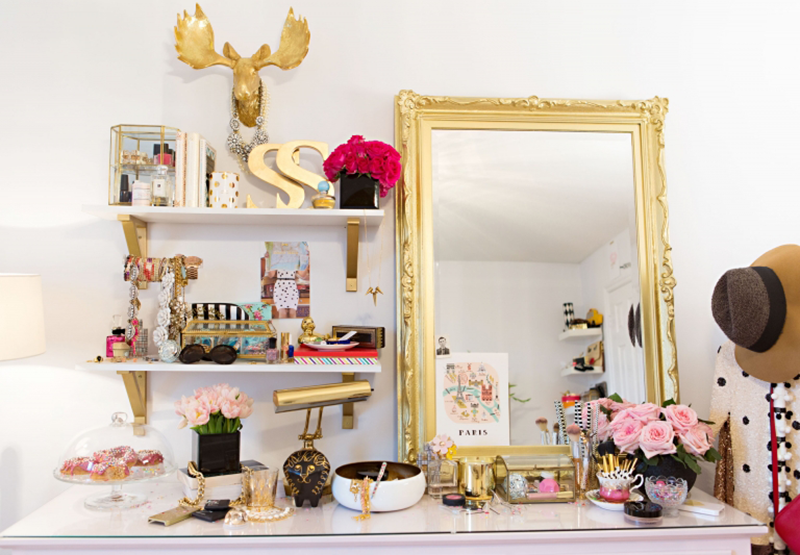
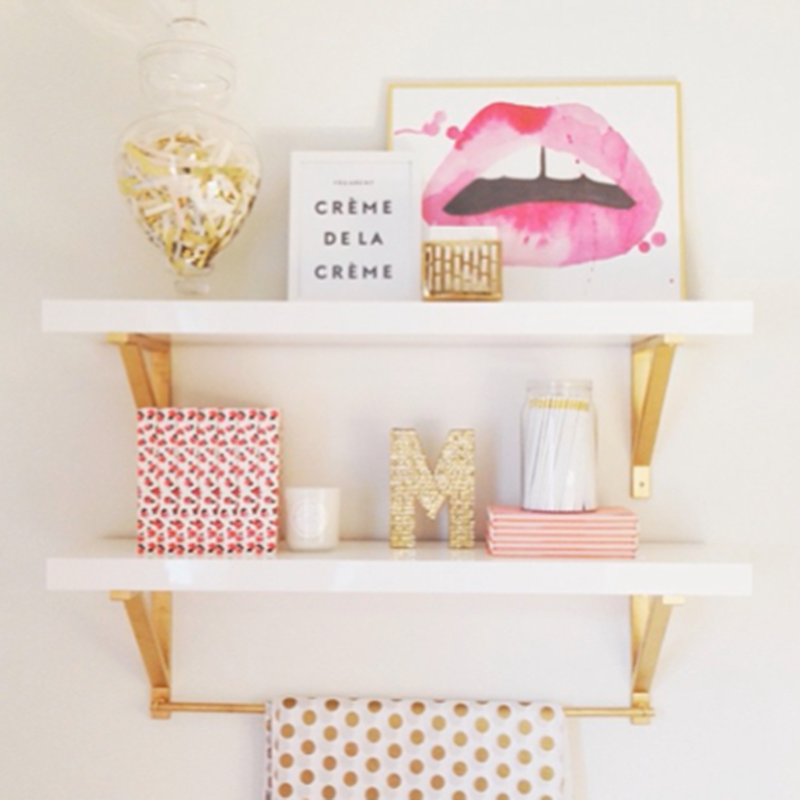
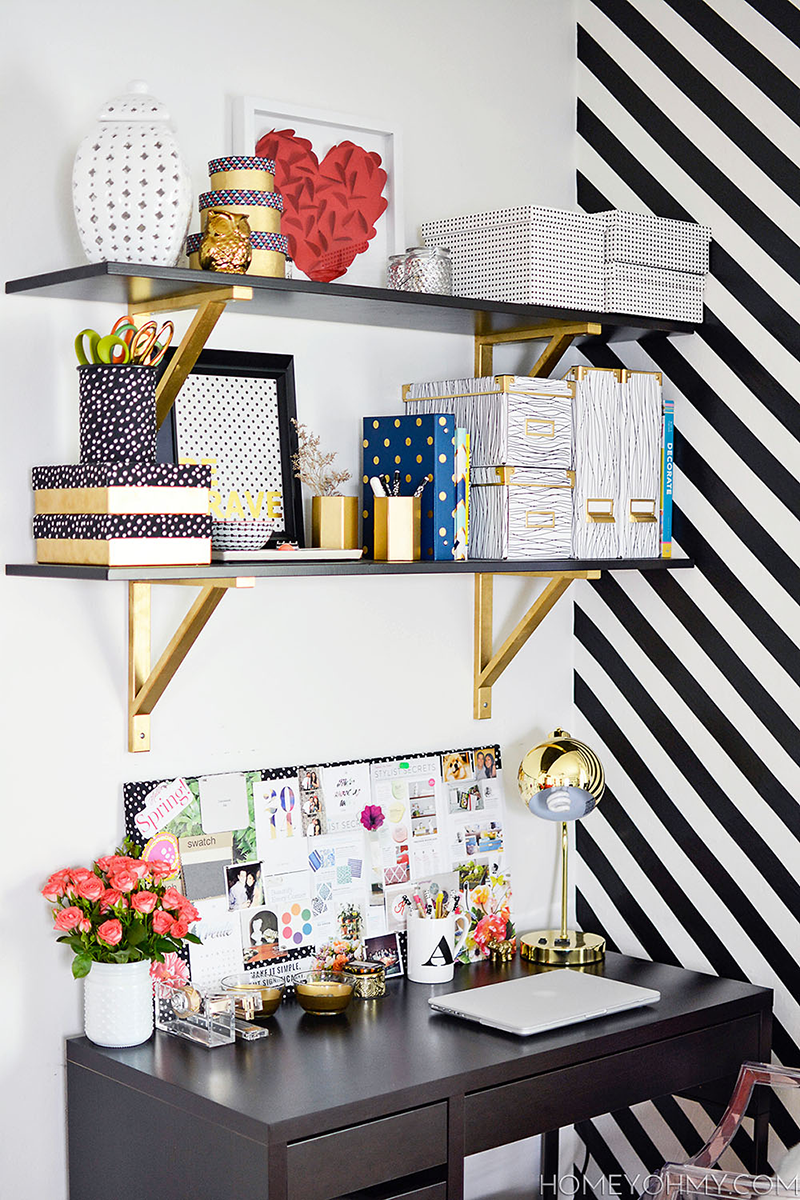
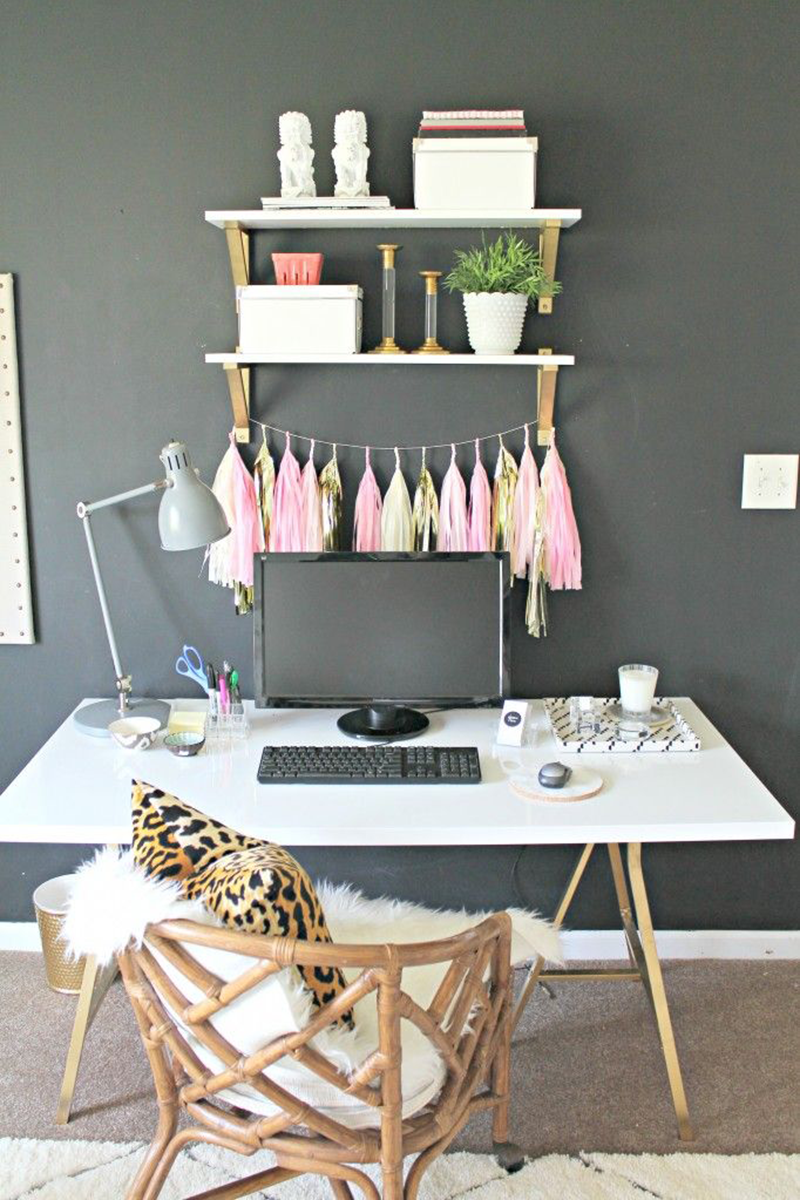
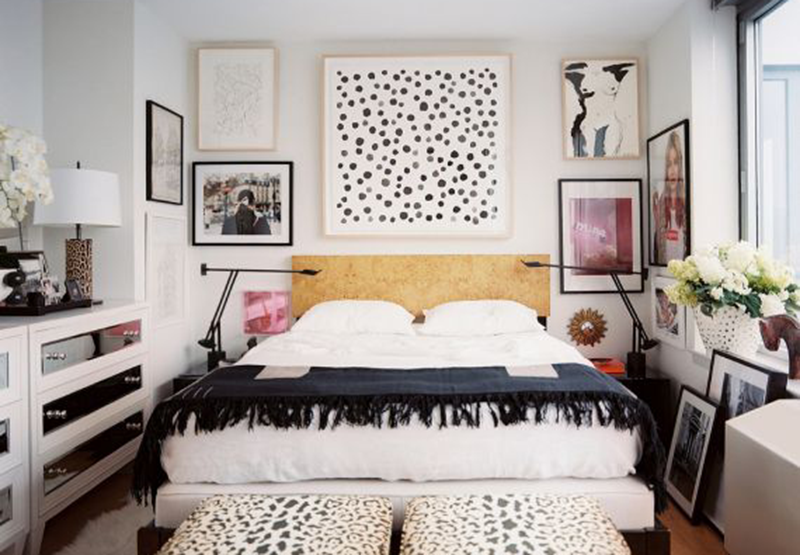
If you follow me on Instagram, you may have seen that I recently said good-bye to my childhood bedroom color. After this post, I decided I wanted a bright, white room. I’m a pretty extreme person because painting has led me to want to redo my entire room. I’m currently on the hunt for a cute desk, and would love to hang a couple shelves right above it. The gold shelf brackets add a touch of glamour to an otherwise functional piece, and would be a super simple DIY!
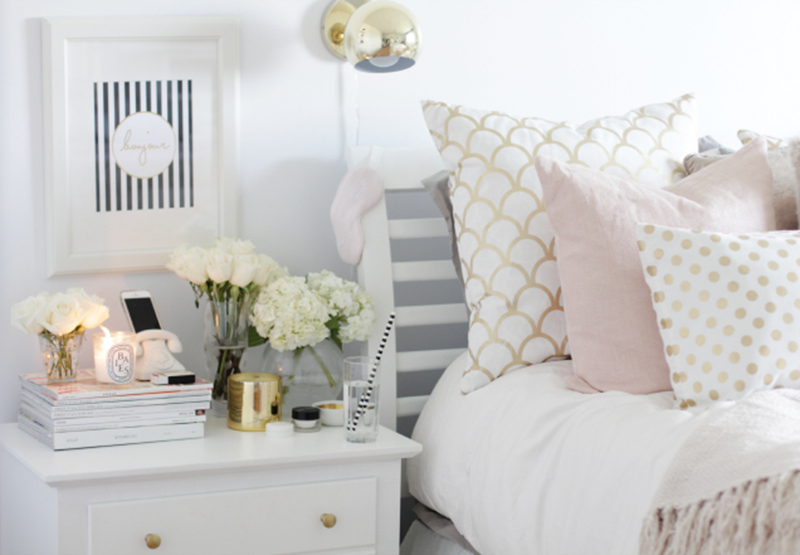
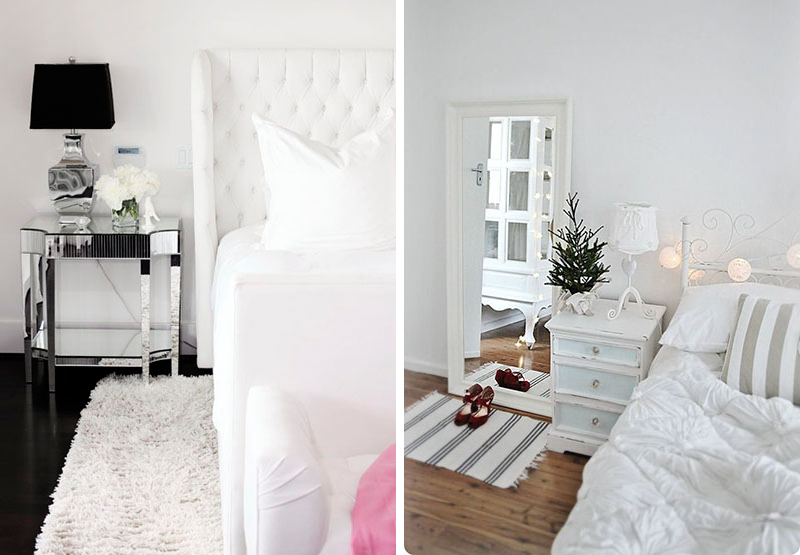
When I was in middle school, my parents let me pick out a new color for my bedroom. I went from a light pink to a really deep pink. I always loved pink and thought the darker color was much more grown up. I loved it, and still love it, though on darker or rainy days it sometimes makes my room feel like a cave. That’s why lately I’ve been admiring white bedrooms. They are much more crisp and bright. I especially love the idea of adding gold and blush accents!
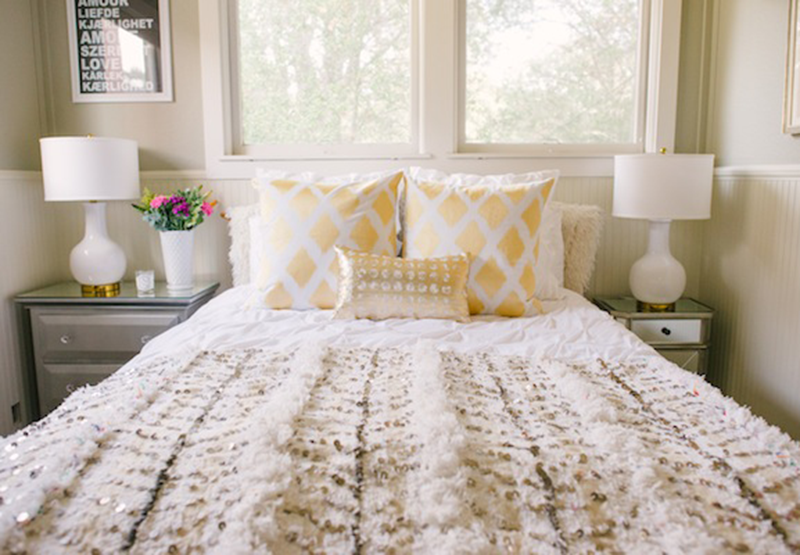
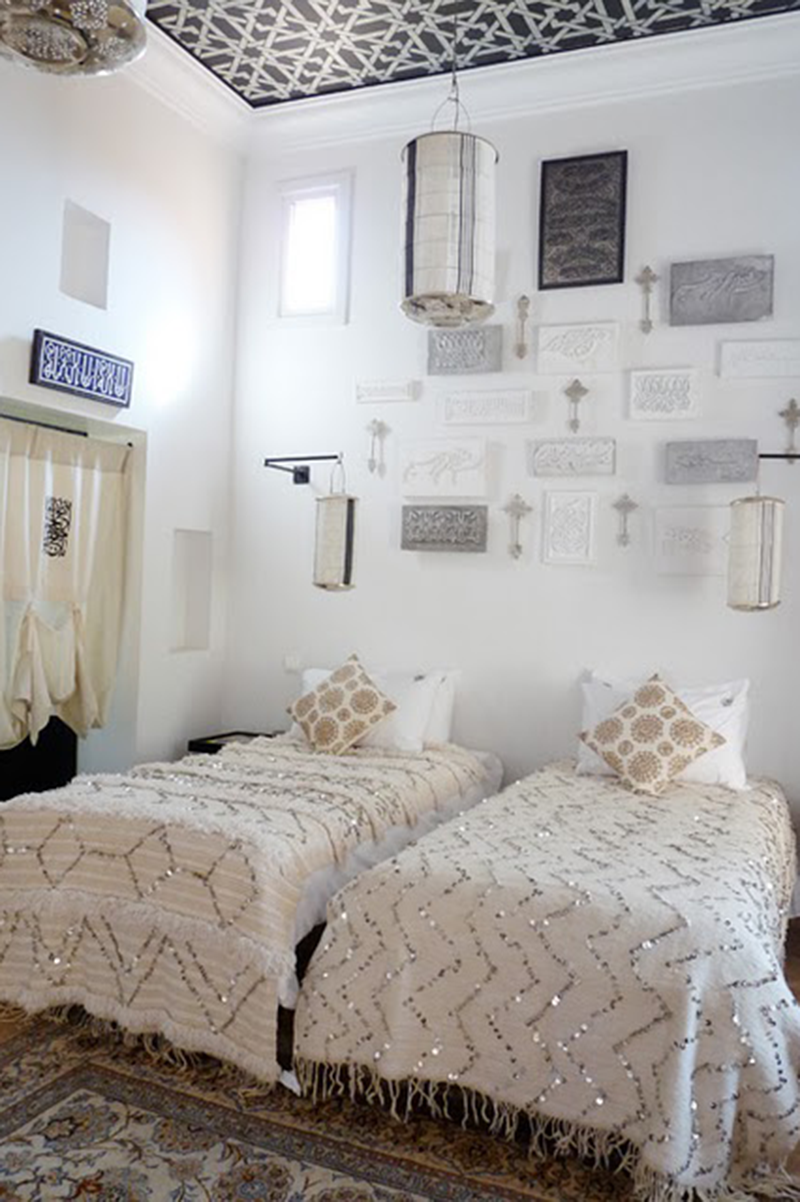
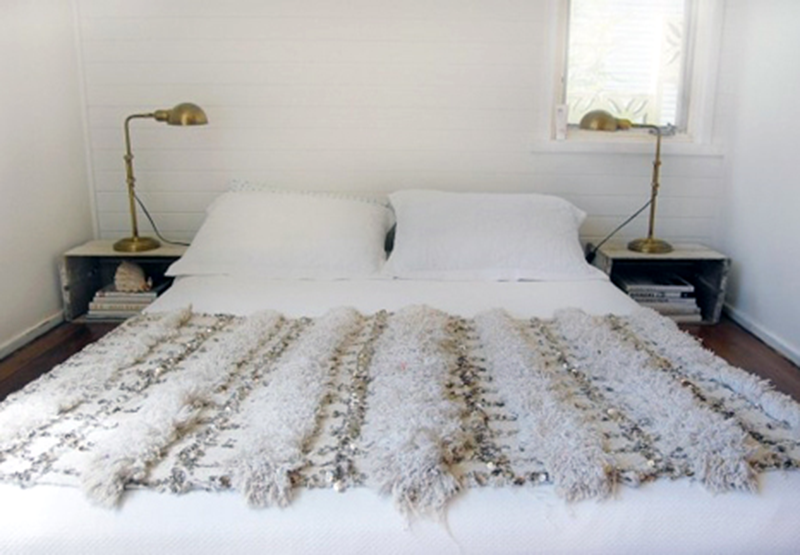
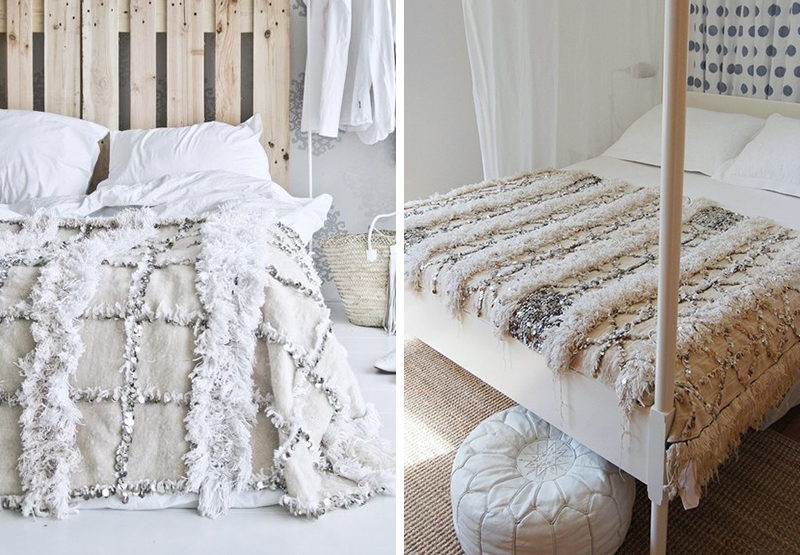
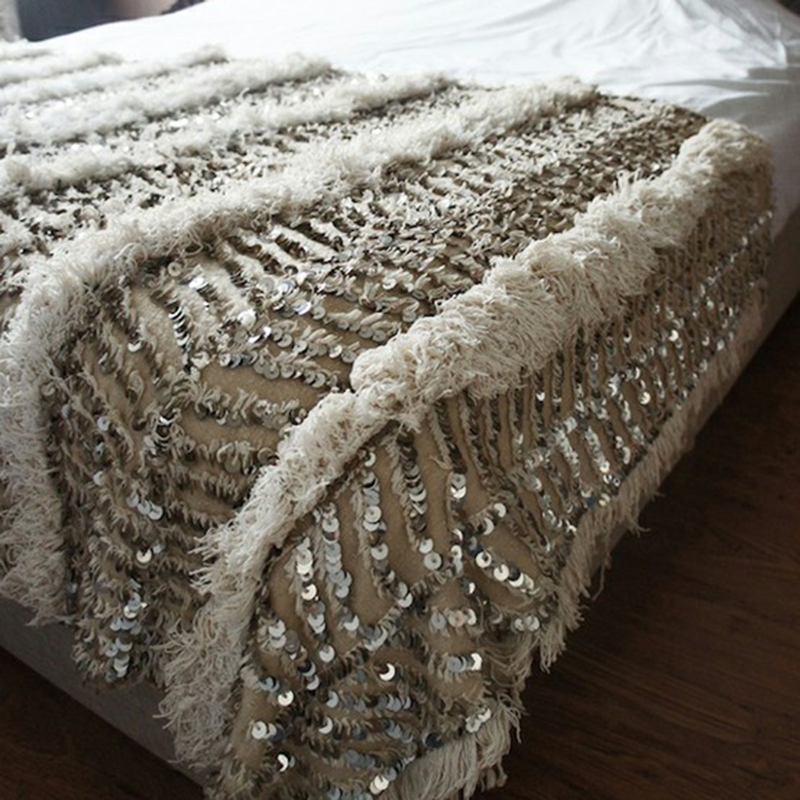
Handira, or Moroccan Wedding blankets, are hand woven out of sheep’s wool, cotton, and linen. The blankets are laborious as they can take hours to complete. Because of the amount of hard work that goes into these blankets, they are not cheap. I’m currently researching ways of how to easily, and economically, recreate these beautiful pieces of art!
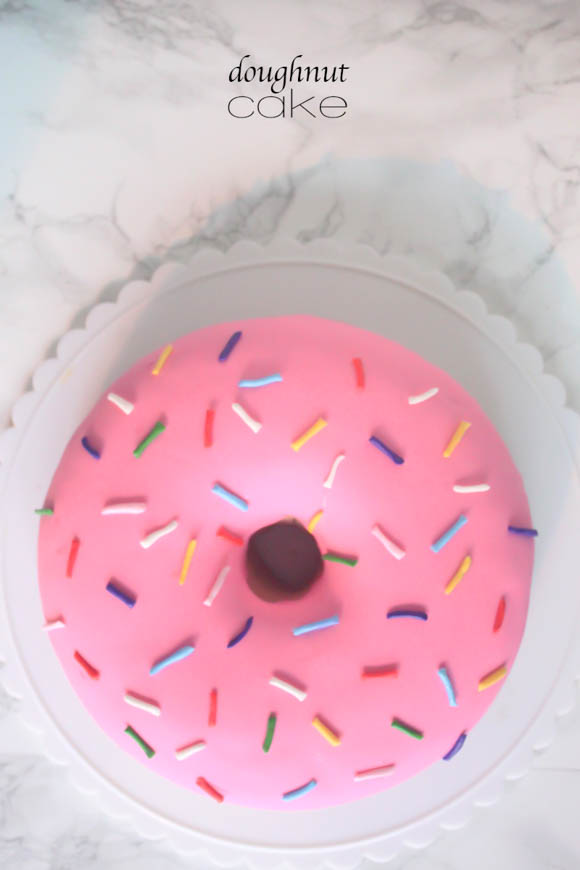
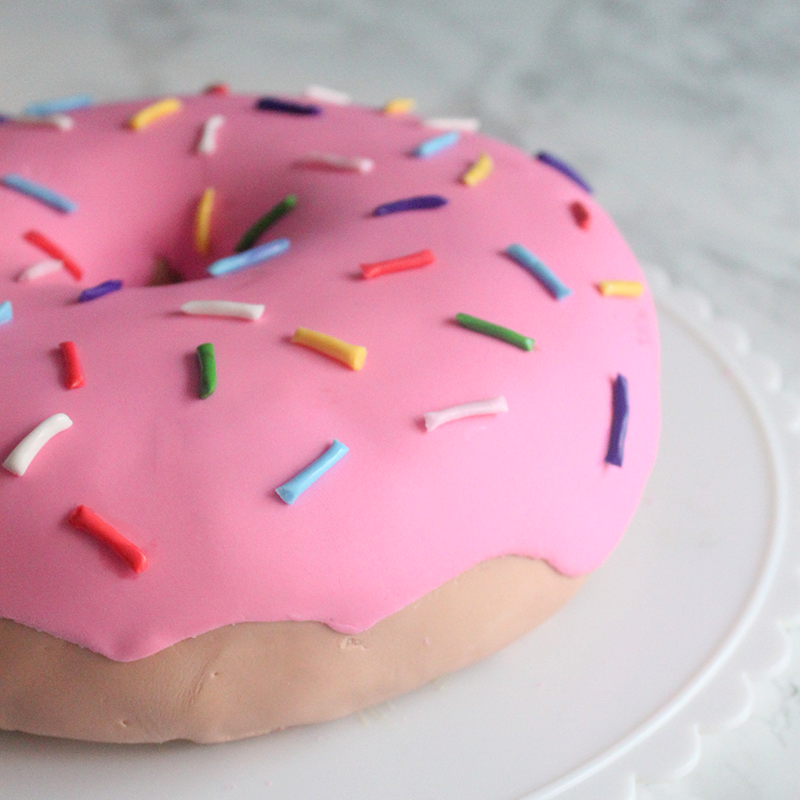
A couple weeks ago many enjoyed FX Network airing every Simpsons episode ever. The marathon brought back such great memories of episodes I hadn’t seen (or ever seen!) for a very long time! It also inspired me to create a cake in honor of the show. I settled on the famous pink doughnut…sprinkles and all!
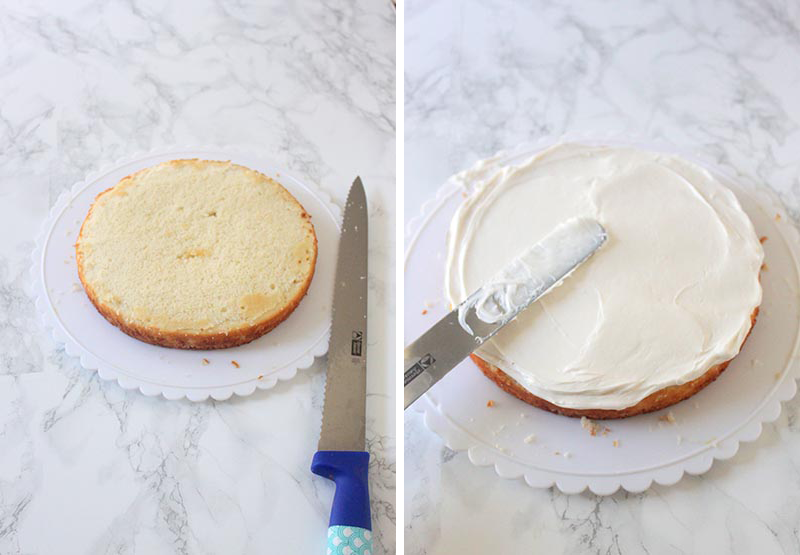
1. The very first step is to bake a cake in your favorite flavor! I used two 8 inch pans. Refrigerate your cakes until completely cool. This will make it easier to ice and stack! Begin by cutting off the tops of both cakes to get an even surface. Ice the top of one of the tiers, then stack the second tier on top.
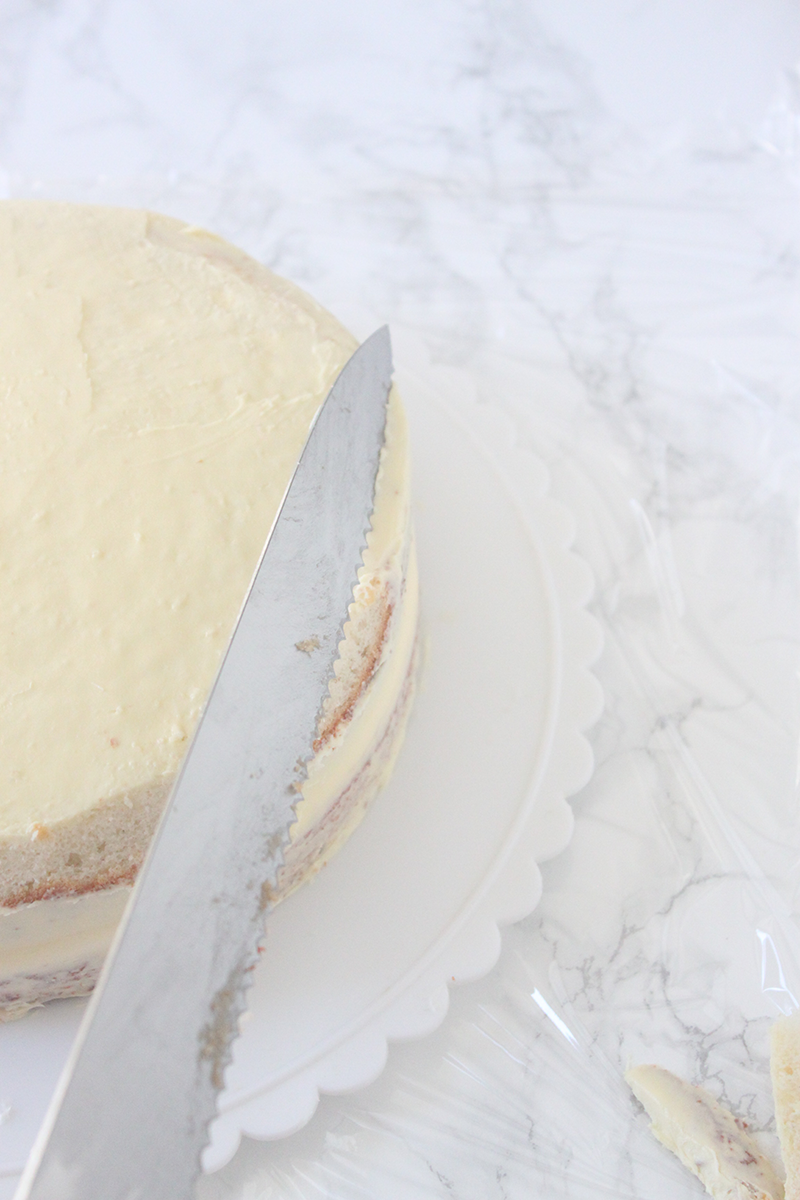
2. Use a swiss buttercream to crumb coat the outside of the cake. Refrigerate the cake for a minimum of 30 minutes. We want a nice cold cake for sculpting.
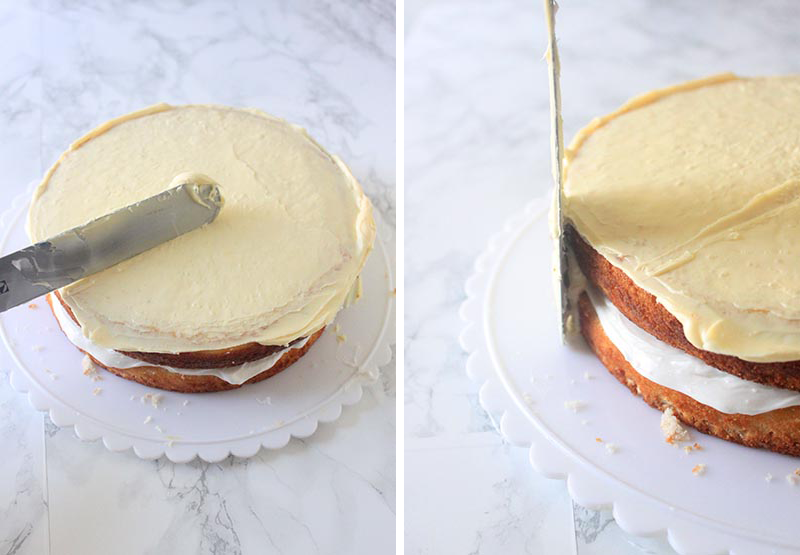
3. To begin sculpting the rounded doughnut shape, trim the top edge of the cake at an angle. Start slowly! It’s better to cut off too little, than too much!
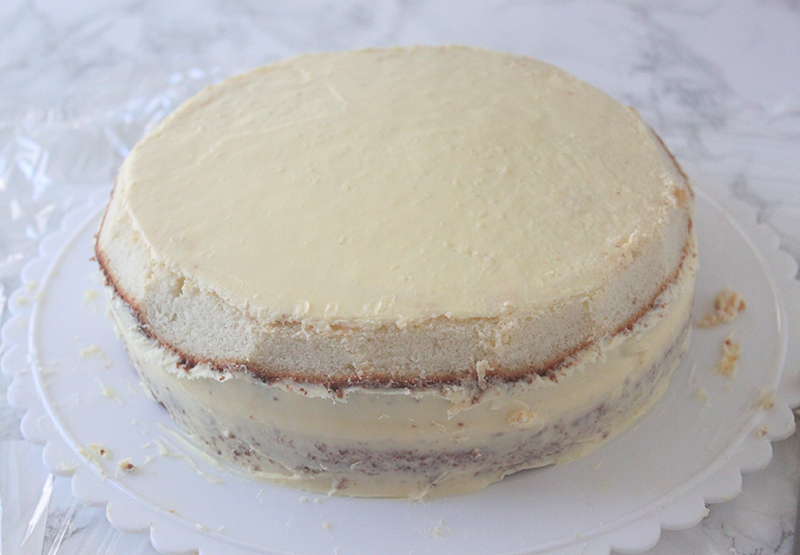
4. Your cake should start to look a little something like the picture above.
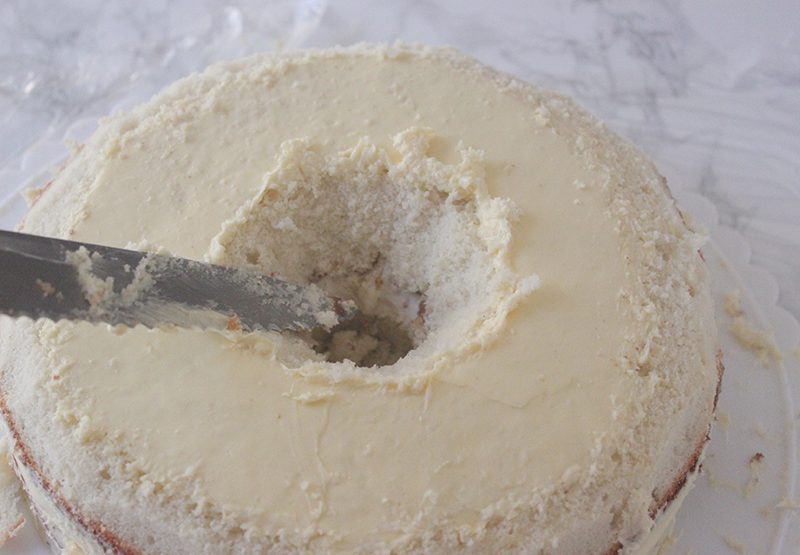
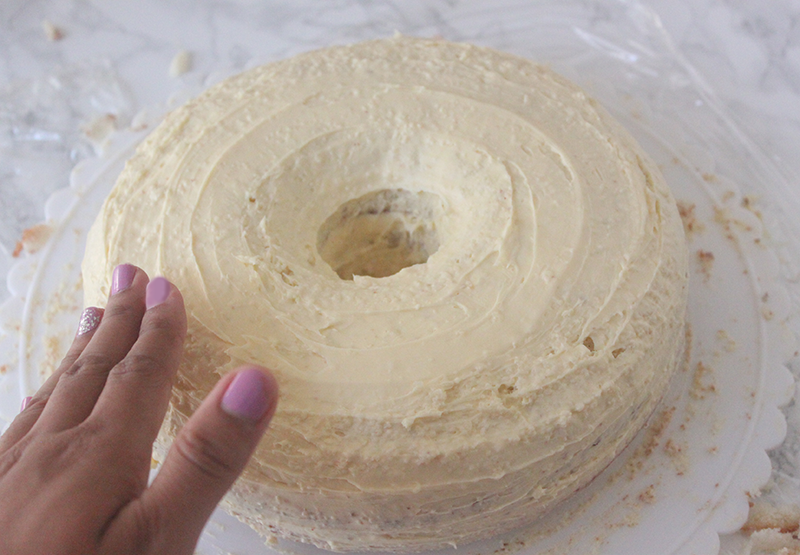
5. To create the doughnut shape, cut out a hole in the center of the cake.
6. Create a more rounded edge by trimming the edge at an angle just as before.
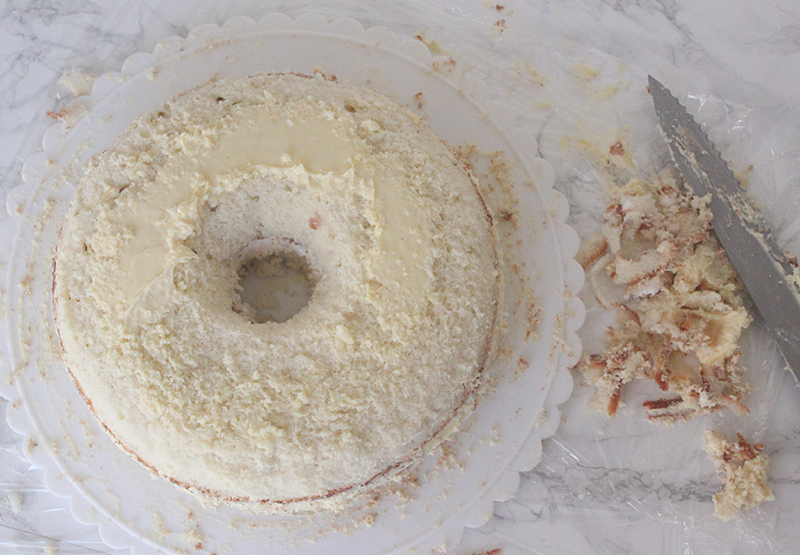
7. Slowing keep trimming the inner and outer edges of the cake until they are nice and rounded! *Don’t forget to trim the bottom edge of the cake as well!*
8. Once your cake is sculpted, cover the cake in a layer of buttercream. Refrigerate until cool. Use your fingers to smooth the buttercream to get an even surface for the fondant.
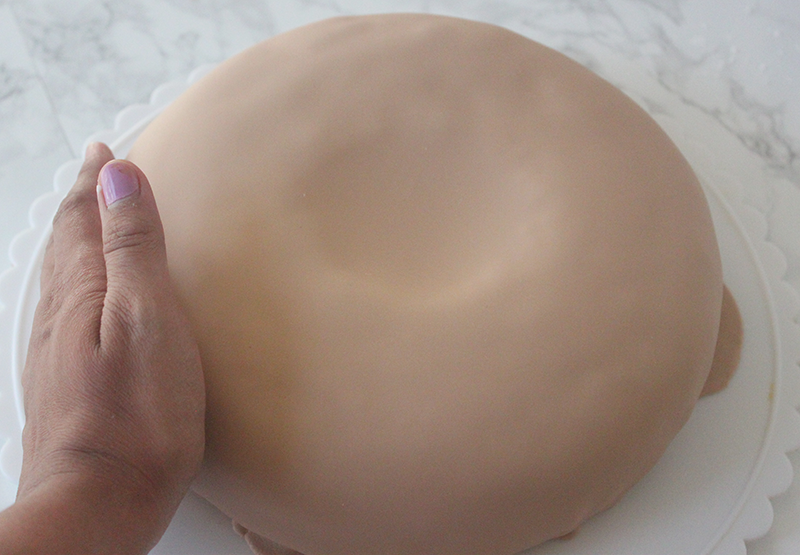
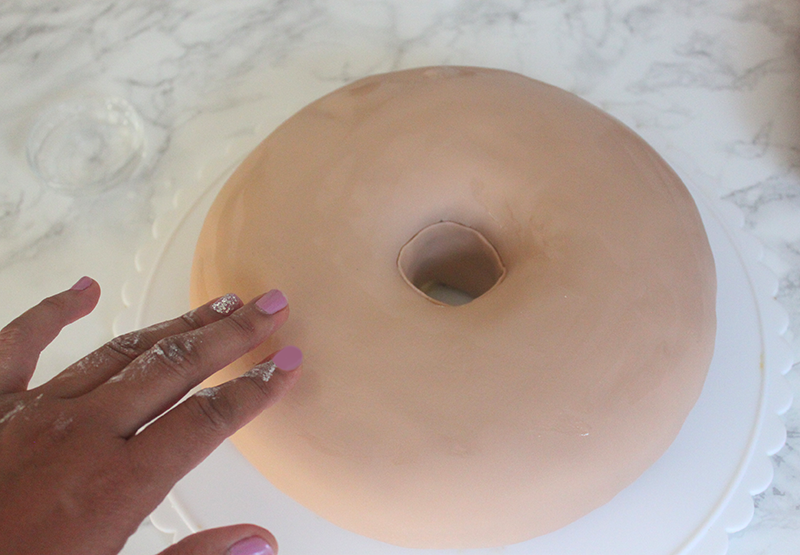
9. Dye a piece of fondant a light tan for the base of the cake. (I used about the size of a grapefruit in order to cover the sculpted 8 inch cake.) Roll out the fondant until it is just big enough to cover most of the cake.
10. Place the fondant overtop of the cake and pull down the edges until the whole cake is covered. Use your hands or a fondant smoother to smooth the fondant over the cake.
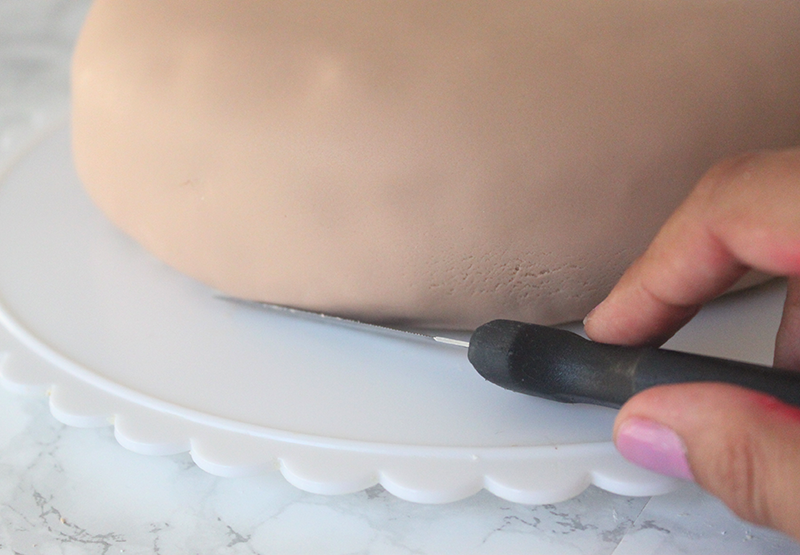
11. Trim any excess fondant with a knife.
12. Use the non-serrated edge of the knife to smooth the bottom edge of the fondant to give the cake a cleaner look.
13. Cut a small hole in the center of the fondant and push down into the inside of the cake. If the fondant does not cover the entire center, cut a smaller piece of fondant to fill it in. Don’t worry about the seam as it will get covered by the frosting.
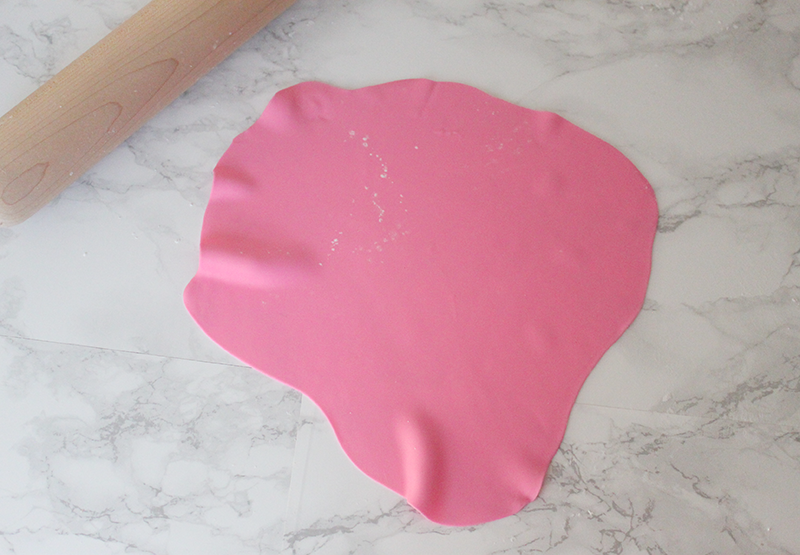
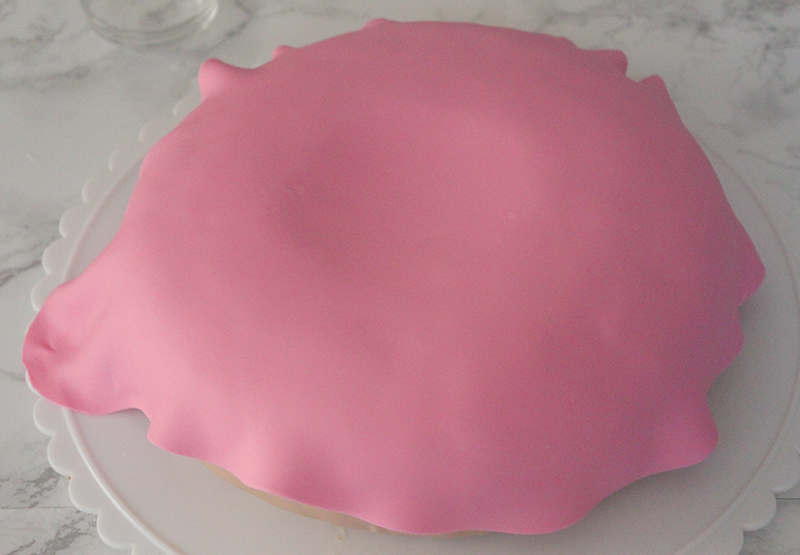
14. Dye a piece of fondant (about the size of an orange) pink. Roll out the fondant into a circle. *Or as close as you can get to a circle. As you can see, I struggled a bit*
15. Use your fingers or a pastry brush to add a thin layer of water to the top of the cake. It will serve as a glue between the two layers of fondant.
16. Place the rolled fondant over the top of the cake.
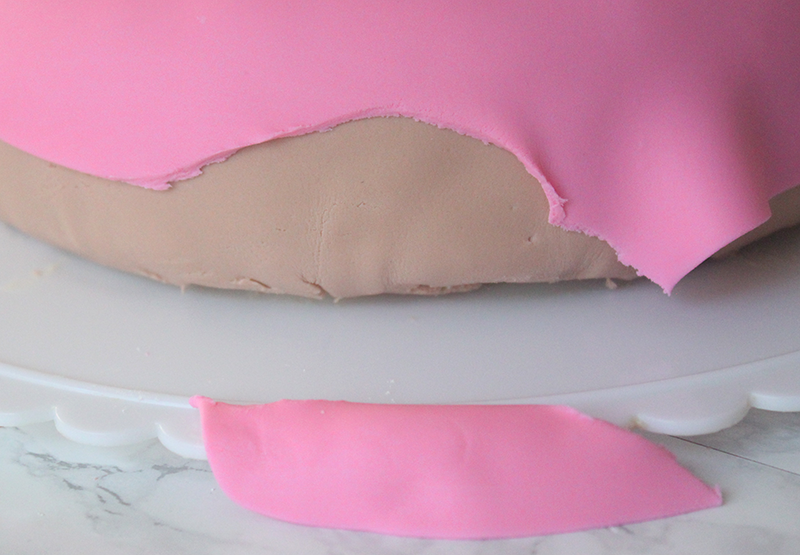
17. Trim the edge of fondant in a ‘wave’ pattern to create the drizzled frosting look.
18. Again, use your finger or knife to smooth the edges of the trimmed fondant for a cleaner look.
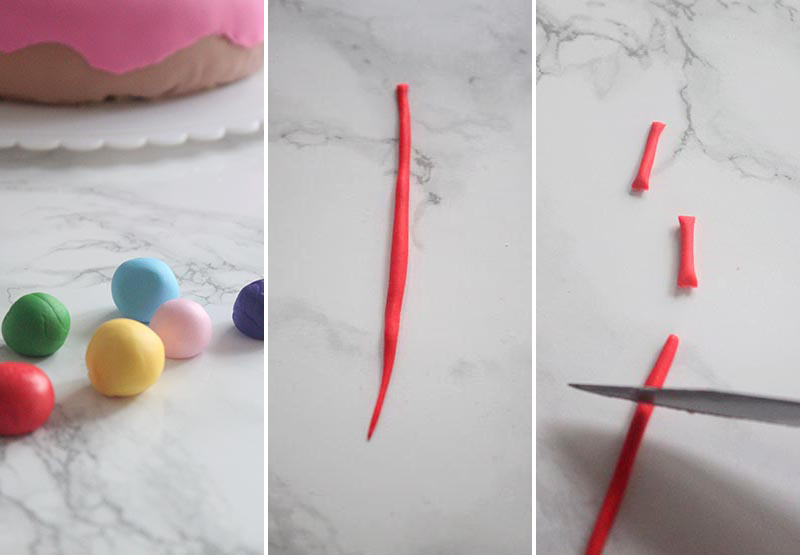
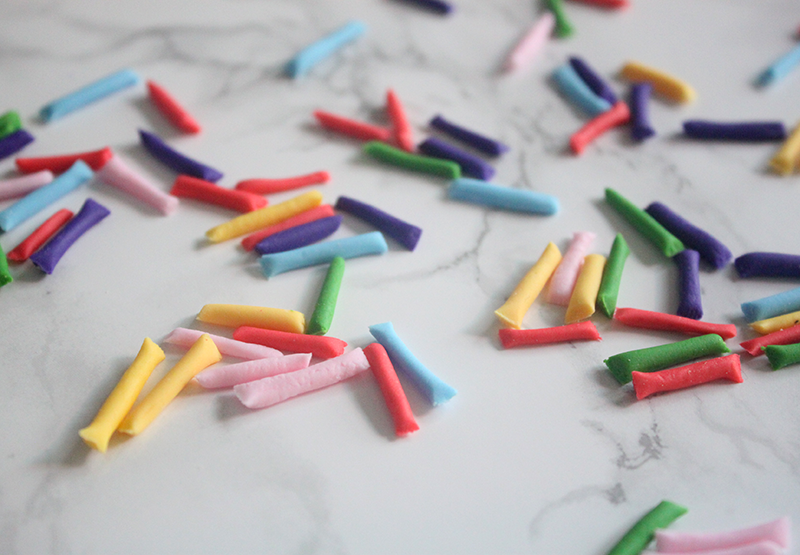
19. Dye small pieces of fondant in multiple colors for the sprinkles. Roll out a thin piece into a long snake. Cut the fondant into about 1/2 inch pieces to create the sprinkles.
20. Roll and cut all your sprinkles!
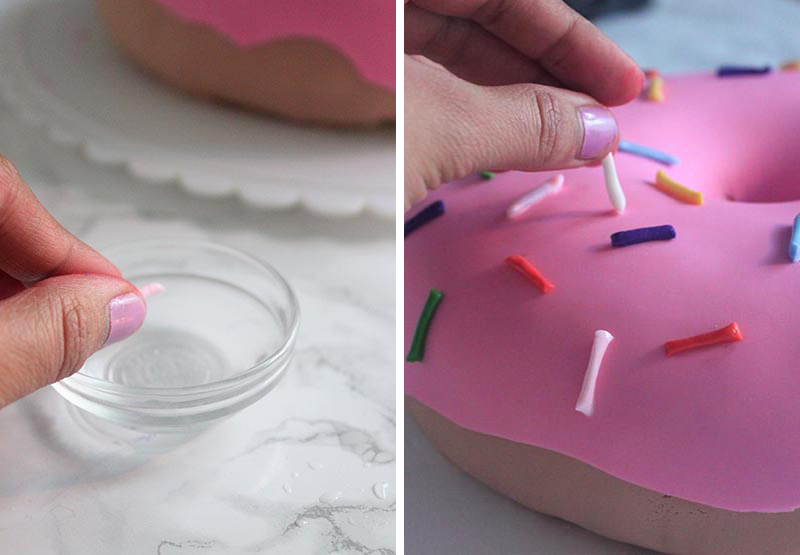
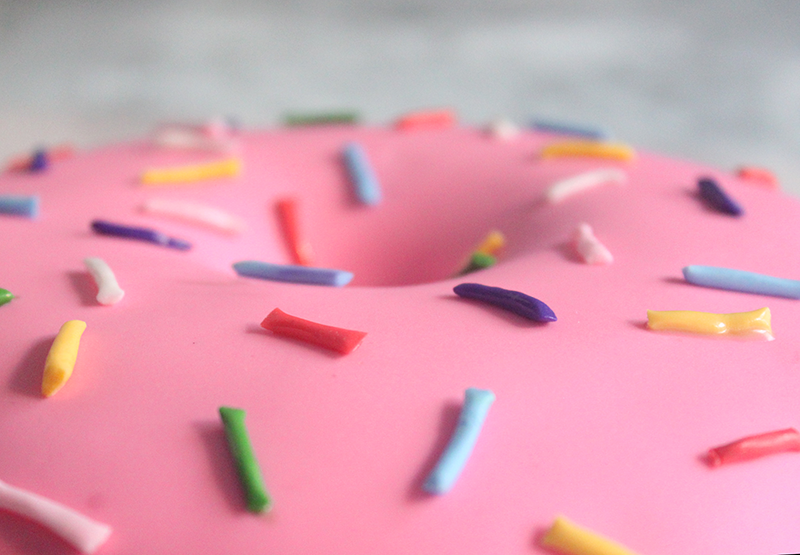
21. Add a dab of water to the sprinkle and place it on the cake. Continue until you have covered the doughnut in sprinkles.
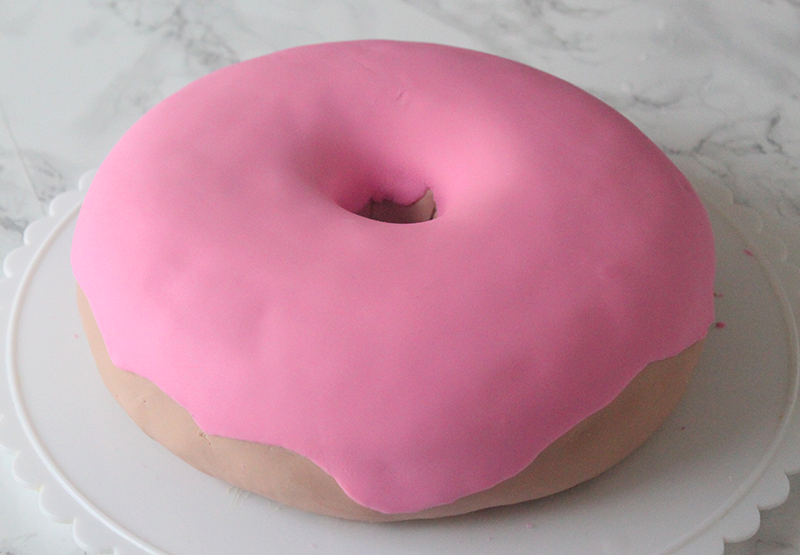
And there you have it! An awesomely adorable sprinkle doughnut cake!!


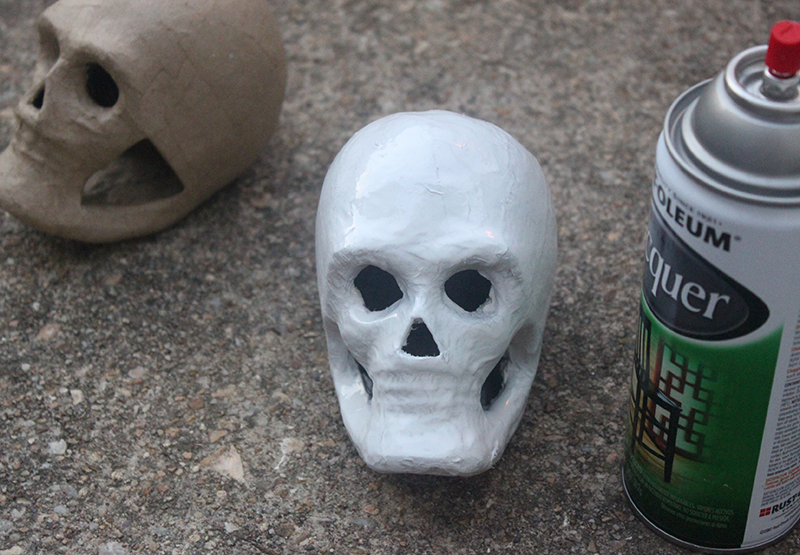 1. Spray paint your skulls white in a well ventilated area. Let them dry completely.
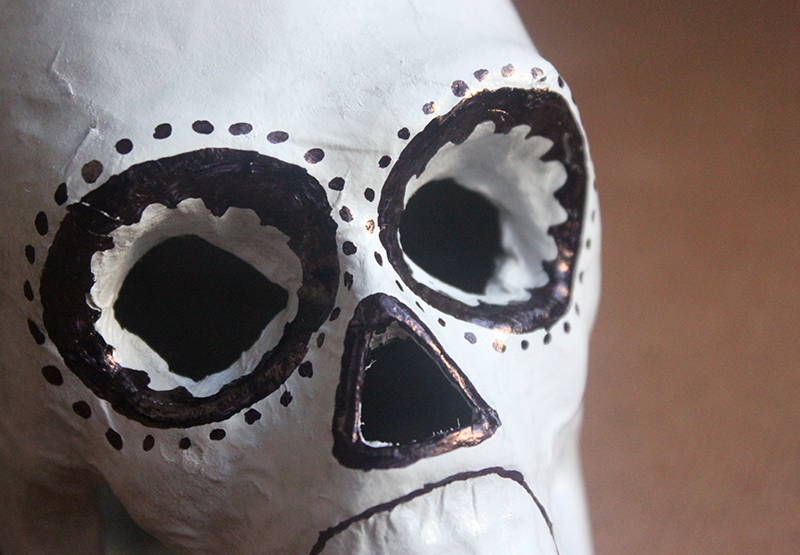 2. Look up Dia de Los Muertos skulls for design inspiration. Use the sharpie to start drawing out your design.
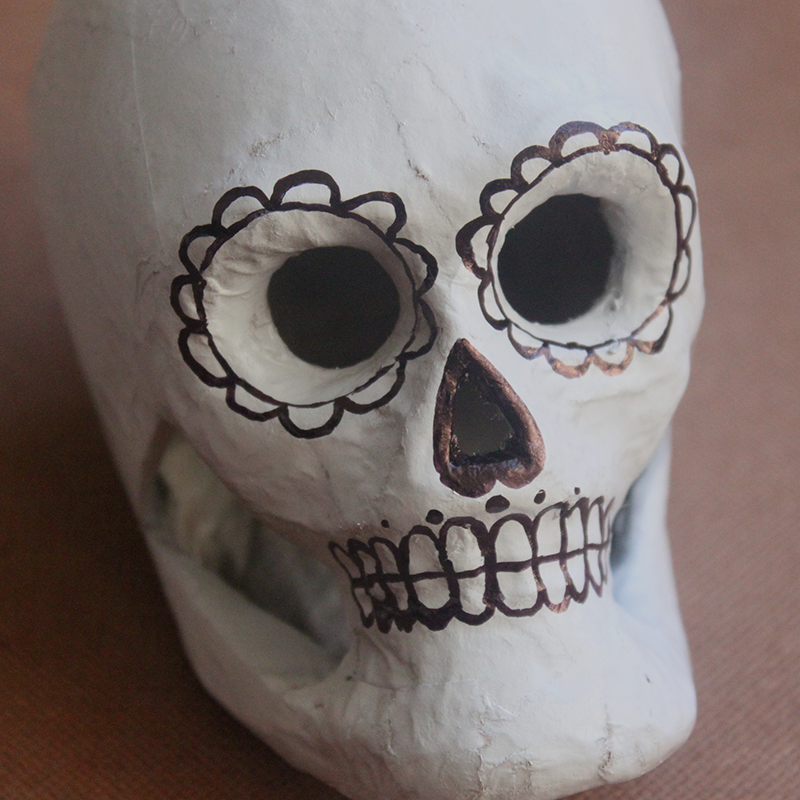 Draw a different design on the second skull.
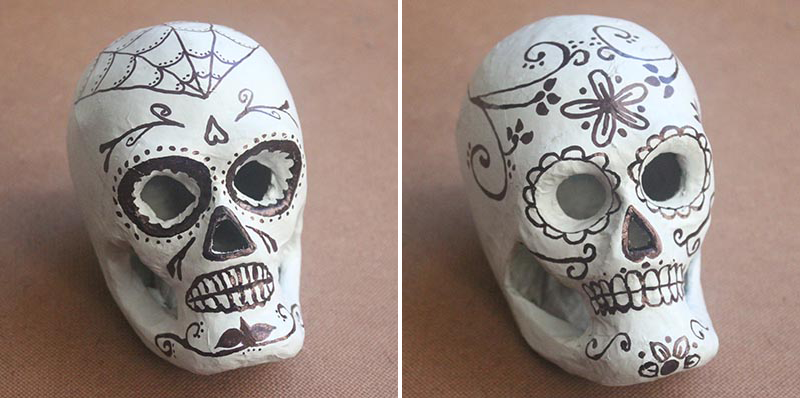 They look great as is so you can always stop at this step. I wanted to test my vase theory though!
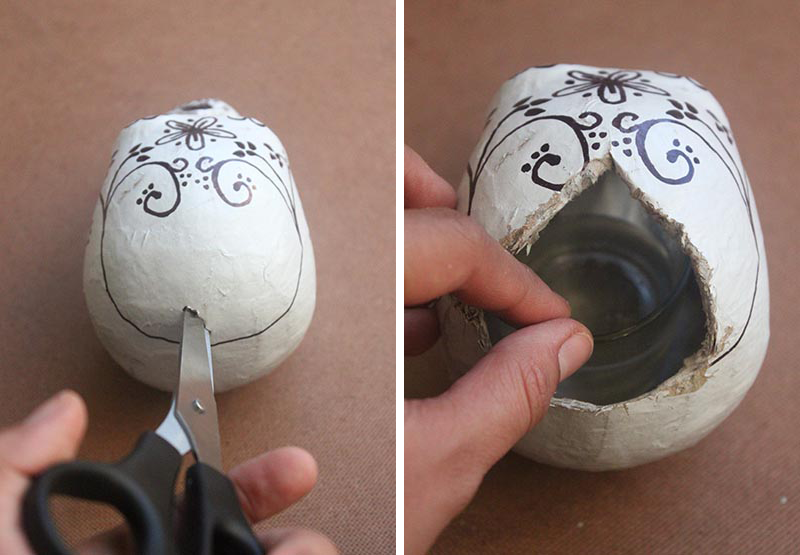 3. To make the skull into a vase, use a pair of scissors to make a small hole at the top of the skull. Twist the scissors to enlarge the hole. Then carefully cut off pieces of the skull until the hole is large enough for the small vase. Insert the vase and fill with water.
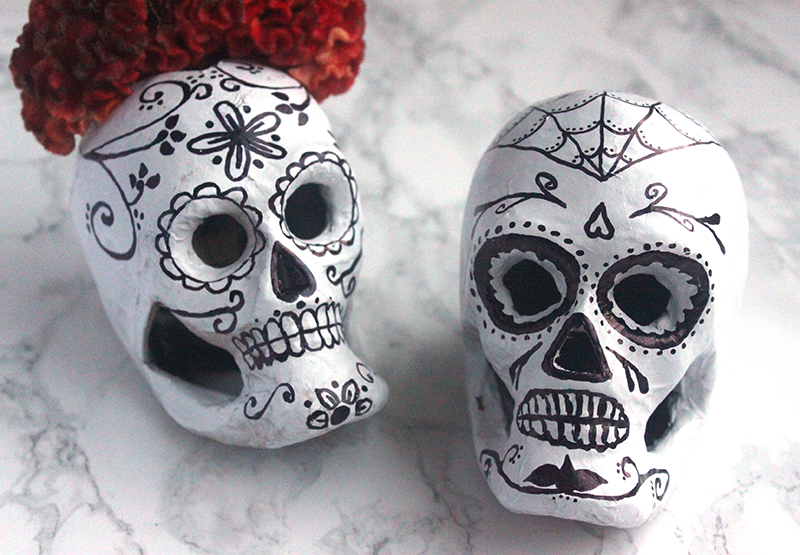
 Add the coxcomb and you’re done! Happy Halloween!!