Clear Clutch

04.30.13

Transparent Clutch

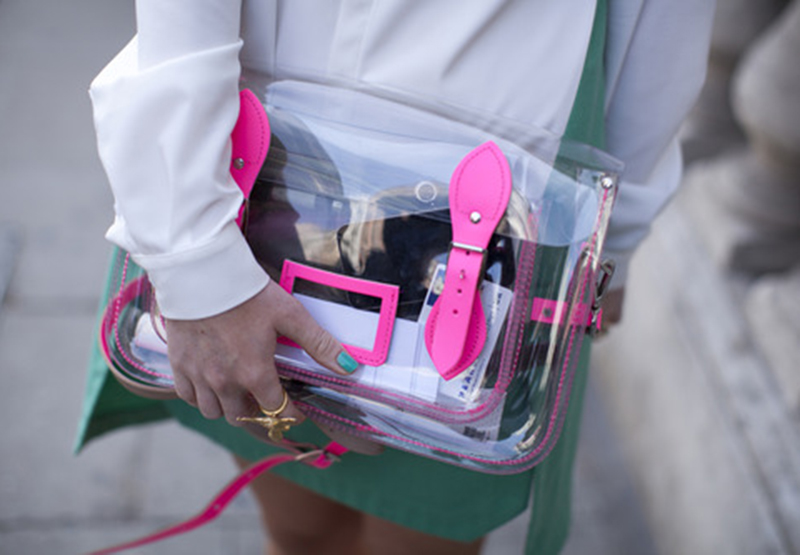
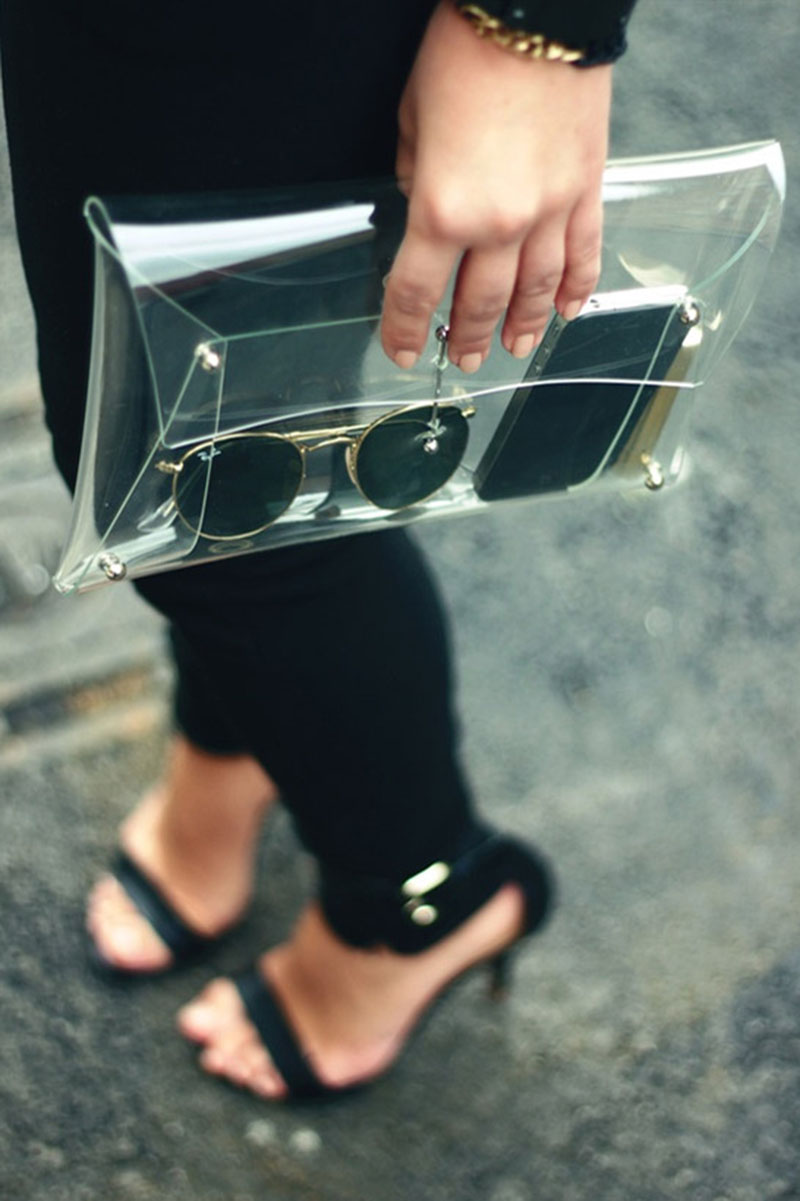
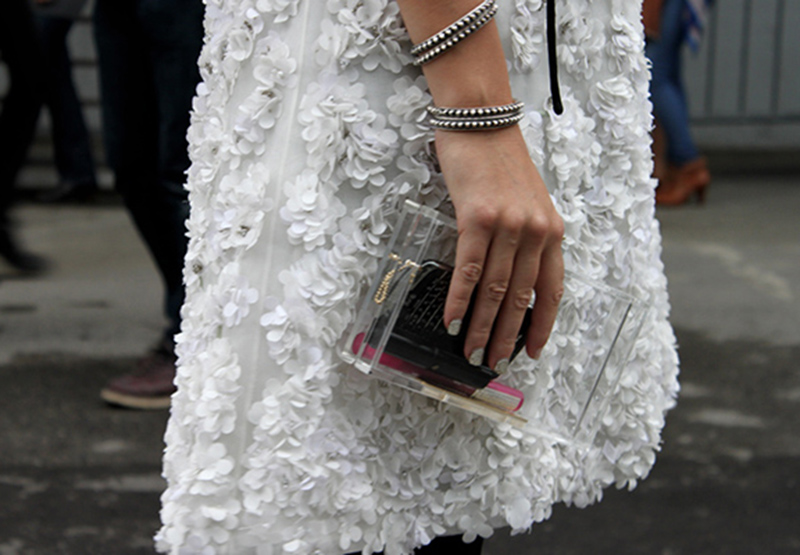
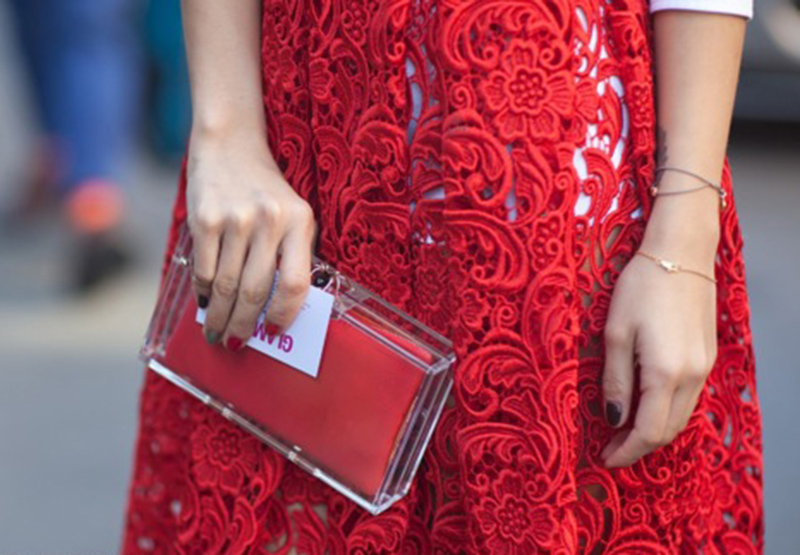
Lately, I’ve been obsessing over the clear clutch trend. On-one-hand, they’re fun, sleek and go with everything. On the other, they’re intrusive. It reminds me of the see-through backbacks people would carry in school. You could see everything! I usually never carry more than my wallet, phone and keys, so it wouldn’t be a big deal. It’s all about personal preference. There are different variations on the clear/transparent handbag trend. For example, the Christopher Kane Jelly Clutch that offers color and opacity. My personal favorite is the lucite clutch. You could easily change out the inner pouch for different looks, all while maintaining a sense of privacy.

Christopher Kane Green Clear Clutch BagClear ClutchLucite ClutchLucite Clutchimages: 1, 2, 3, 4

DIY Embroidered Necklace

04.29.13

Embroidered Necklace

A few weeks ago I made a post about embroidered collars by the talented Lorena Marañón. Her work is incredibly intricate and colorful. She also makes beautiful pieces of jewelry which inspired me to try my hand at making an embroidered necklace. While nowhere close to the amazing work of Miss Marañón, I loved the way it turned out! Keep reading for the tutorial and see more of Marañón’s work here!

Embroidered Necklace

You’ll Need:

– Stiffened Felt
– Embroidery Thread
– Pen
– Scissors
– Large Needle
– Ruler
– Jump Rings
– Pliers
– Gold Chain

Read More →

DIY Sequin Sweater

04.26.13

Sequin Sweater

Ever since I saw this sequin sweater by Alice + Olivia, I knew I had to have it. However, it is not in my price range. Then a friend suggested it was DIYable (yes, I make up words). I was up to the challenge so I bought a gray sweater and some black sequin trim. Thankfully, the design is pretty straightforward, so this project wasn’t as difficult or as time-consuming as I originally imagined.

Sequin Sweater

You’ll need:

– 5 Yards Sequin Trim
– Sweater
– Craft Glue
– Tie Pattern
– Fabric Pen
– Scissor
– Needle & Thread

Sequin Sweater 1. Print out your pattern at full scale (or draw your own). Cut out the pattern and position it at the top center of your sweater. Trace the outline of the tie with a fabric pen.

Sequin Sweater 2. Add a thin line of glue along the outline of the tie. (My sweater was pretty thin so I had to place a piece of newspaper in between sweater layers.) Lay the sequin over the glue and gently pat it down. Continue in this fashion a few inches at a time.

Sequin Sweater 3. Glue the sequin along the entire outline. Continue to follow the shape of the tie, slowly working your way in. Keep going until you have filled in the entire thing. Add individual sequins wherever there is an open space.

Sequin Sweater 4. Using a needle and matching thread, stitch sections of the sequin for extra reinforcement from the backside.

Sequin Sweater Sequin Sweater And you’re done!

DIY Bead Bracelet Tutorial

04.25.13

Delicate Bead Bracelet

If you’ve been following my blog you may have realized bracelets are one of my favorite pieces of jewelry to make. Check out my past bracelet tutorials here, here and here. I’m usually drawn to simple pieces so I decided on a delicate bead bracelet.

Delicate Bead Bracelet

You’ll need:

– Small beads
– Chain
– Wire
– Jump Rings
– Jewelry Finding
– Wire Cutter
-Needle-nose Pliers

Delicate Bead Bracelet 21. Start by measuring your chain against your wrist to determine how long to cut the chain. Mine was about 6″ long.
2. Cut a piece of wire approximately 4″ – we will need a longer length to have extra room to work with.

Delicate Bead Bracelet 33. Wrap the wire around the tip of the pliers leaving some room at the end.

Delicate Bead Bracelet 44. Slightly open the loop and attach one end of the chain. To secure the loop, twist the extra piece of wire around the base. Cut any excess wire.

Delicate Bead Bracelet 55. Add your beads to the wire. I added on 10, but you can add as many or as little as you like. Repeat Step 4 on the open end of the wire.

Delicate Bead Bracelet 66. Cut your chain in the center opposite the string of beads. Add a jump ring to one end, and a jump ring with finding to the other.

Delicate Bead Bracelet 7Delicate Bead Bracelet 9Wear it alone or layer it with other bracelets.


Homemade Bagels: New York Style

04.24.13

Homemade Bagel

Today I’m sharing an amazing recipe for homemade bagels. This particular recipe mimics New York style bagels. The first time I had a New York bagel I bought a half dozen at a time. I didn’t try one until I was on the bus home, and immediately regretted not buying more. At that moment I understood why New York holds the crown for best bagels. The outside is crispy, while the center remains soft and chewy. Though the recipe doesn’t call for a lot of ingredients, these bagels were very flavorful. They take some time, but in the end are worth the effort!

Homemade Bagels Homemade Bagel Homemade Bagel Homemade Bagel