DIY Woven Chain Bracelet
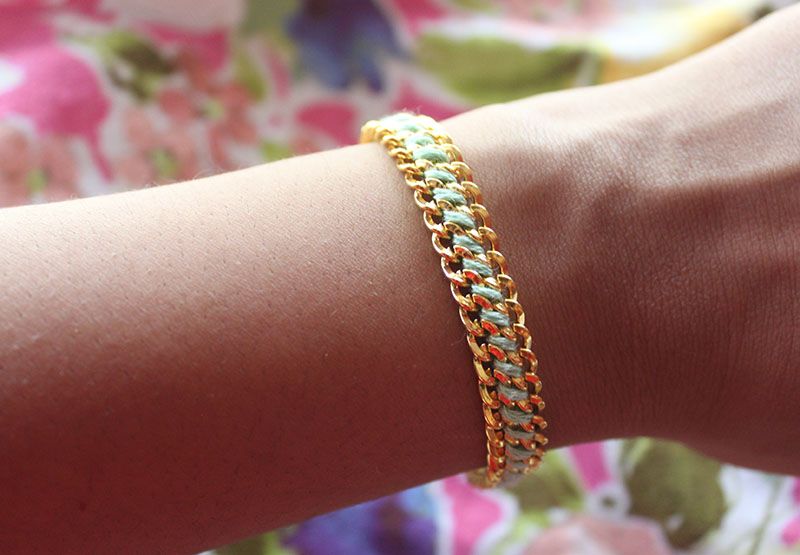
There are many variations of the woven chain bracelet. I had some left over chain and embroidery thread from previous projects, so I decided on a simple method to string two pieces of chain together. I used a hemming stitch to connect the chains, and added jump rings and a finding. I love the way it turned out! I plan to make more and maybe spray paint the chain in different colors!
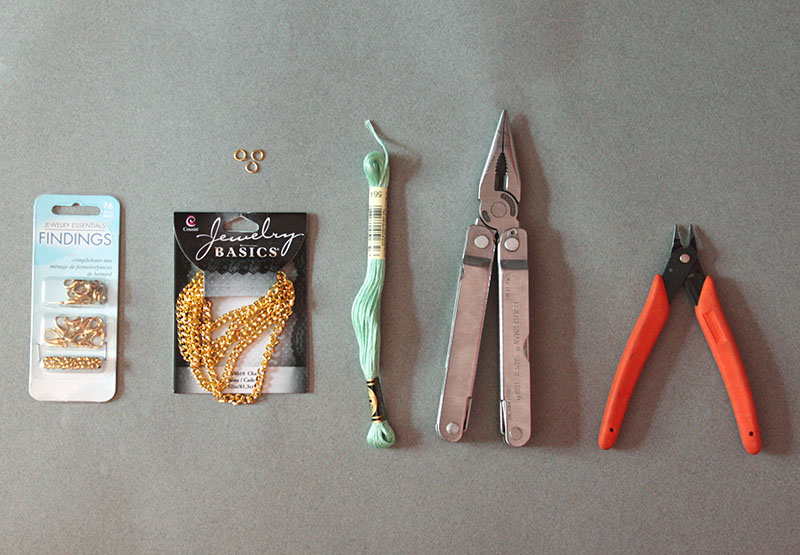
You’ll need:
– Finding
– Gold Chain
– Jump Rings
– Embroidery thread
– Pliers
– Wire Cutter
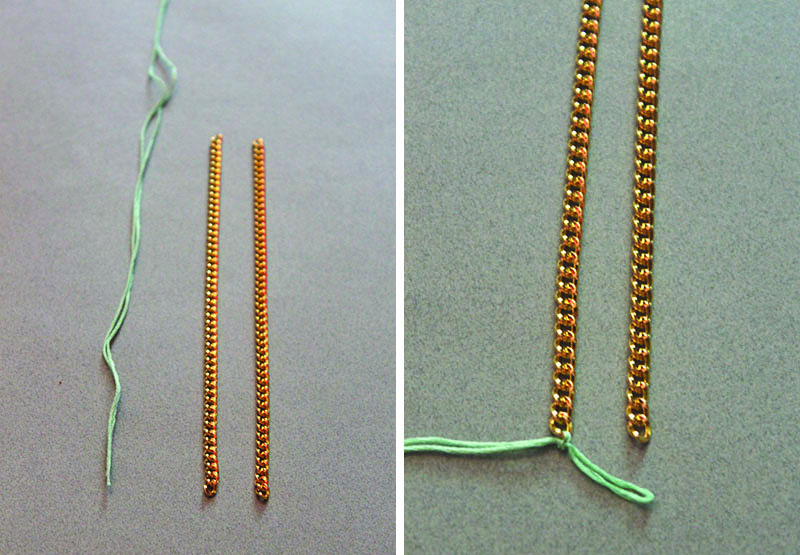 1. Using your wrist as a guide, measure and cut your chain to the length you want it. Mine came out to about 6 1/2 inches. Cut a 36 inch piece of embroidery thread and fold in half. Attach the thread to one end of one gold chain and tie a double knot.
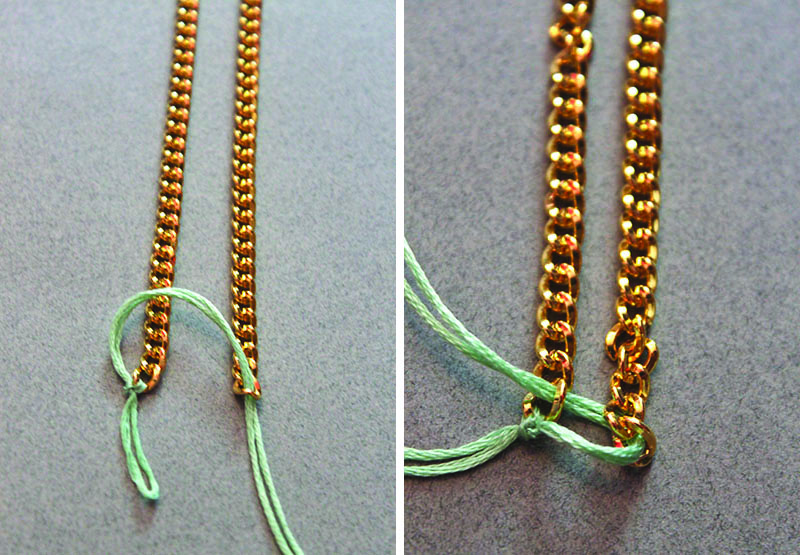 2. Thread the embroidery through the first opening of the second chain. Going underneath the first chain, thread the embroidery through the first opening. (I ended up attaching a large needle to the end of the thread to make the stitching easier.)
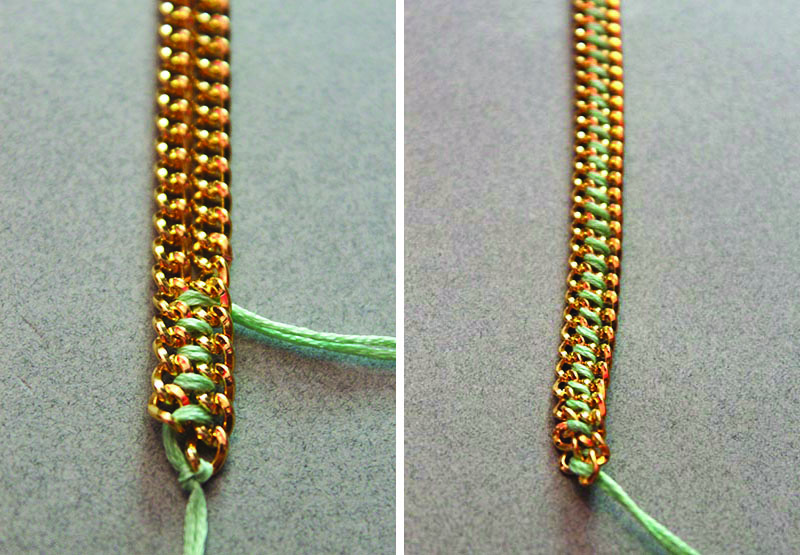 3. Continue to “stitch” the chains together in the over-under pattern until you reach the end of the two chains. Tie a knot on the end of the chain. Cut off any extra thread.
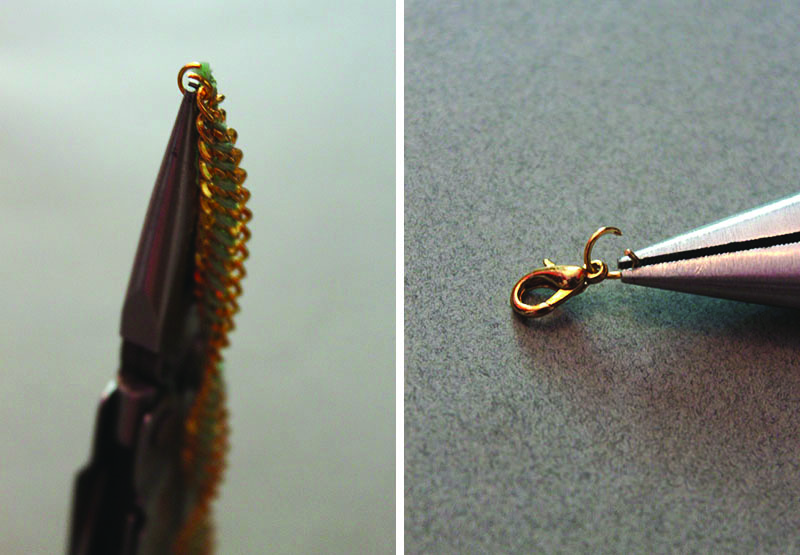 4. Attach jump rings to each end of the bracelet. On one of the jump rings, add a finding.
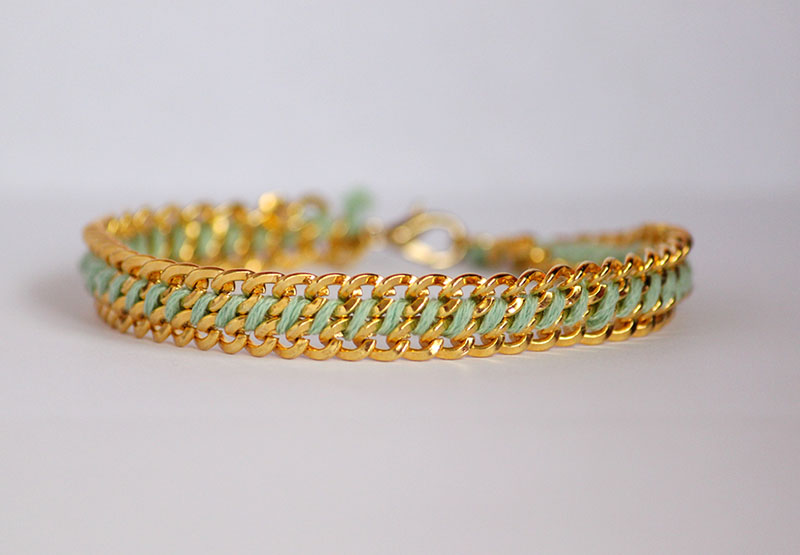 And you’re done! More bracelets to add to your jewelry collection!


I love this! I am so going to try this, thanks for sharing.
♥ Paula Shoe Fiend.
http://shoe-fiend.blogspot.co.uk/
I love this. So simple, yet so creative!
beautiful!!!
Its an easy project a very common design but an evergreen pattern, perfectly fits with all kinds of outfit and in all occasion.
I tried it, didn’t work out so well…ended up getting really twisted even though I kept it straight while stitching. Yours looks much better!
Hi Julie! Were you weaving it really tightly? Mine got twisted the first time I made it, so I tried again stitching it more loosely.
This is what I made yesterday evening in five minutes, what do you think?
I really like this model of bracelet and my version is so summery!
WOW! It’s beautiful! I love the color gradient!!!
Thanks so much for sharing! (:
Bracelet done
I can’t understand why but my picture is not displayed