DIY Yarn Wrapped Planter

06.09.13

DIYYarn wrapped planter

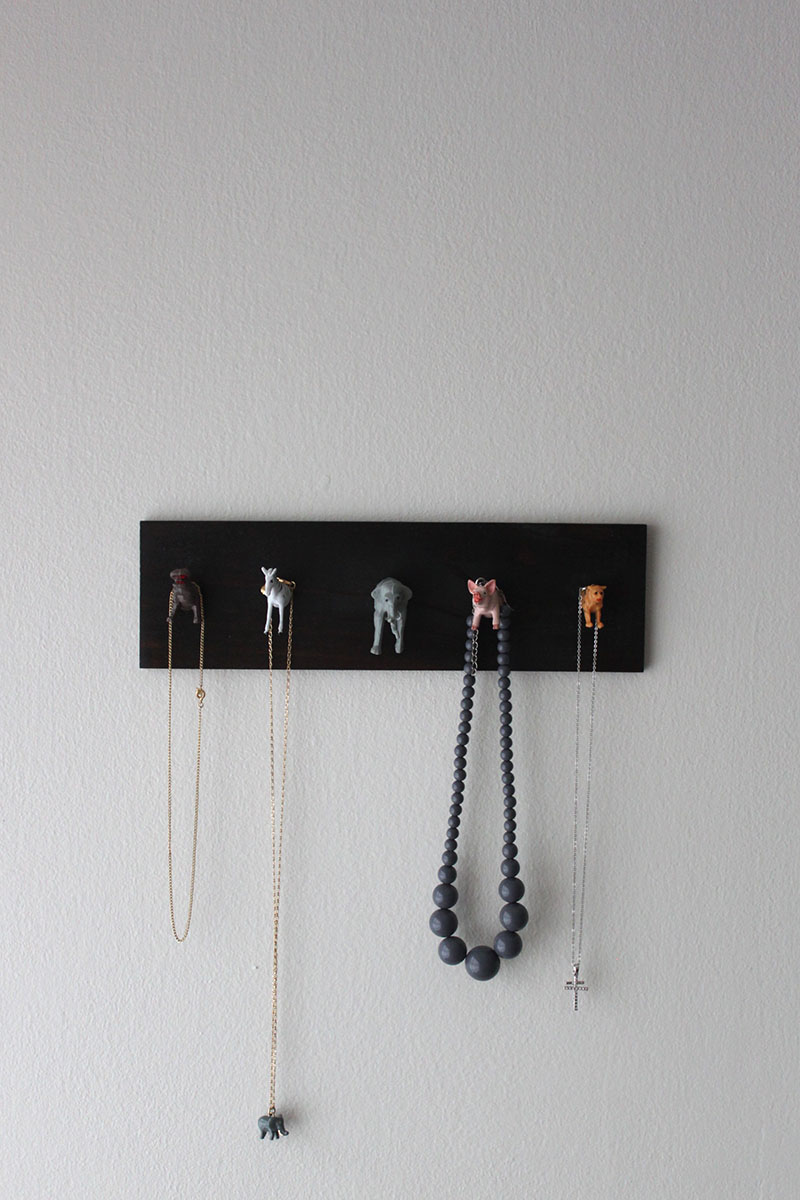
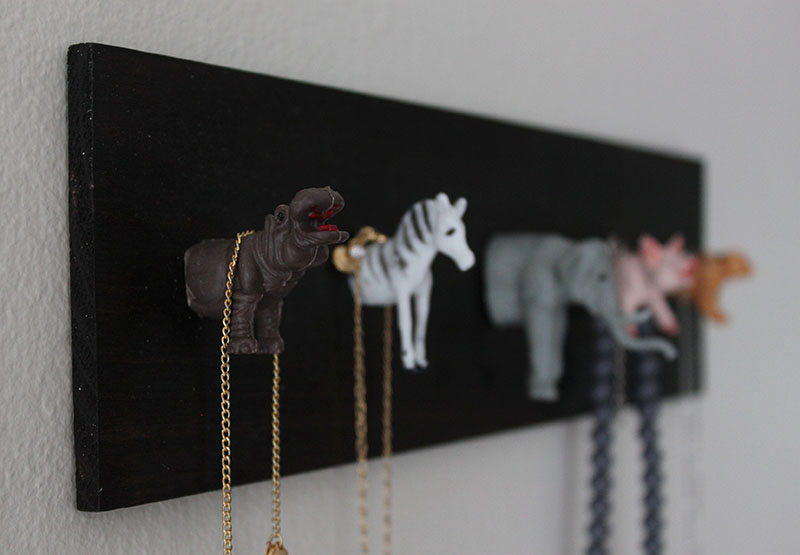
If you saw my last post, you know I’ve been in Chicago the last few days helping my sister move-in to her new apartment. The week has been full of building furniture, running errands, and of course plenty of DIY decor projects. First up is this yarn wrapped succulent planter. I found the succulents at Home Depot and decided they needed a bright planter. I chose to wrap it in yarn for added texture.

Yarn-Covered-Planter

Materials:

– Planter
– All-purpose Glue
– Yarn

DIY Yarn Wrapped Planter
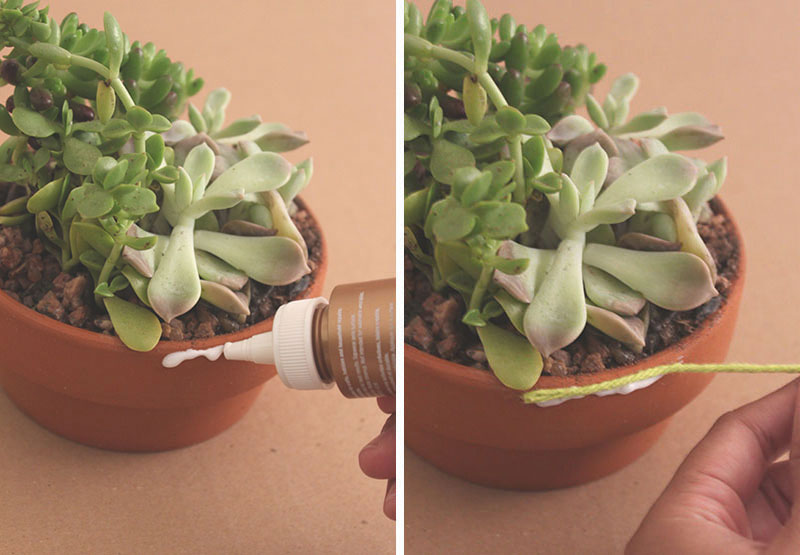
1. To start, add a line of glue along the top edge of the planter. Attach the yarn to the line of glue. Continue to add glue and wrap the string until you reach the beginning edge.

DIY Yarn Wrapped Planter2. A fast method to cover the planter is to cover a small portion of the planter with glue all the way around. This way you can continuously wrap the yarn along the planter. Continue in this fashion until you have covered the entire planter. Cut off the leftover yarn.

DIY Yarn Wrapped Planter
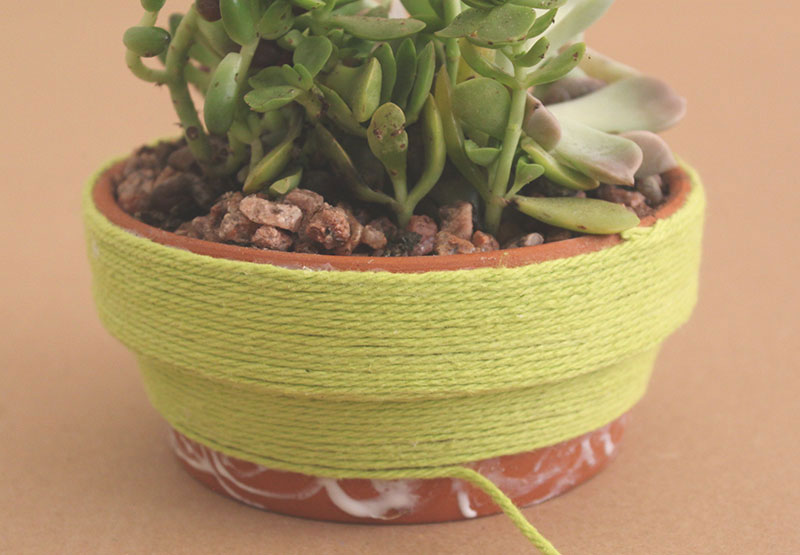
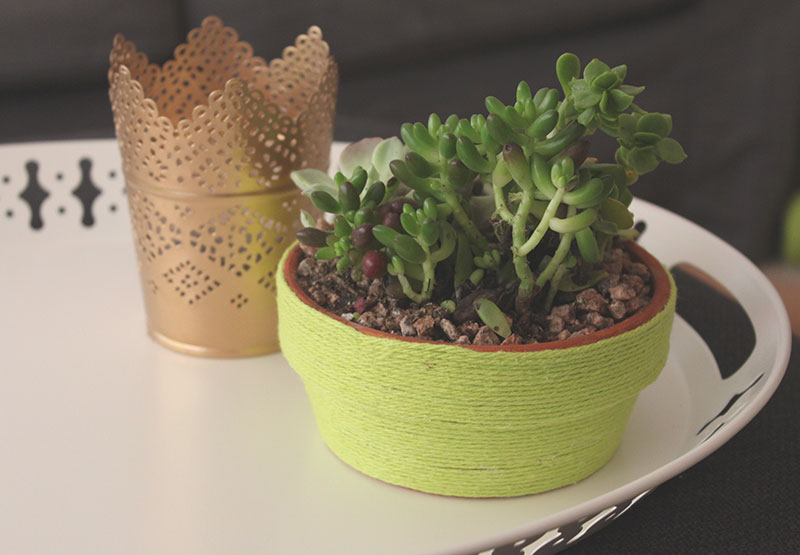
Now you have an updated yarn wrapped planter! Match it to your furniture or color scheme.

Chicago.

06.06.13

chicago{image}

I’m currently in Chicago helping my sister move. I haven’t seen much of the city or tried any deep-dish pizza (if you have any suggestions, I’d love to hear them!), but I’ll be here for two more weeks. Stay tuned for plenty of DIY decor projects!

Fortune Cookies

05.28.13

Fortune Cookie

Last week I made Chicken Lo Mein for dinner one night. I wanted something sweet to accompany it and decided fortune cookies would be the perfect way to complete the meal. I then realized I had no idea how they are made. After reading through a few recipes, (and one batch of trial-and-error) I decided on using this recipe. I ground the sugar in a food processor to create a smoother batter. I began by only baking two at a time, but moved my way up to three. After some practice, making fortune cookies was fun and simple!

Fortune Cookie*Writing fortunes was the best part! Personalize them for friends and family!*

Fortune-Cookie Fortune-Cookie Fortune-CookieFortune Cookies


DIY Jewelry Holder

05.23.13

DIY-Jewelry-Holder-10-23-07-16

I saw this jewelry holder one day at The Paper Source and knew it could easily be recreated. I had leftover plastic animals from this DIY tutorial, so it was the perfect opportunity to use the rest! You can also see another one of my jewelry organizer tutorials here.

DIY-Jewelry-Holder

Materials:

– Plastic Animals (I bought these at Michaels)
– Piece of wood (Mine was 12″ x 3.5″)
– Mini Saw
– Super Glue
– Drill
– Wood Stain (Optional)

DIY-Jewelry-Holder-21. This first step is optional, but I chose to stain the piece of wood in a dark Espresso color.

DIY Jewelry Holder 2. Let the stain dry thoroughly! I waited a whole day.

DIY-Jewelry-Holder-43. Using a straight edge, make two marks on either end of the wood. Drill a small hole over each of the marks. Be careful not to drill through your wood.

DIY-Jewelry-Holder-54. Using a miniature saw, carefully cut your animals in half. This was the most tedious step of this project. The elephant took forever!! Make sure your blade is sharp and take extra care when sawing.

DIY-Jewelry-Holder-65. Arrange the animals on your piece of wood. Use super glue, or other strong glue to attach the animals to the wood. (So far the animals have held up. For extra strength, you could screw in your animals from behind.)

DIY Jewelry Holder DIY Jewelry Holder 8 And you’re done! Just let the glue dry before hanging any jewelry.*The Hippo is my favorite!!*

Safety Pins

05.22.13

Safety Pin Collar

Safety Pins in fashion are both stylish and functional. Once used to avoid any wardrobe malfunctions, safety pins have become a new statement piece and a bolder form of emroidery. For a DIYer, safety pins are easy to use and make quick updates to your clothing. They are also very versatile. Safety pins can be used in jewelry as seen by Marc Jacbos and Tom Binns. Or, you can embroider a jacket collar or shoulder pad. The possibilities are limitless!

Safety Pins Safety Pin Jacket Safety Pins  images: {1, 2, 3, 4}