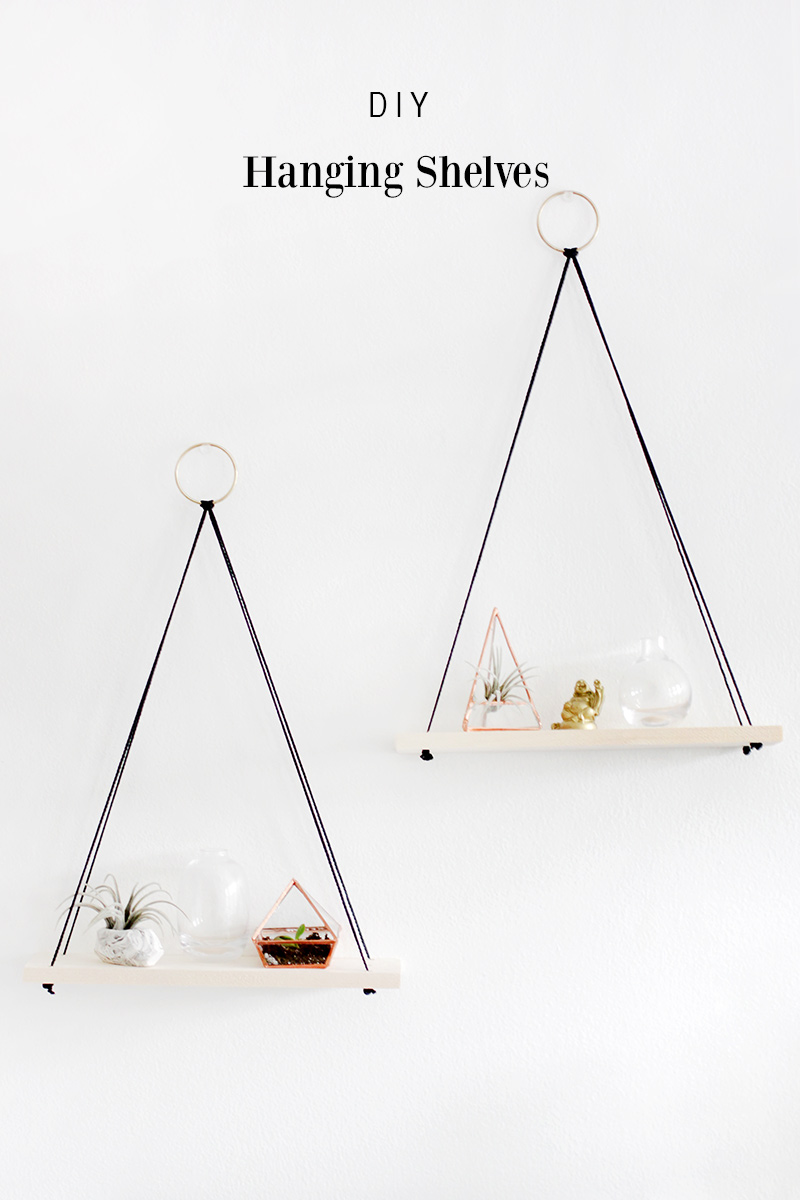
DIY Hanging Shelves
Do you always find yourself hoarding small trinkets that you have no idea where to store, or is that just me? I hung some shelves last year that are already overflowing with plants, frames, and small ceramic sculptures, so I wanted to hang some smaller shelves that would also serve as an art piece. I love the look of unfinished wood and the simplicity and strength of rope cord. The result is a simple design that makes a big impact in your space! Read on for the tutorial for these DIY Hanging Shelves…

materials for diy hanging shelves
wooden board(s), rope cord, metal rings, scissors, saw, drill
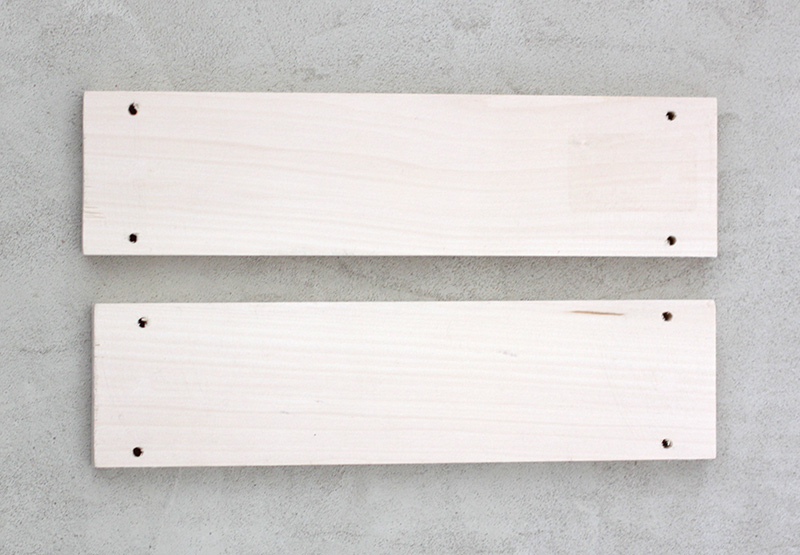 If needed, cut your boards to size. I cut a 24″ board in half. Drill two holes on opposite ends of the board. You can measure the exact distances or eyeball it like I did.
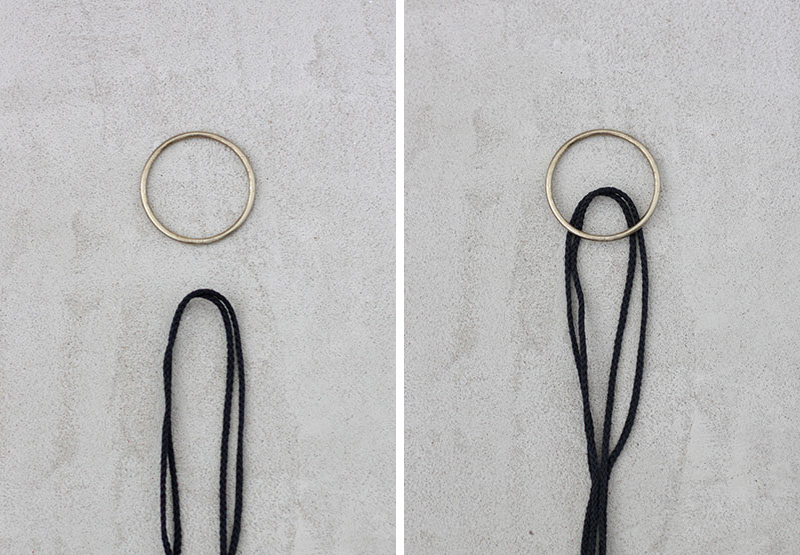 To hang your first shelf, cut two pieces of cord to your desired length, remembering to leave room for the knotted ends. I cut 2 pieces of 40″ cord. To attach the cord to the metal ring, we’re going to make a Lark’s Head knot. Fold the two pieces of cord in half, and place the folded end underneath the metal ring.
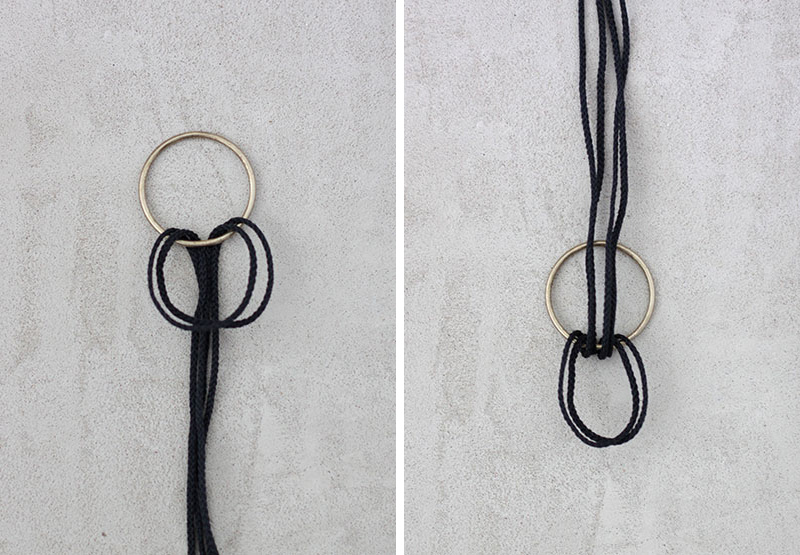 Bend the folded end over the metal ring, then pull the rest of the cord up and through the loop.
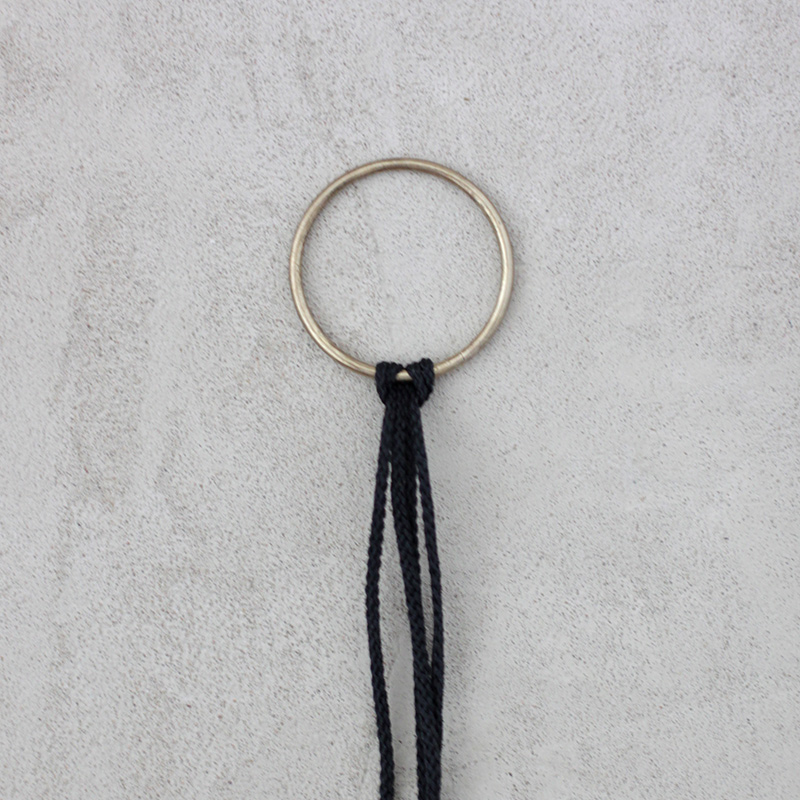 Pull the cord taut to create the lark’s head knot around the metal ring.
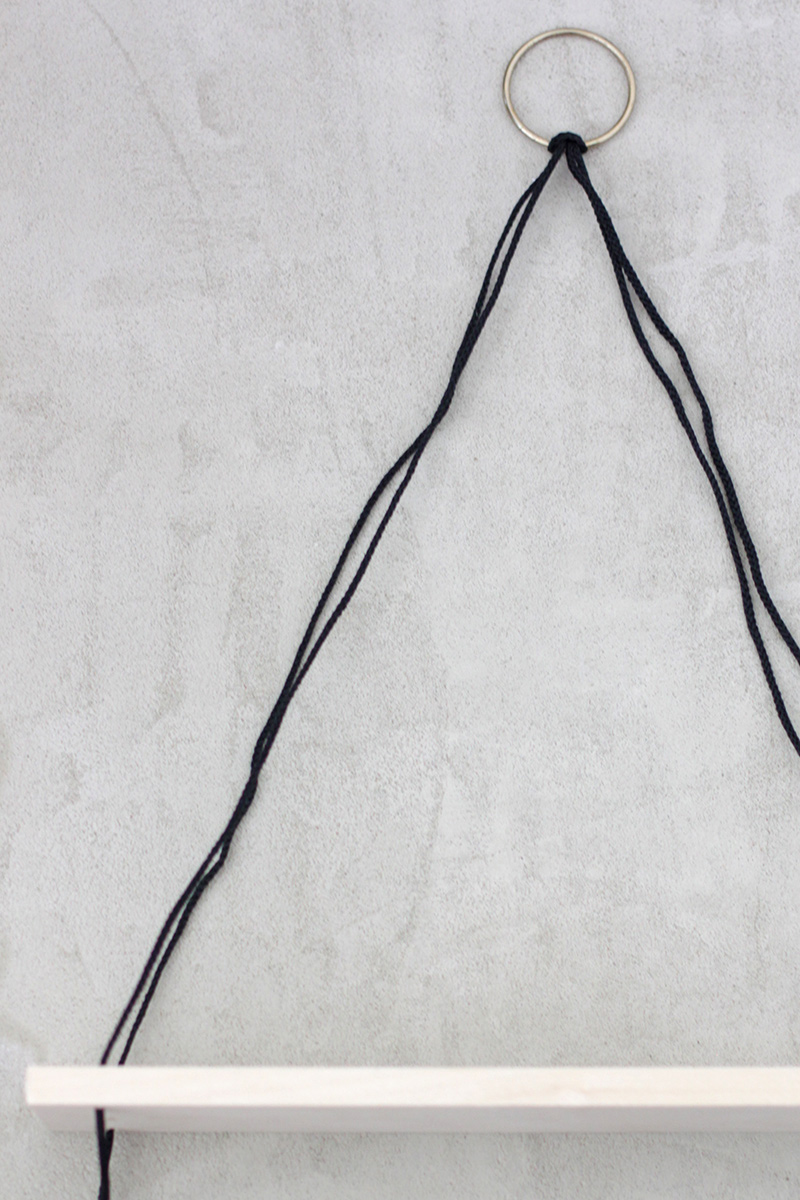 Separate two of the strands and pull each strand through one of the drill holes. Repeat on the other side.
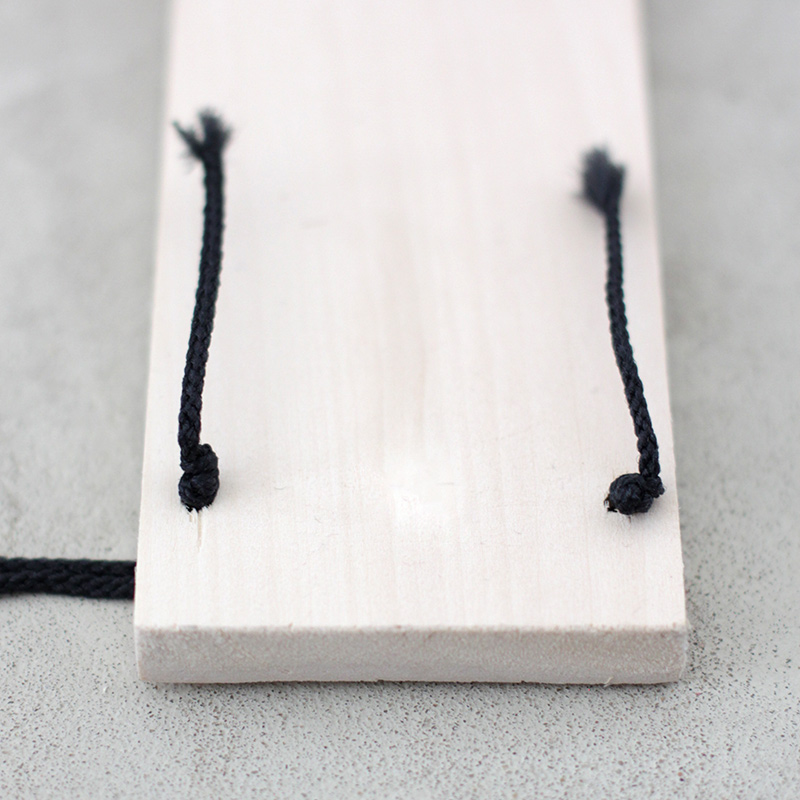 Adjust the length of the cord to make your shelves hang as high or low as you want. Then, tie knots at the end of each piece of cord. Trim off the excess cord.
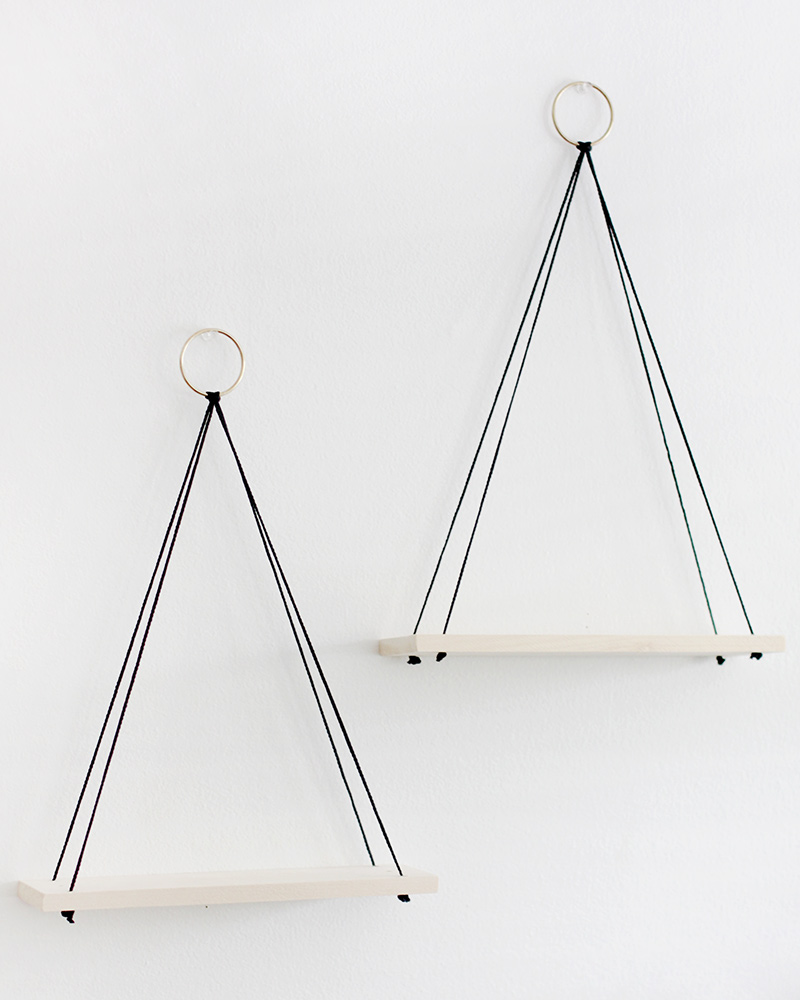 Hang your shelves!

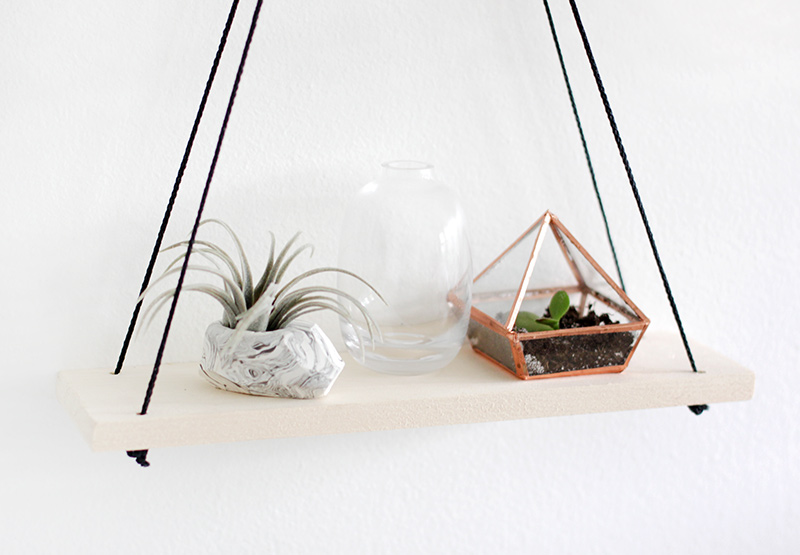
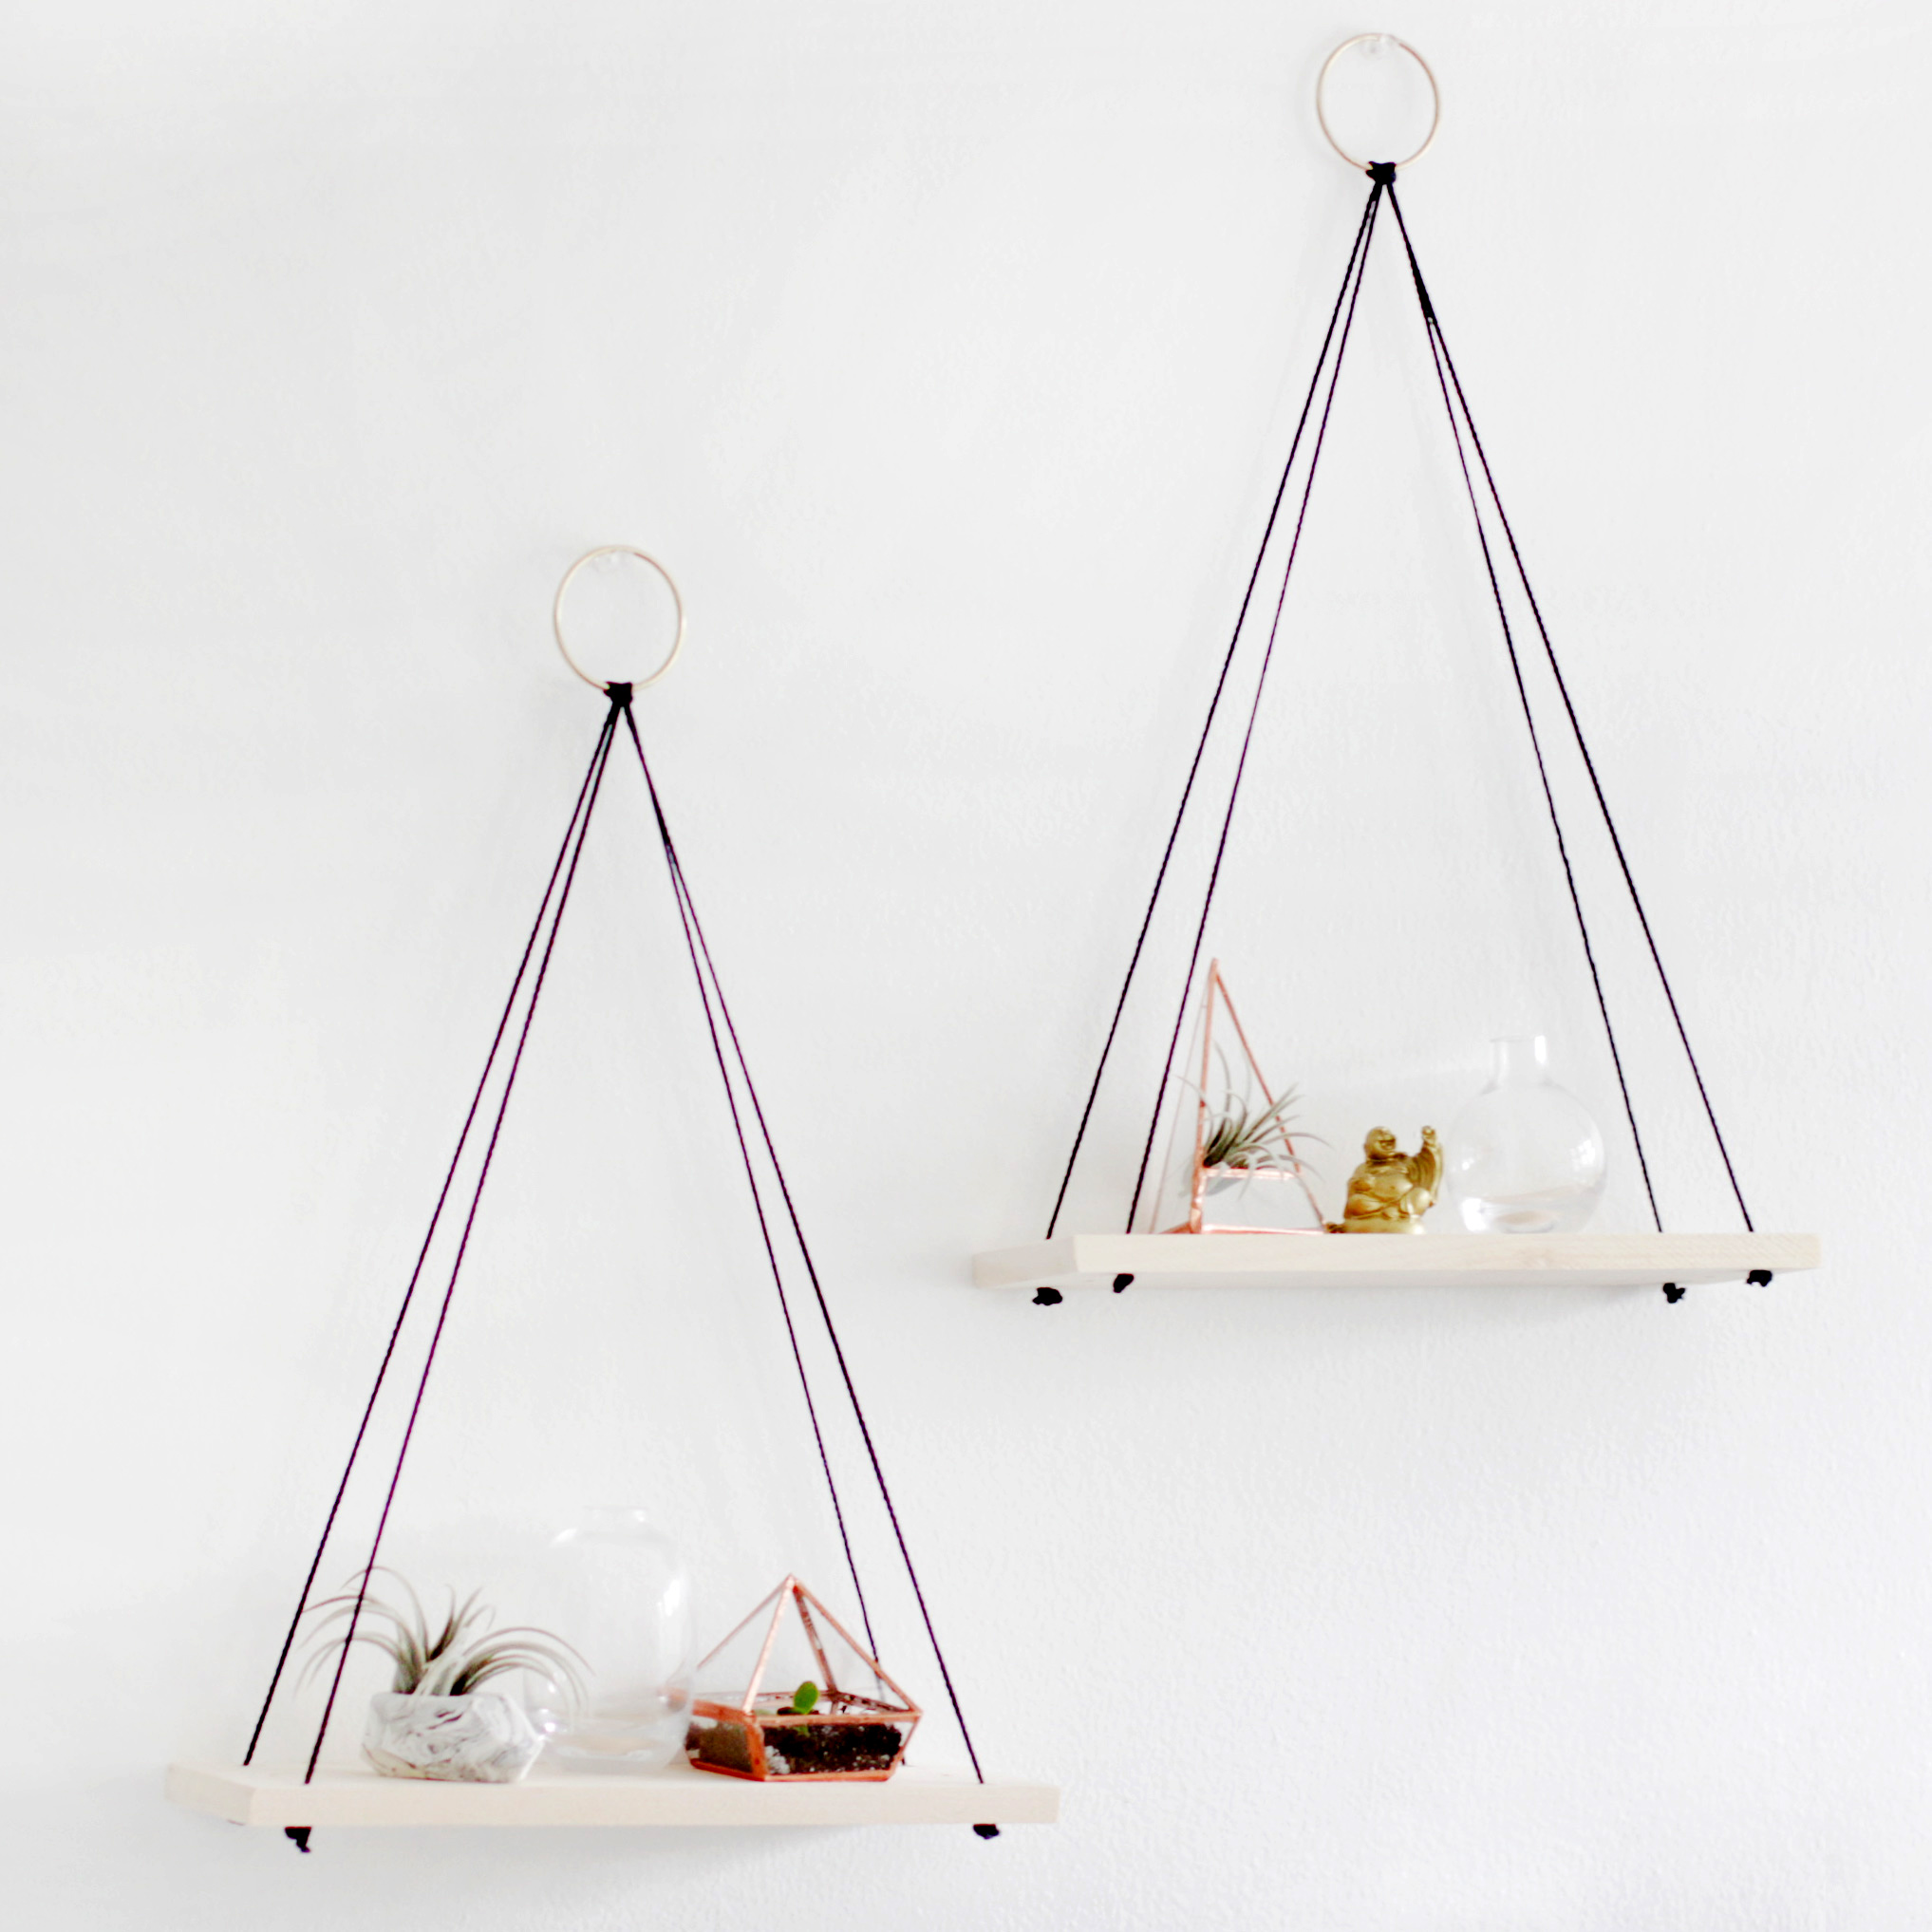 Add some of your favorite decor pieces to your DIY hanging shelves and you’re done!!

Love it! What kind of wood did you use for the boards?
Hi, Brenda! It was a Clear Pine Craft Wood.
Thank you for responding! I love the coloring of the wood! Definitely gonna give these a go :) .
what kind of cord is it? Looking to find out the strength needed? Were you able to hang it with a pushpin?
Hi Brittany,
I used parachute chord I bought at a craft store. I did just use a push pin to hang them as I didn’t plan on putting anything too heavy on the shelves.
what size is the ring? I’m a click away on my amazon account to buy a set of six 3 inch rings. Thanks in advance!
Hi Kristen,
I used 2 inch rings I bought at a craft store.
Hope that helps!
Great idea :D thanks
what isn’t mentioned is that its hard to level! LOL the knots have to be perfectly even, took me a few tries to get it just right.
https://uploads.disquscdn.com/images/f42fef4cb1cf3668fa8a2dc4deb295f1ab6eca844138adbe1ba2f1abe8f12d08.jpg
It definitely took me a few tries too. This looks so great! Thanks for sharing :) I also love that air plant display!!
Yes! I love my Pinterest projects lol
What were the dimensions of your wood?