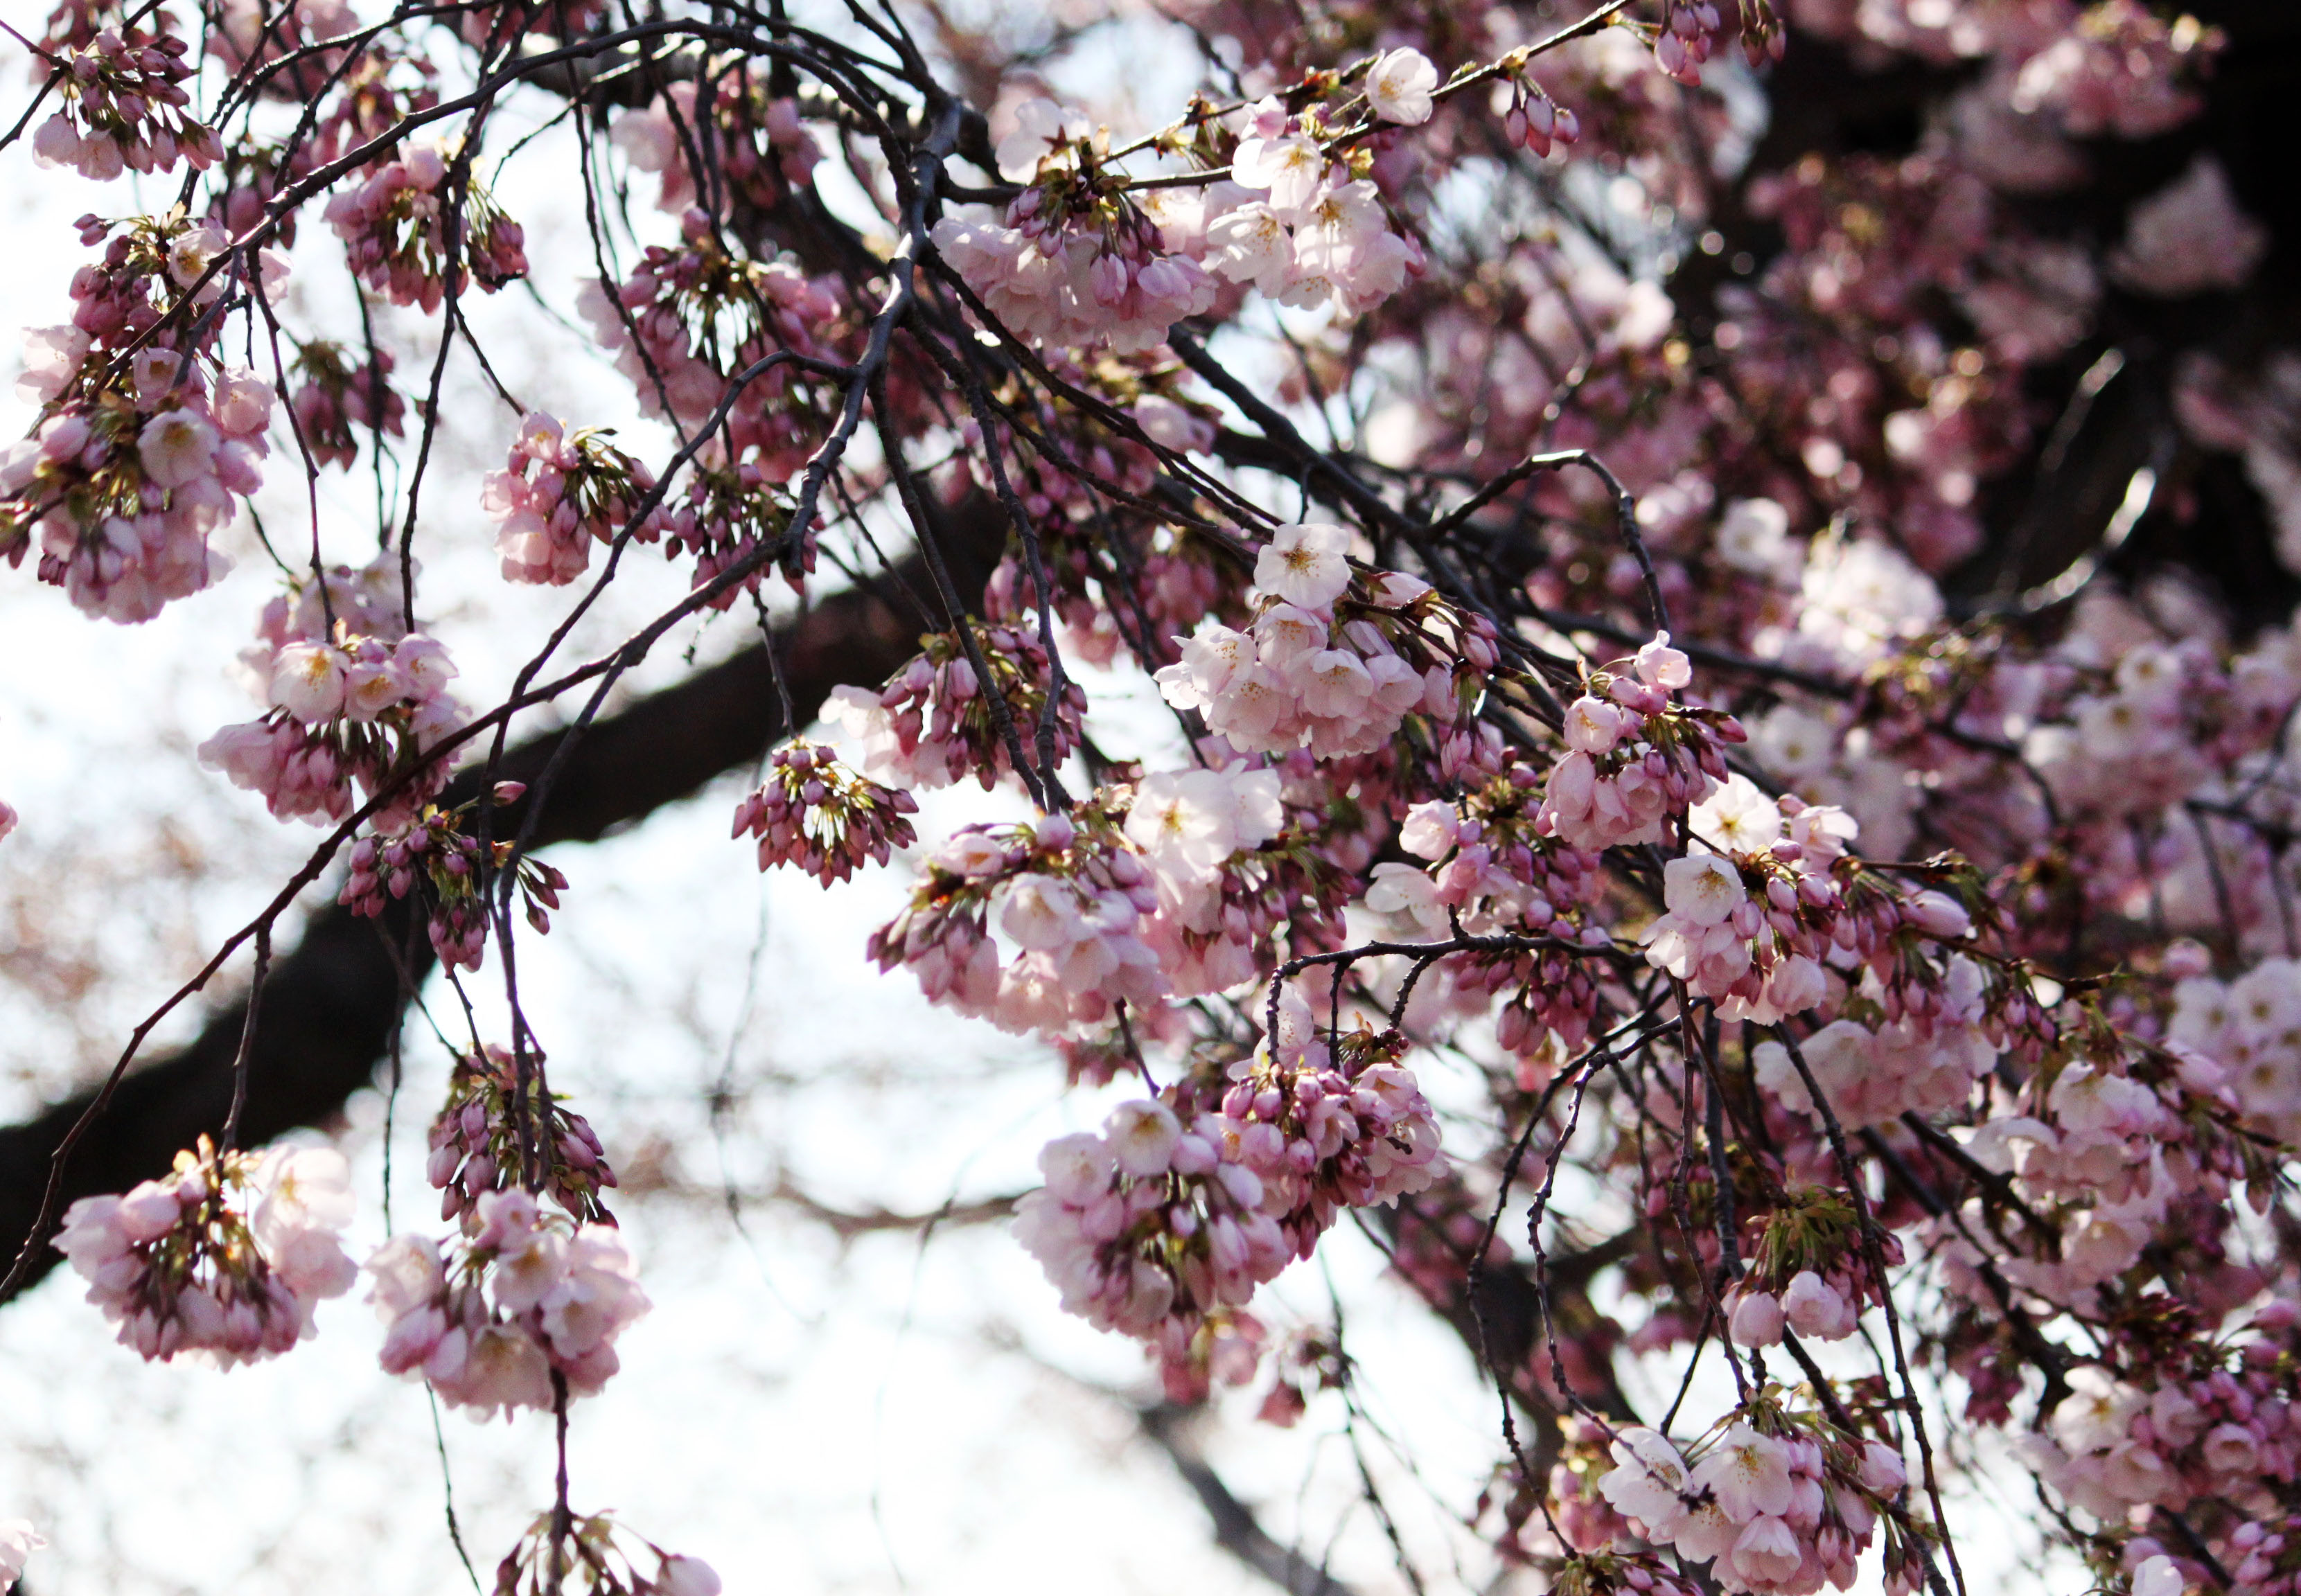
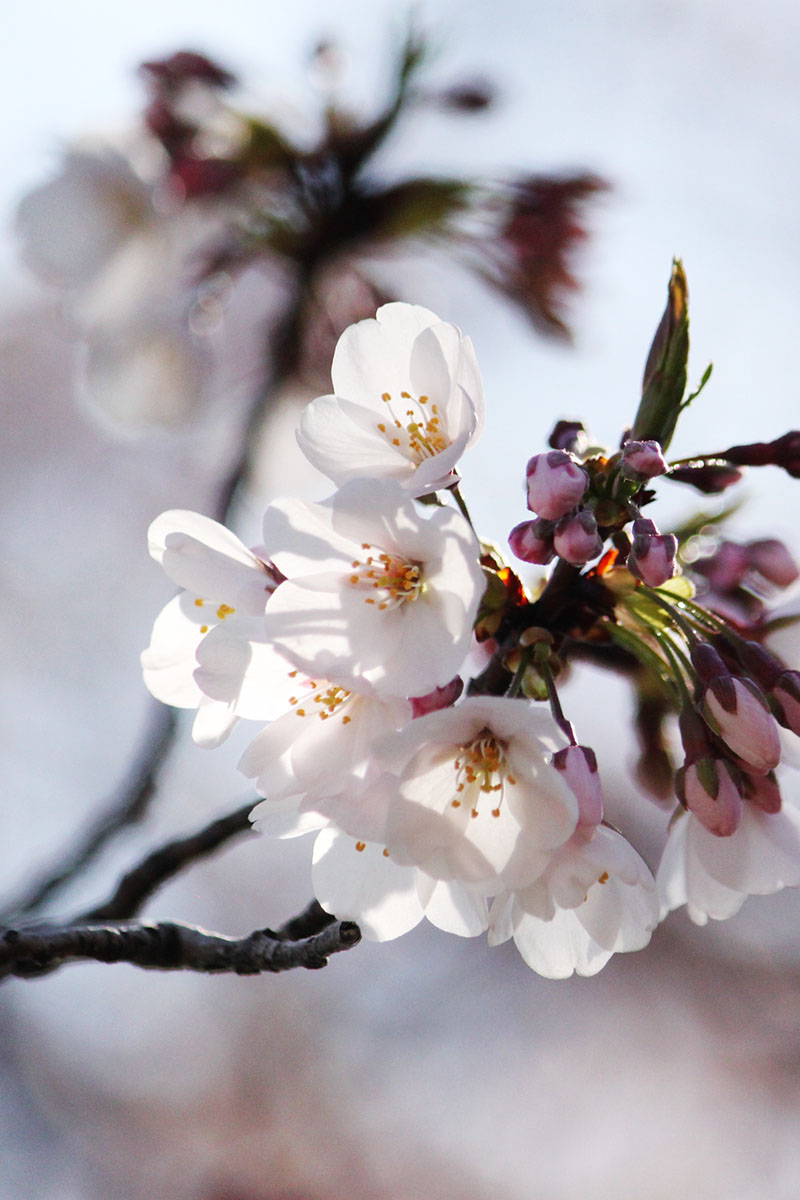
This past weekend was the National Cherry Blossom Festival in DC. Everyone was hoping to see some great blossoms, but the weather was not cooperating. There were few blooms, and you could tell people were disappointed. However, it seems this week we have skipped Spring all together and went straight to summer. With temperatures in the high 80s (it hit 90 yesterday, eek!) the blossoms are starting to peak. Hopefully I can see them again soon!
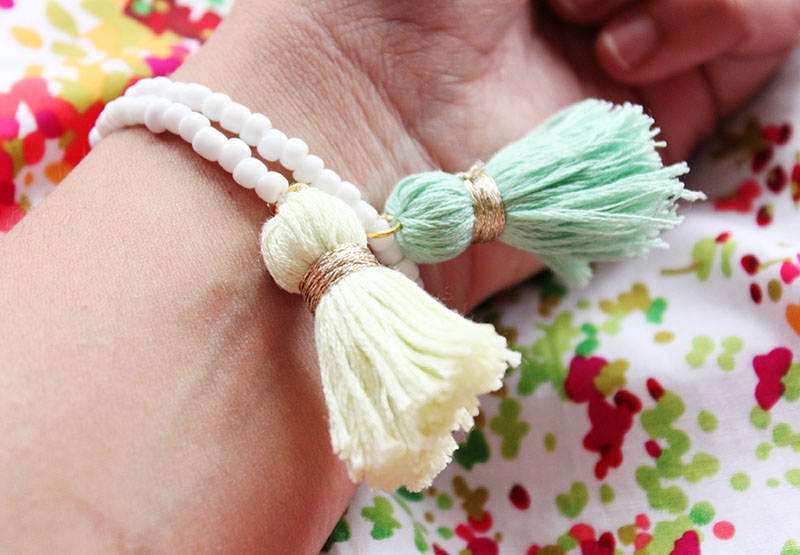
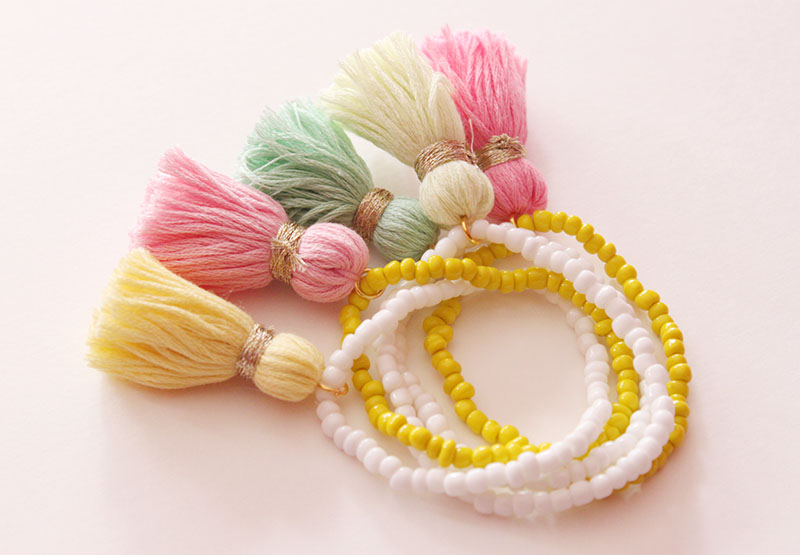
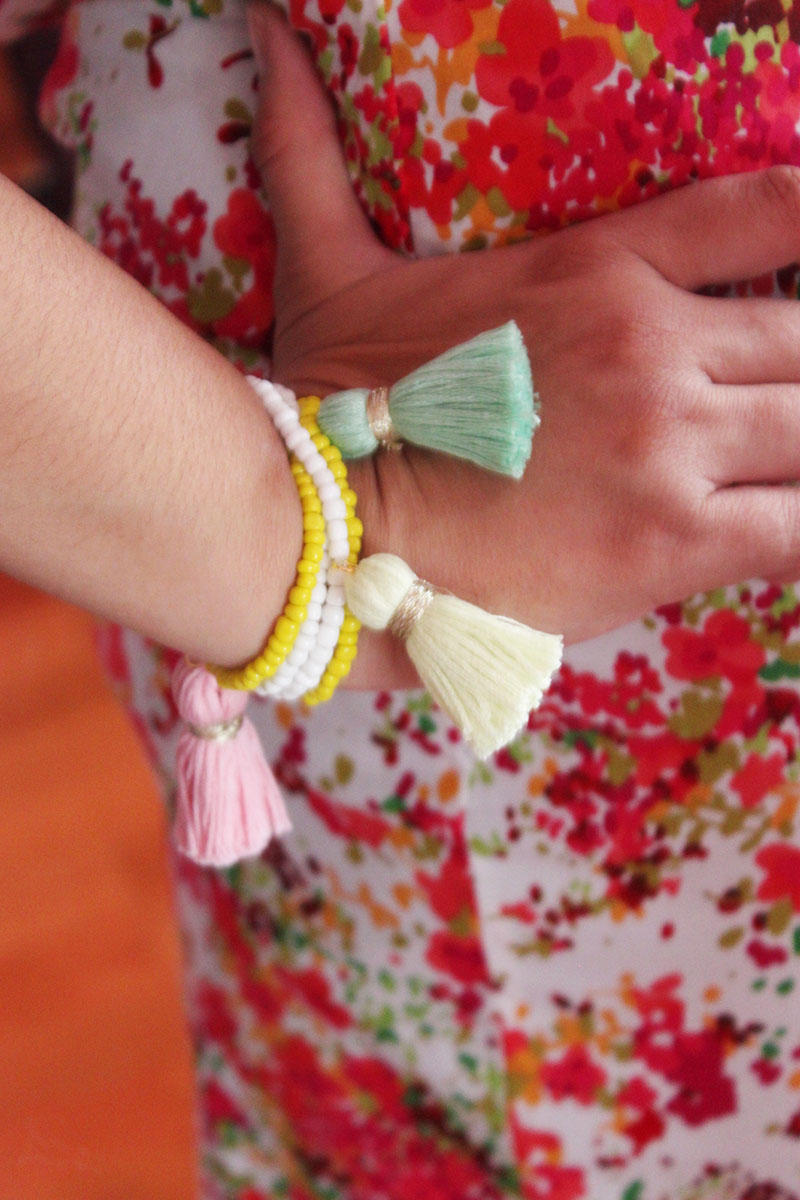
Earlier this week I posted a tutorial on how to make tassels out of embroidery thread. I knew I wanted to create a piece of jewelry with the tassels for a fun and colorful look. I decided on tassel bracelets. I used small beads in two different colors, but you can use as many colors as you want. The smaller sized beads also make the tassel bracelets great for stacking!
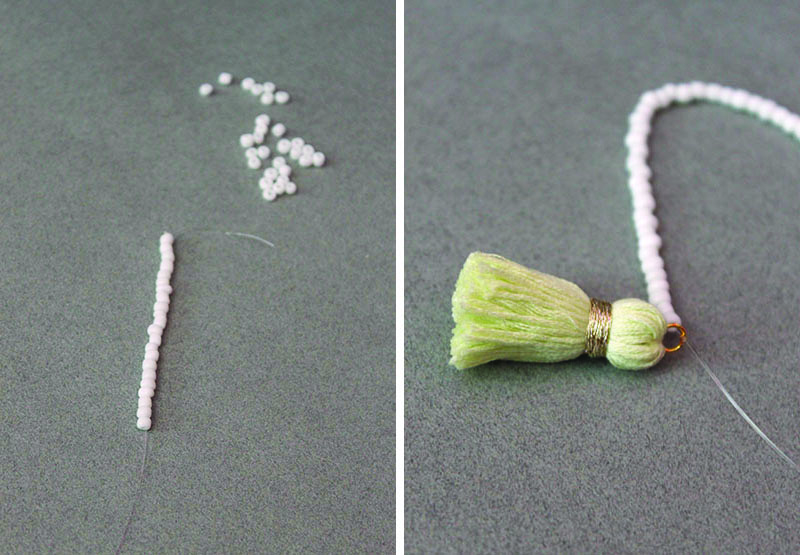
1. Start by cutting a 12″ long piece of stretchy jewelry cord. Triple knot one end of the cord, leaving about a 1″ tail.
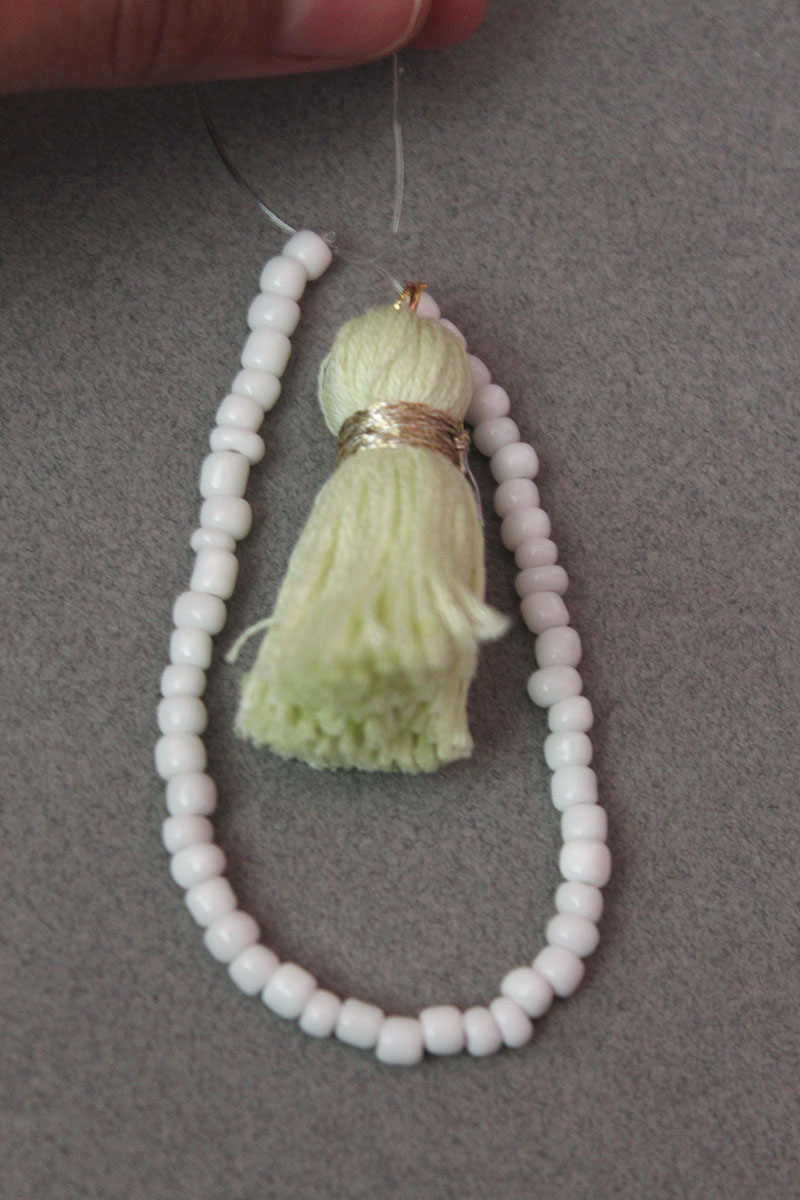
2. String the beads onto the cord. Keep measuring the bracelet to your wrist, and adjust the size accordingly. When the bracelet is the correct length, add a tassel to the end.
3. Finish the bracelet by tightly double knotting the cord at the end. Cut off any excess cord.
And you’re done! A simple and quick DIY with great results. Imagine the all the different color combinations you could do! Have fun!!
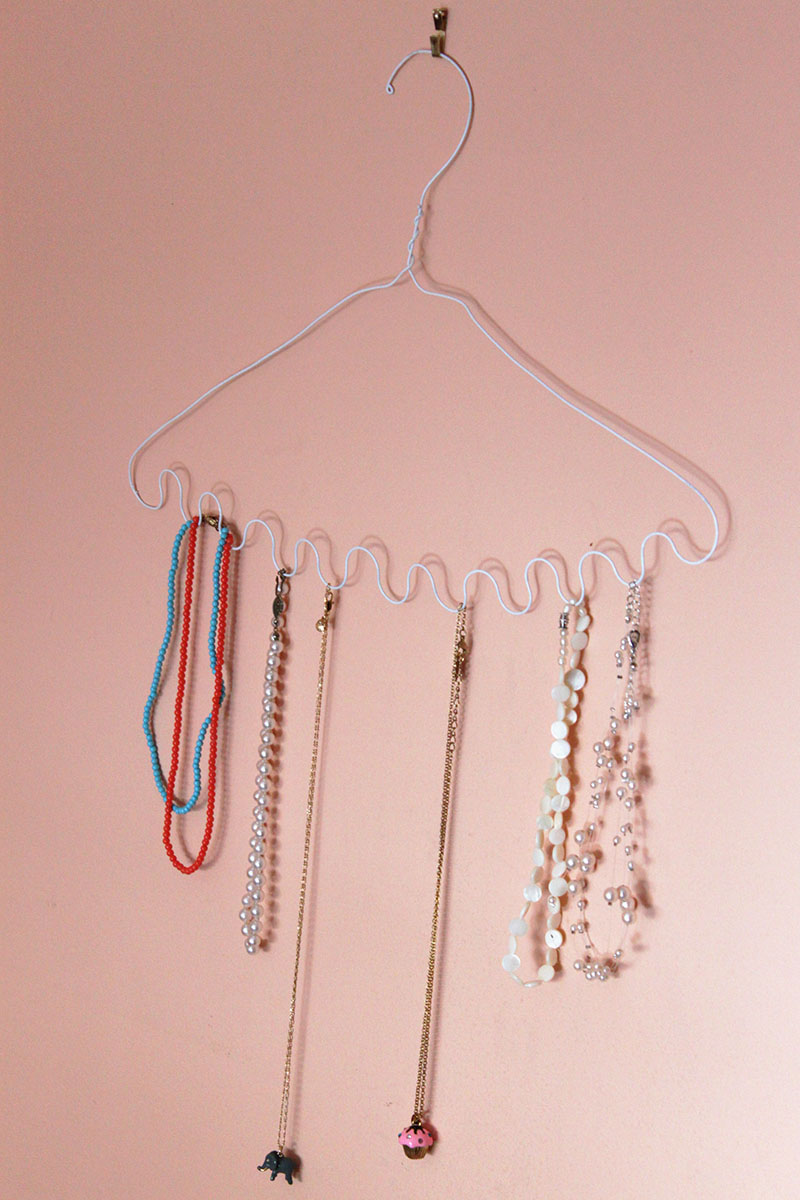
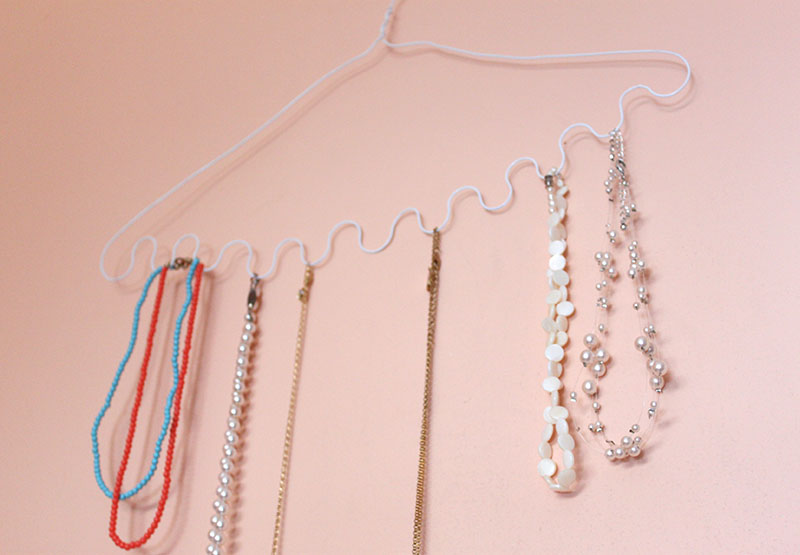
Earlier this week I made a post about different jewelry storage ideas. Today I’ll show you how to make your own jewelry organizer out of wire. I was inspired by this photo on Pinterest. This DIY allows you to organize your jewelry and display it in a fun way!
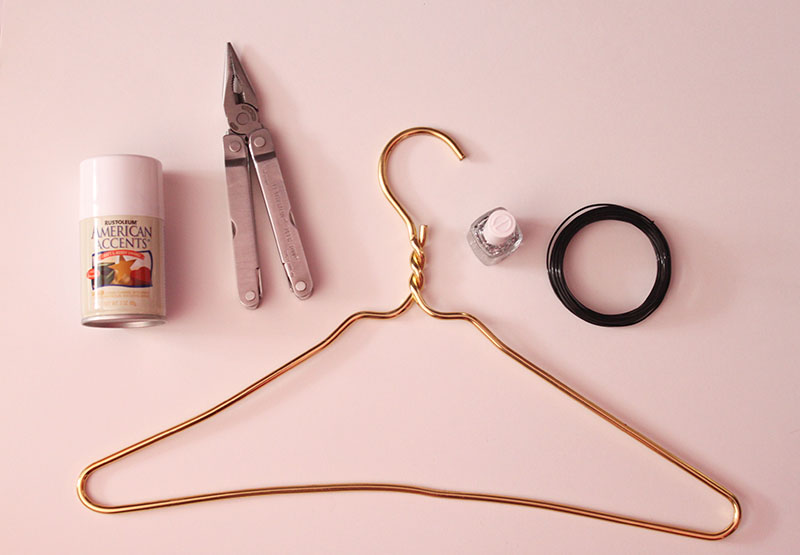
What you’ll need:
– Hanger as a template
– Wire (I used 12 gauge)
– Pliers
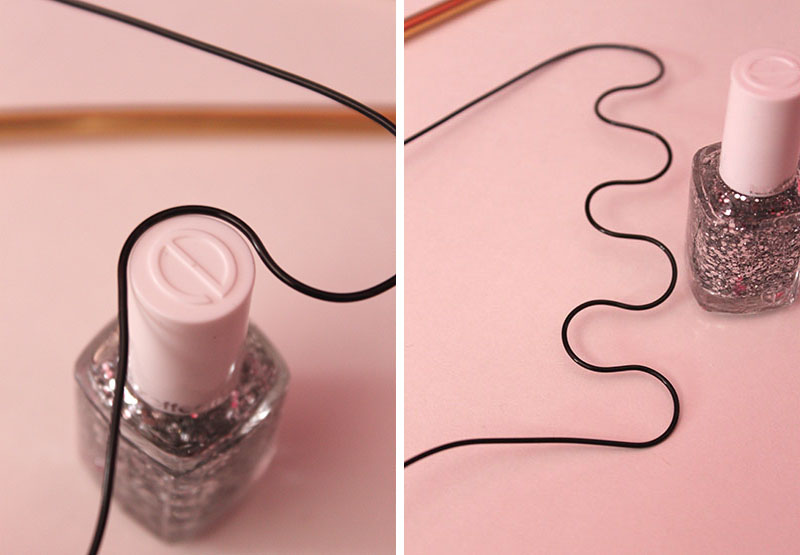
– Something small and round (Nail polish or chapstick works)
– Spray paint (optional)
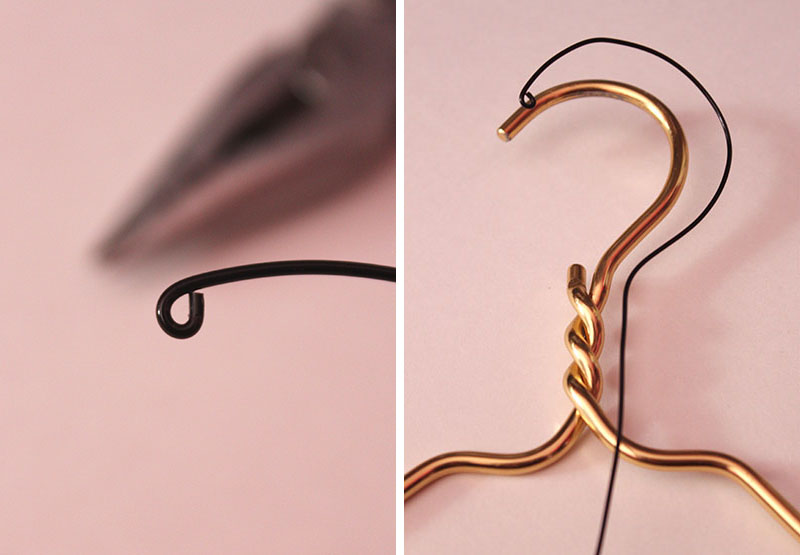
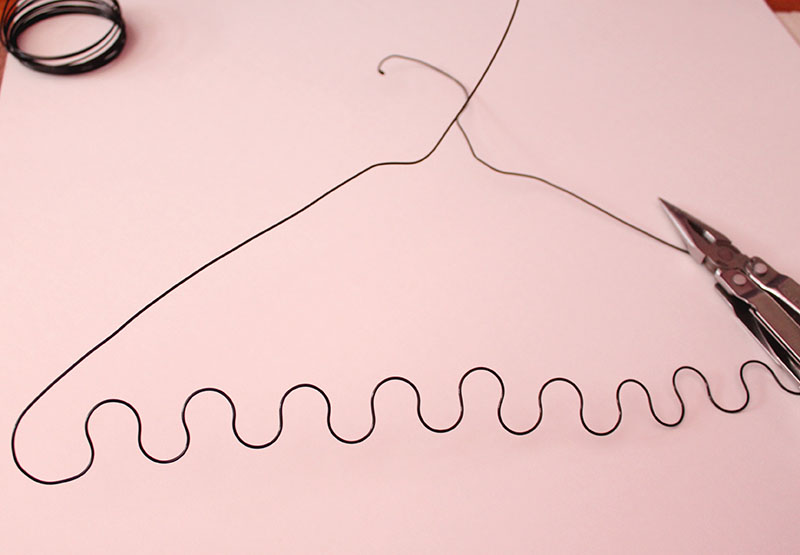
1. Start by making a small curve on one end of the wire. Using the hanger as a template, shape your wire to follow the curves of the hanger.
2. Continue to recreate the shape of the hanger until you reach the deep bend on one side.
3. After you create the first bend, use the nail polish bottle or chapstick to create the wavy pattern along the bottom of the hanger.
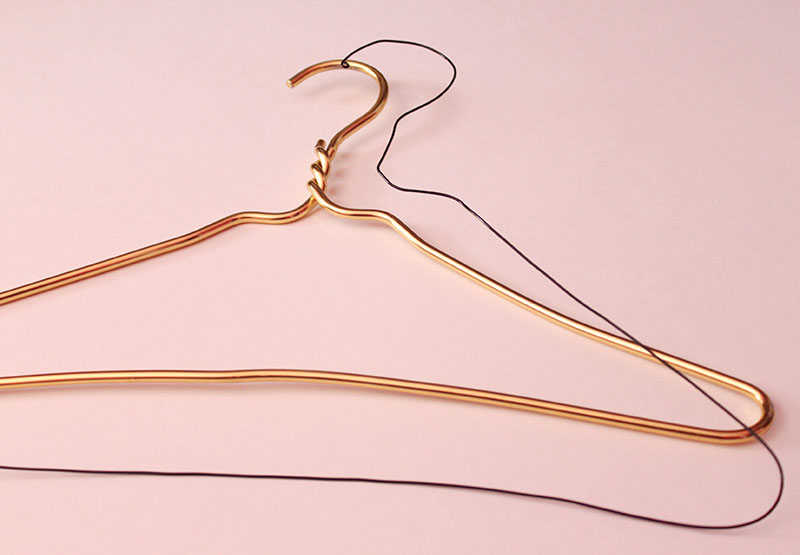
4. Continue the pattern until you reach the opposite end. Then create the second bend to complete the hanger shape.
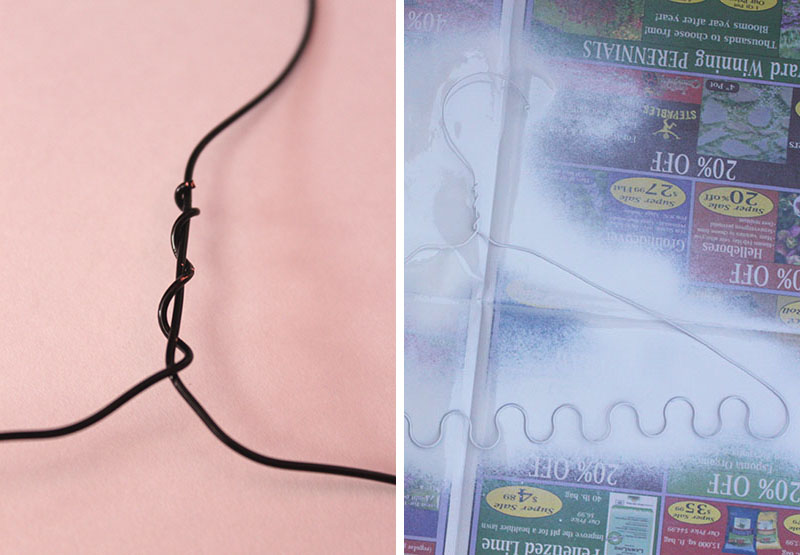
5. Twist the wire multiple times around the neck of the hanger. Cut off excess wire. Leave your jewelry hanger as is, or spray paint in any color!
Voila! A great way to store your necklaces and bracelets!!
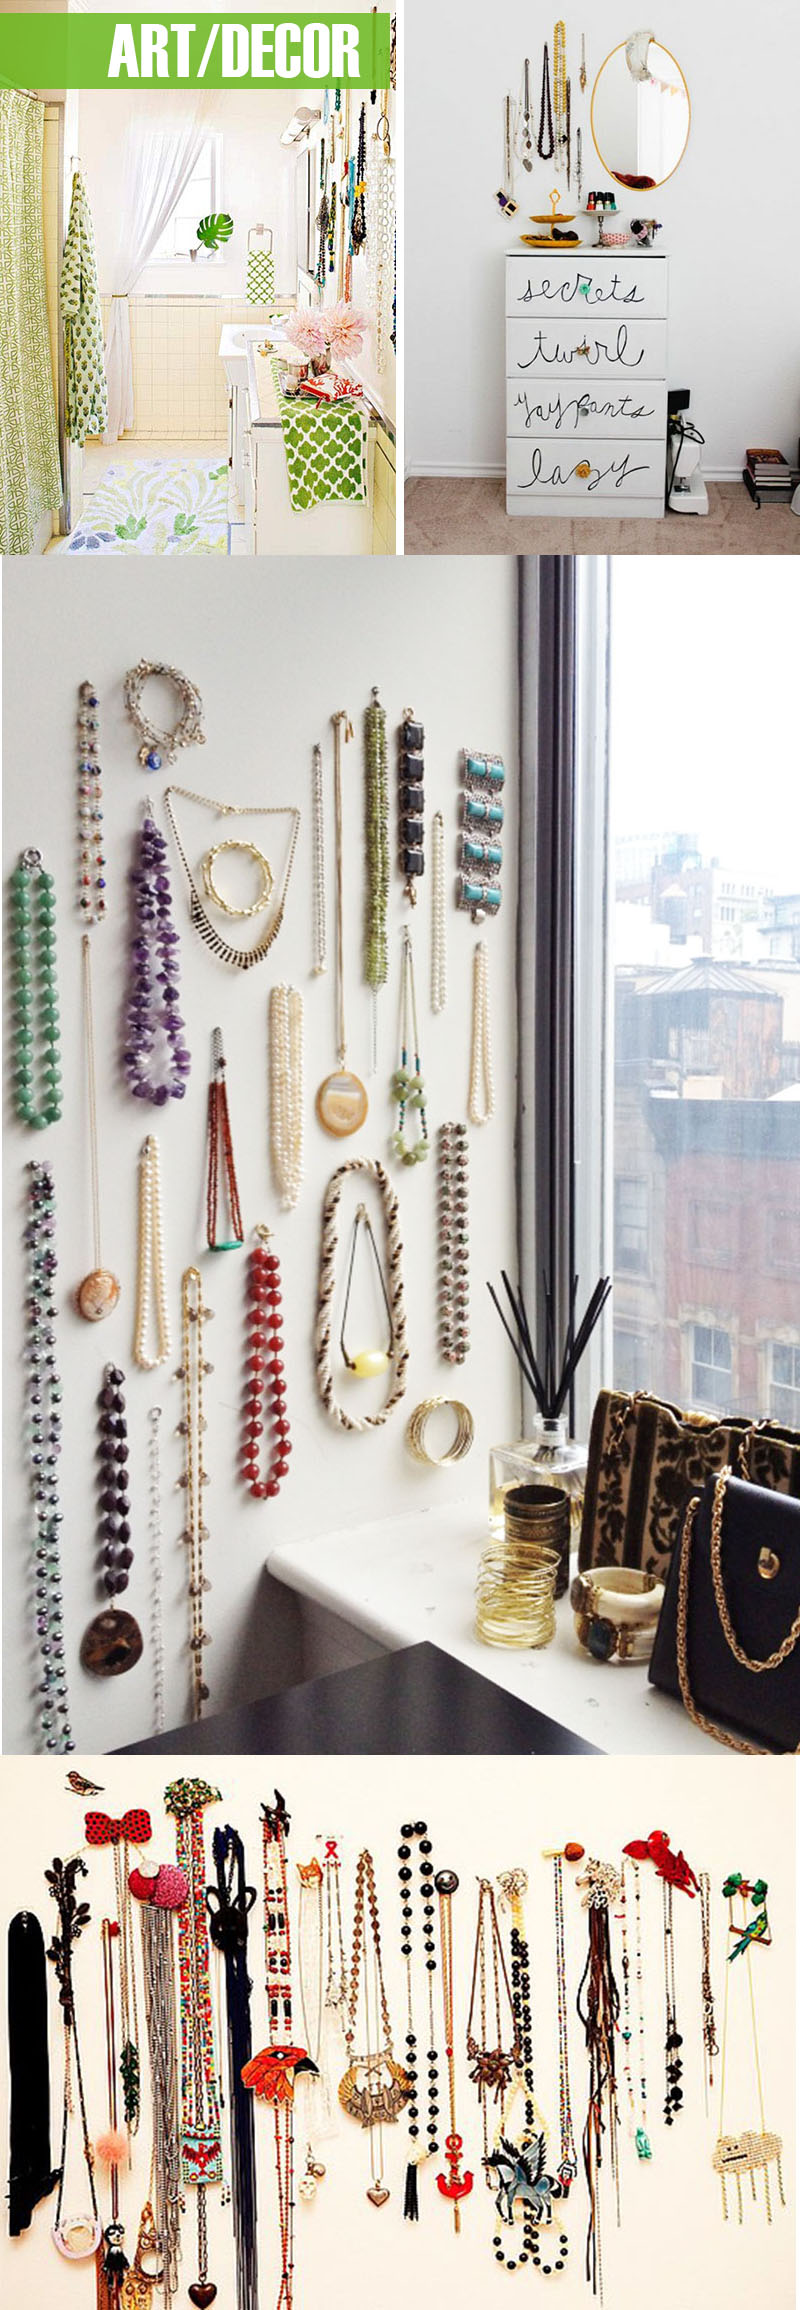
Up-cycle old frames into jewelry storage for necklaces, bracelets and earrings! Buy a frame from your local thrift shop, paint it the color of your choice, and add a textured backing to hang your jewelry. Lace, hooks and knobs work great!
Different shapes of stands work to hold your necklaces and even earrings. In the top image, the smaller more intricate details in the tree allow you to display your earrings. In the bottom right image, taller ‘branches’ allow you to hang bracelets and longer necklaces. Or you could try your hand at wood-making and create a silhouette jewelry bust!
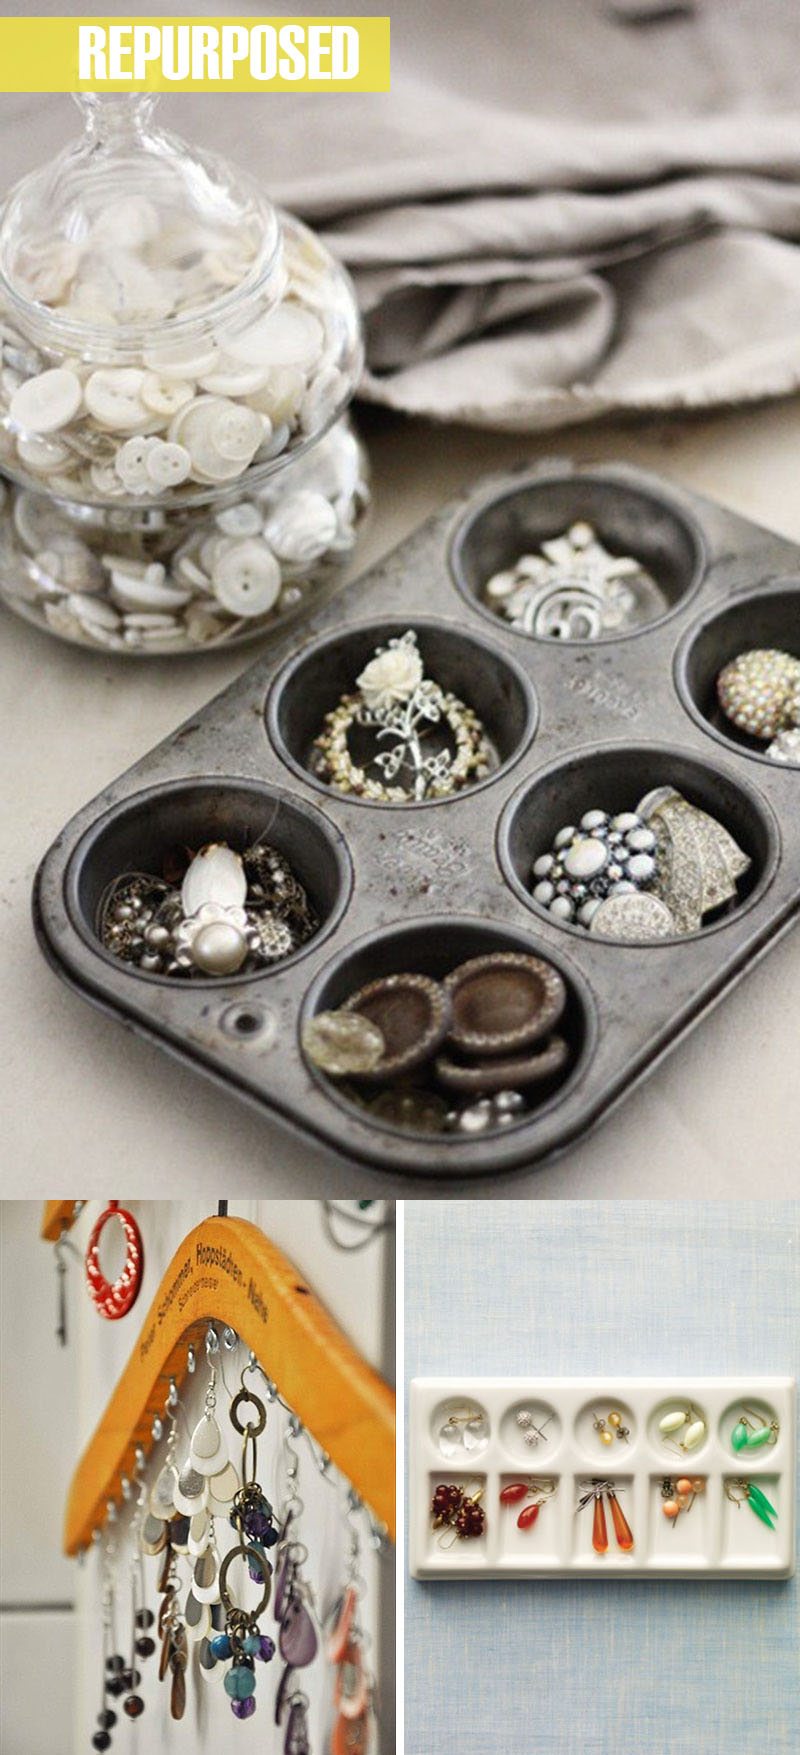
Sometimes the most creative ideas come from re-imagining an object’s use, such as using a cupcake/muffin baking pan to store bracelets. Or, adding hooks to a wooden hanger. Or using a paint palette to organize earrings!
Jewelry as art or decor is a great storage solution for when you want to show off more unique pieces. Use nails or hooks to display your jewelry on a wall.
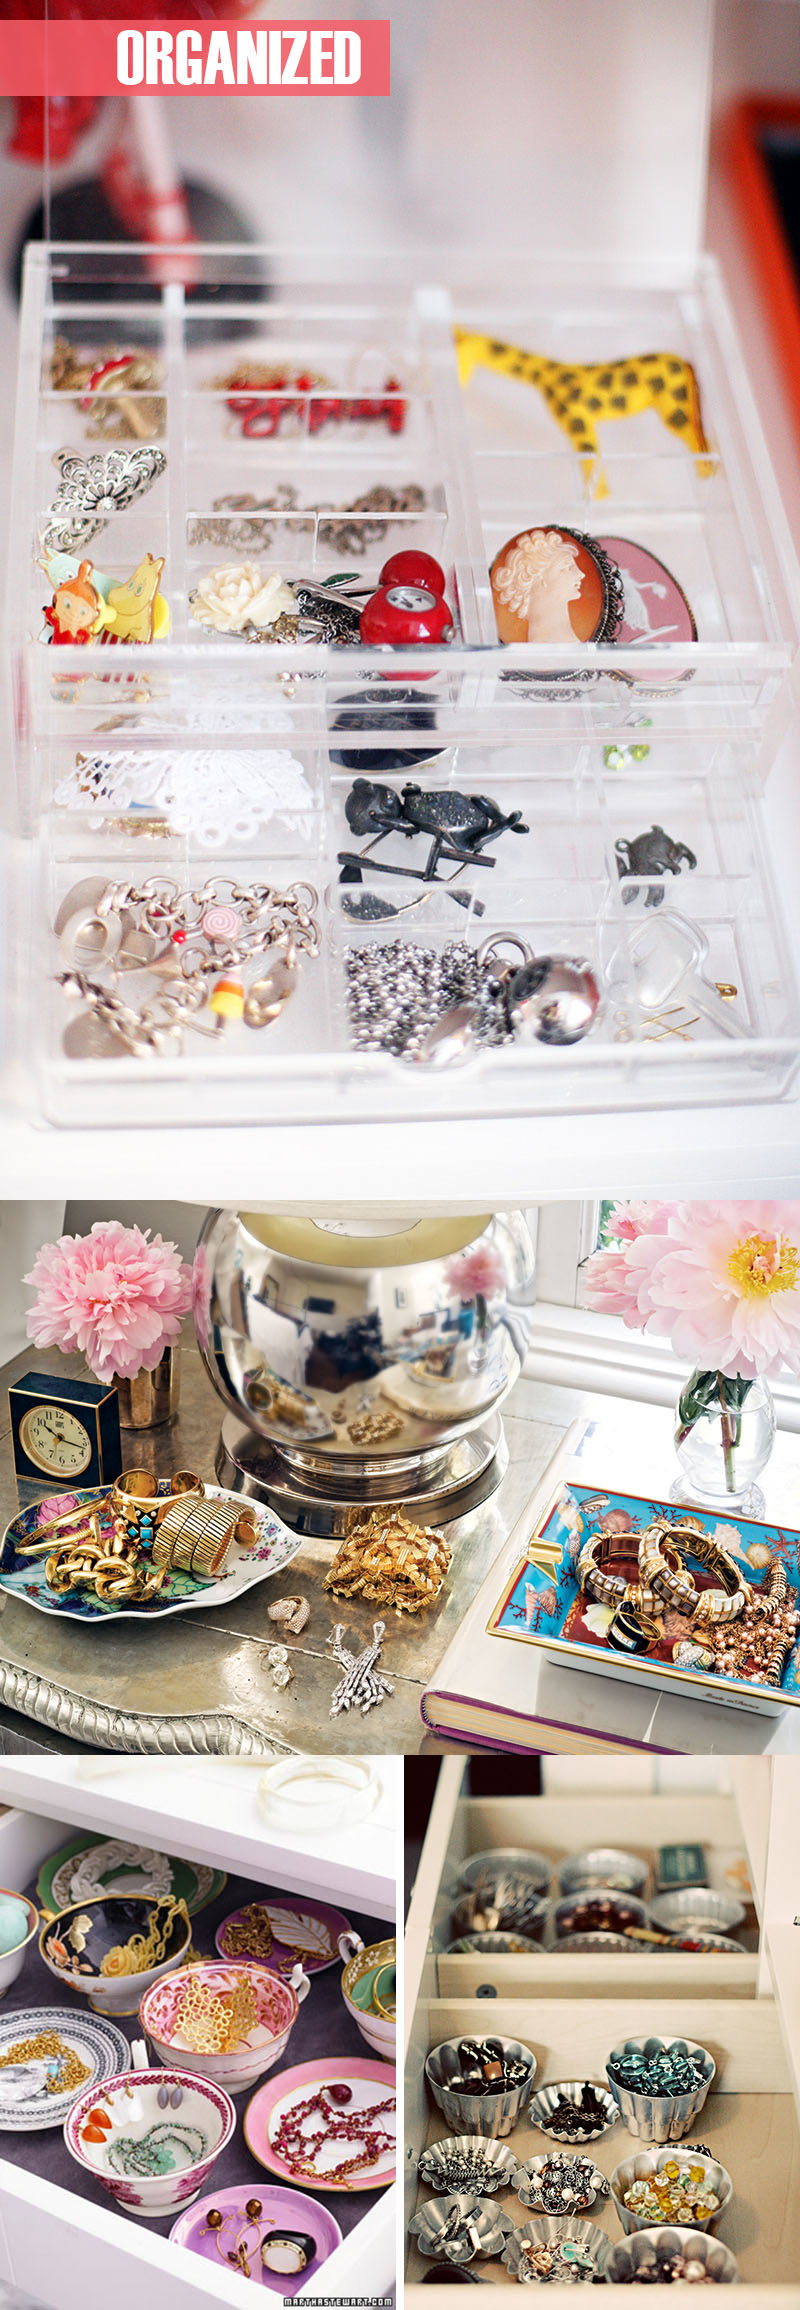
Usually, if I don’t wear jewelry, it’s because it’s tucked away in a jewelry box. Or my necklaces are tangled together and I don’t have the time (or patience) to separate them. This is when organization comes in handy. Lucite drawer separators organize and display your jewelry all at once. Repurpose dishes with pretty designs or use antique teacups. The possibilities are endless!
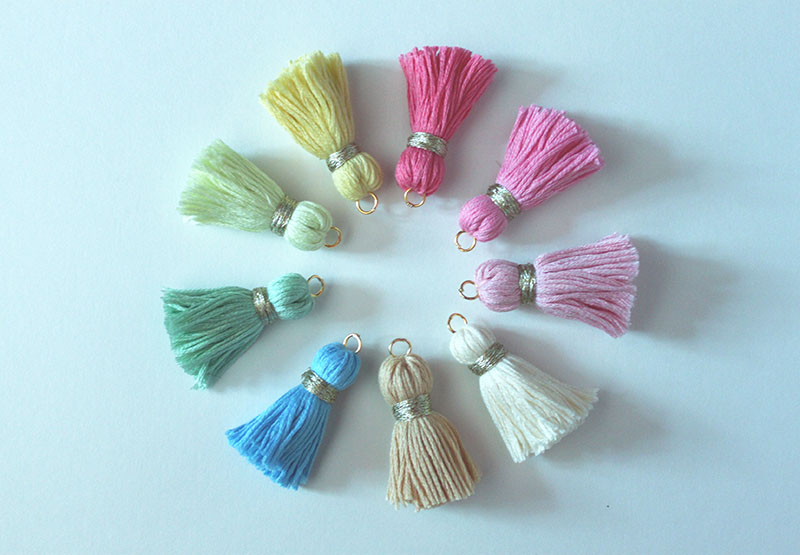
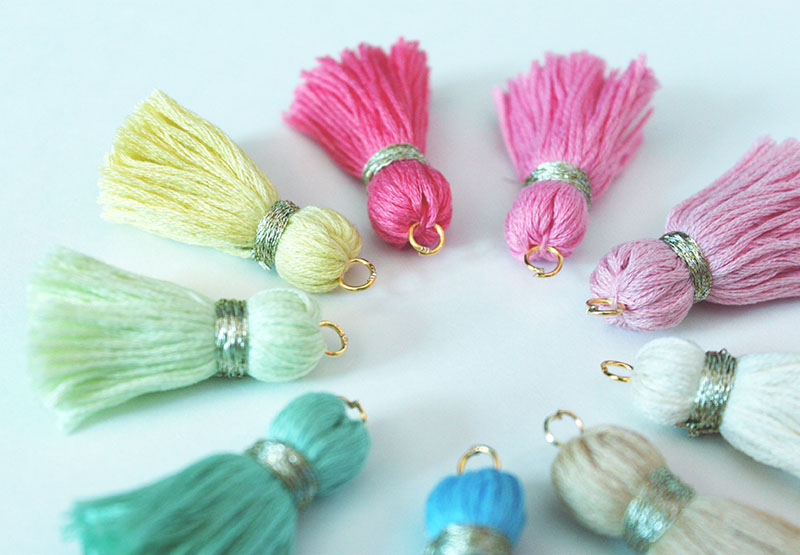
I’m very excited about today’s post! I’ve been seeing tassels everywhere from handbags to jewelry. I decided to make mine using embroidery thread (37 cents at Michaels!!) in multiple colors. I used a gold thread to tie the tassels together for more contrast and a slight shimmer. I loved the way they turned out! Now to find inspiration on how to wear them!!
What you’ll need:
– Embroidery thread in different colors
– Gold Thread
– Scissors
– Ruler
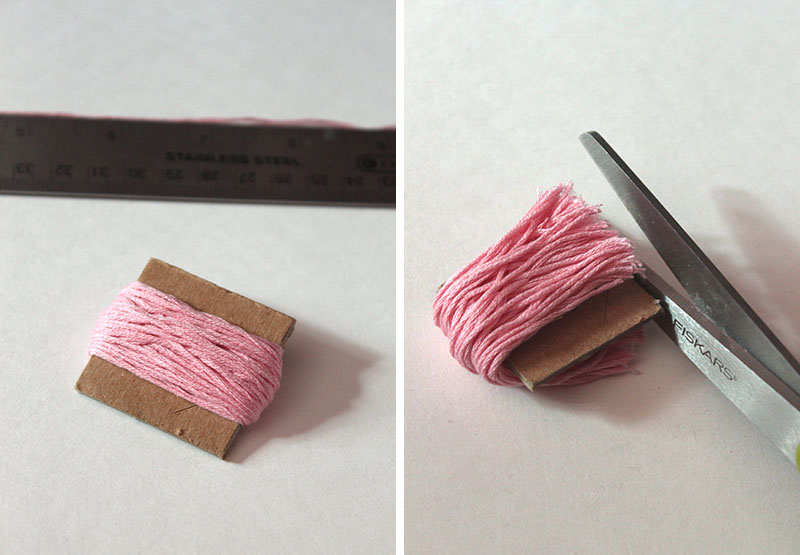
– Piece of cardboard (1″x1″)
– Jump Rings
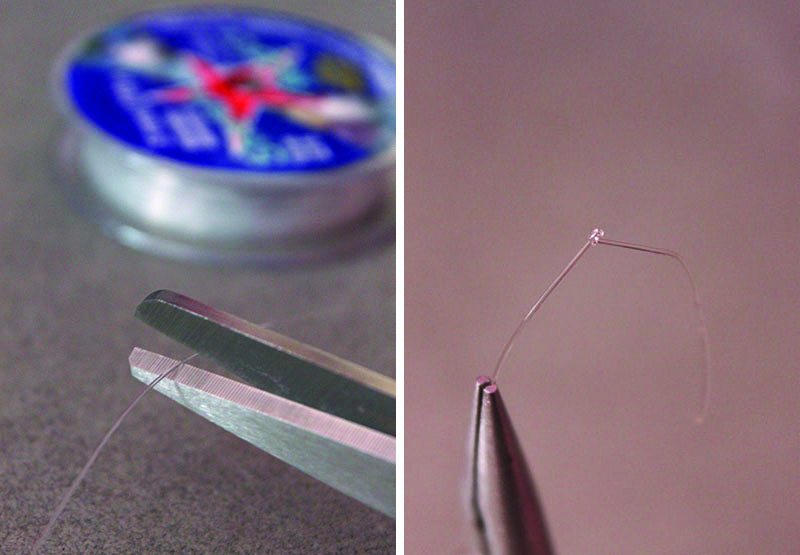
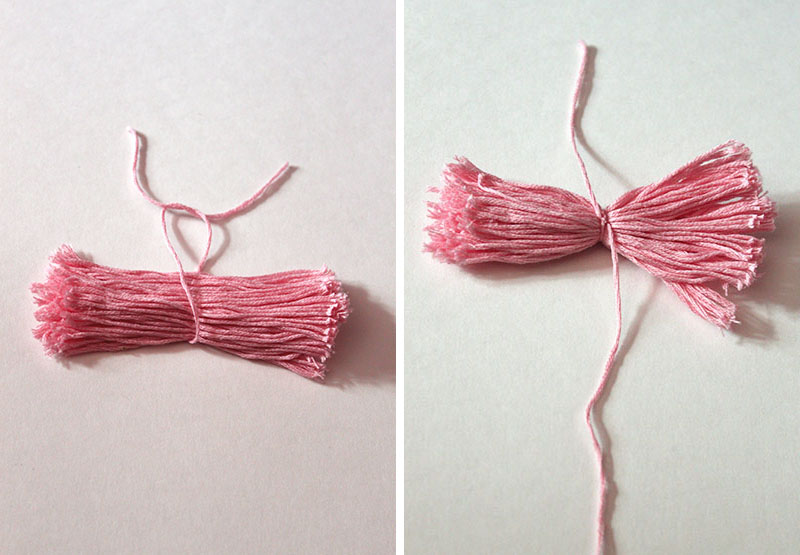
1. Cut your piece of cardboard to approximately 1 inch x 1 inch. Cut a 12″ piece of thread and set it aside. Then wrap the remaining thread around the piece of cardboard. Use the scissor to cut one end of the wrapped thread.
2. Use the 12″ piece of thread and wrap it around the center of the thread pieces. Tightly double knot it.
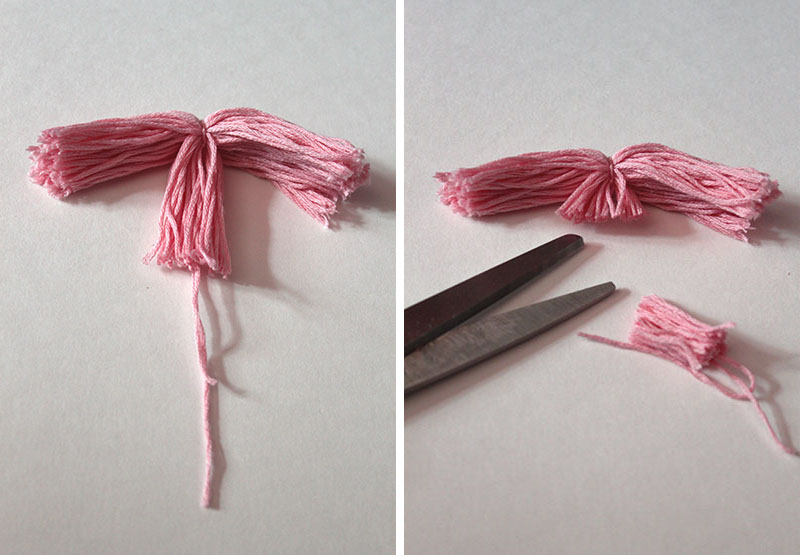
3. To thin out the tassel and make the center more bulky, separate some of the inner threads in the middle. Cut off two-thirds of the thread.
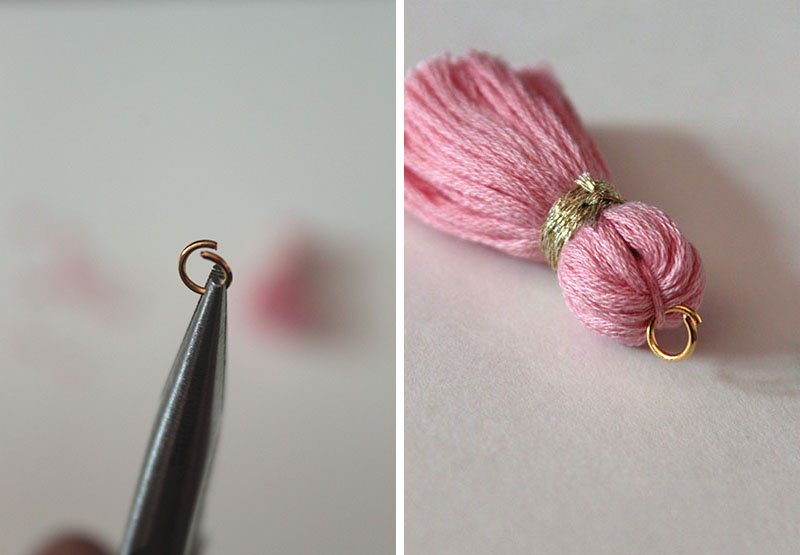
4. Fold the outer threads towards the middle to cover the smaller, cut threads. Cut a 12″ piece of gold thread. Tie the gold thread around the tassel. Wrap it around multiple times, and tie it off. Cut off any excess thread. Trim the end of the tassel to make it more even.
5. Add a jump ring to the center thread.
And you’re done! Add to a keychain or make some earrings…get creative!


