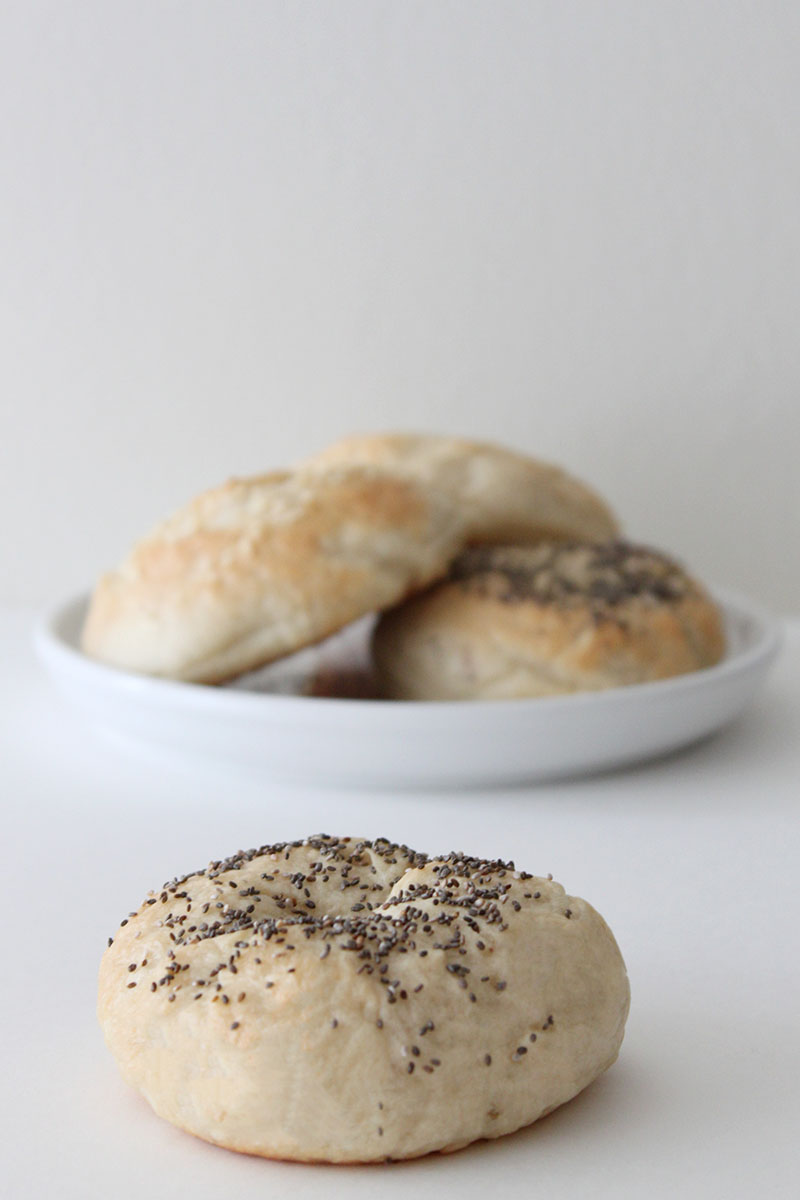
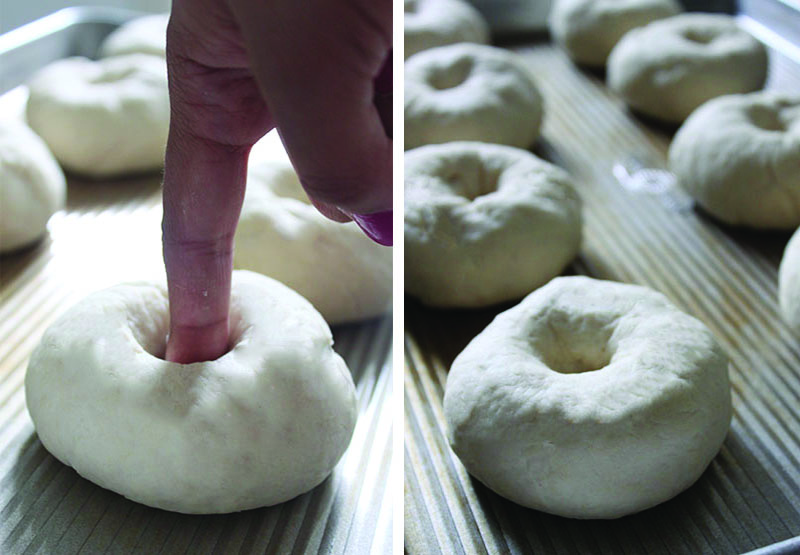
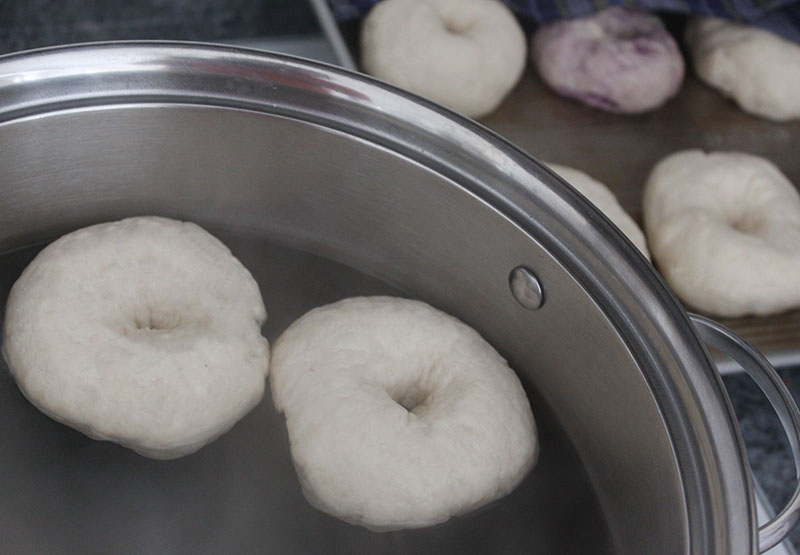
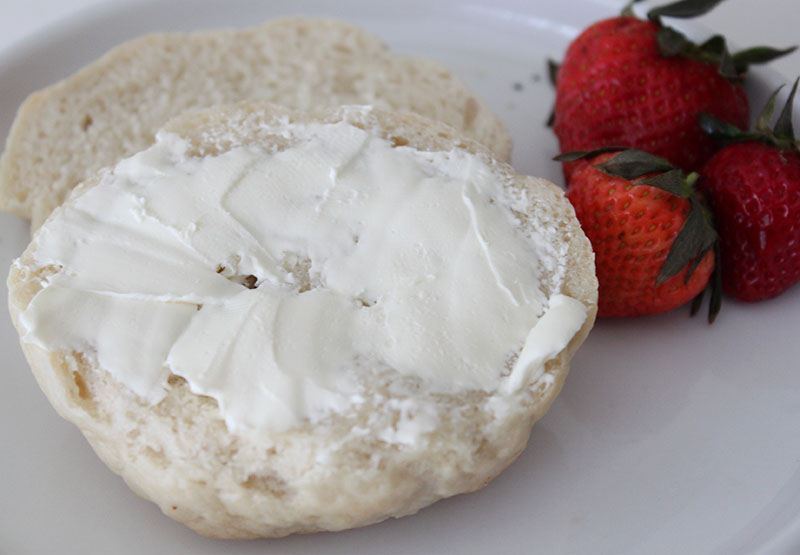
Today I’m sharing an amazing recipe for homemade bagels. This particular recipe mimics New York style bagels. The first time I had a New York bagel I bought a half dozen at a time. I didn’t try one until I was on the bus home, and immediately regretted not buying more. At that moment I understood why New York holds the crown for best bagels. The outside is crispy, while the center remains soft and chewy. Though the recipe doesn’t call for a lot of ingredients, these bagels were very flavorful. They take some time, but in the end are worth the effort!
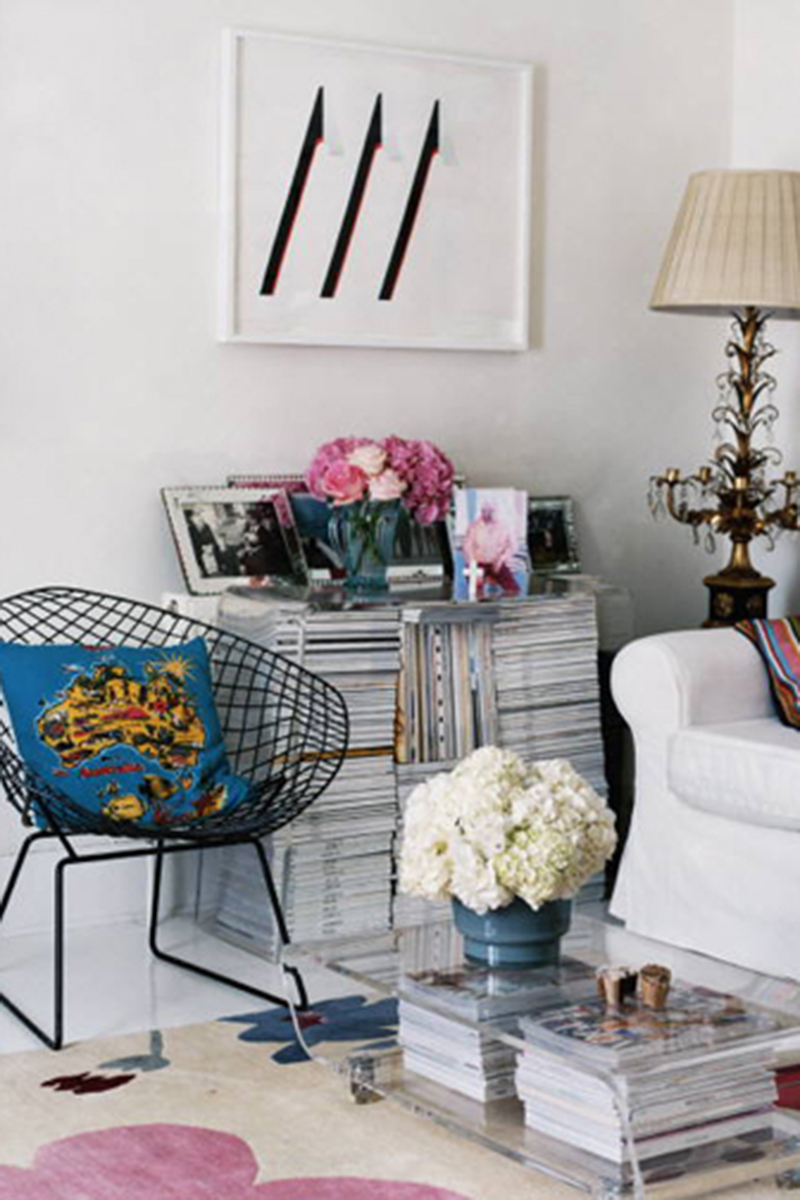
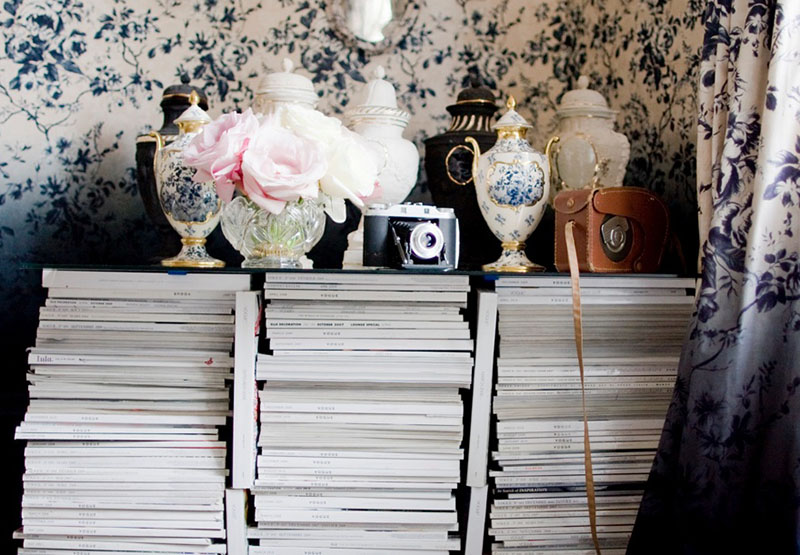
I currently have monthly subscriptions to 6 different magazines. (They are the Christmas gift that keeps on giving.) So naturally, I have a growing stack of magazines, read and unread. I usually think stacks of magazines look sloppy but these images prove otherwise. I love the idea of turning a stack of magazines into a table or stand for decor, such as flowers or picture frames. Or, in extreme cases of magazine hoarding, using them to fill an inactive fireplace. Time to get stacking!
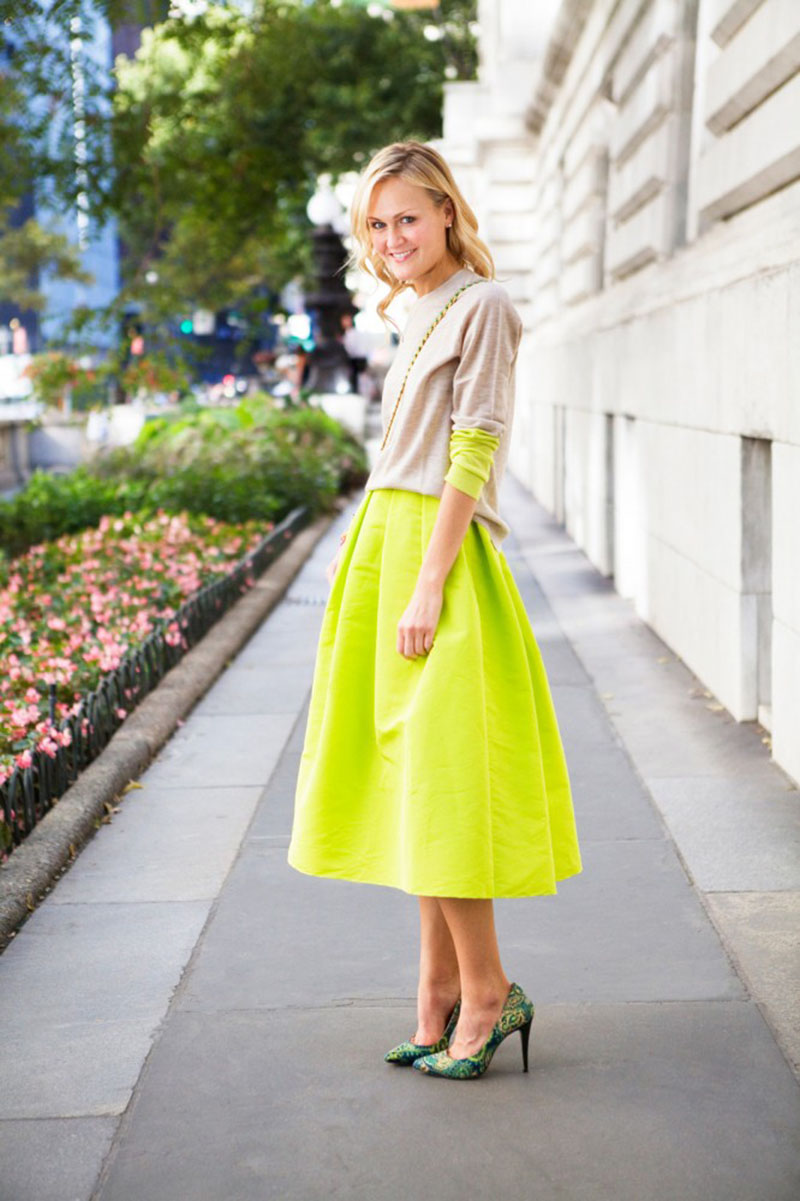
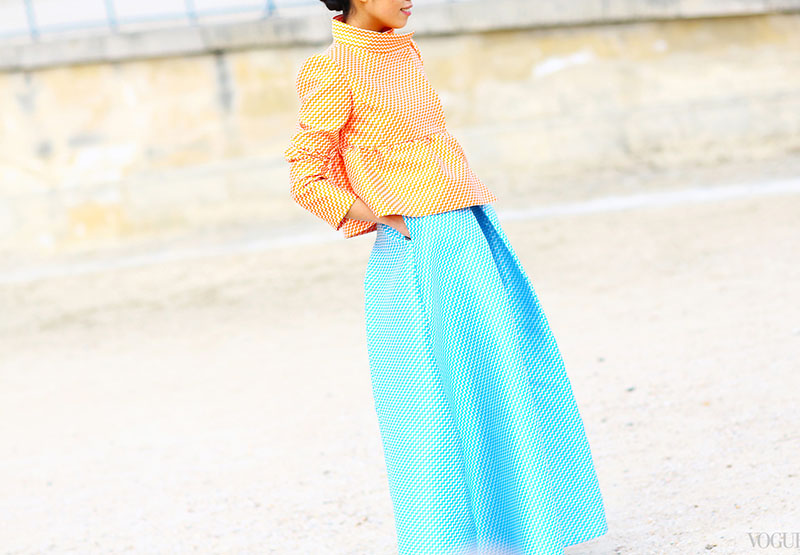
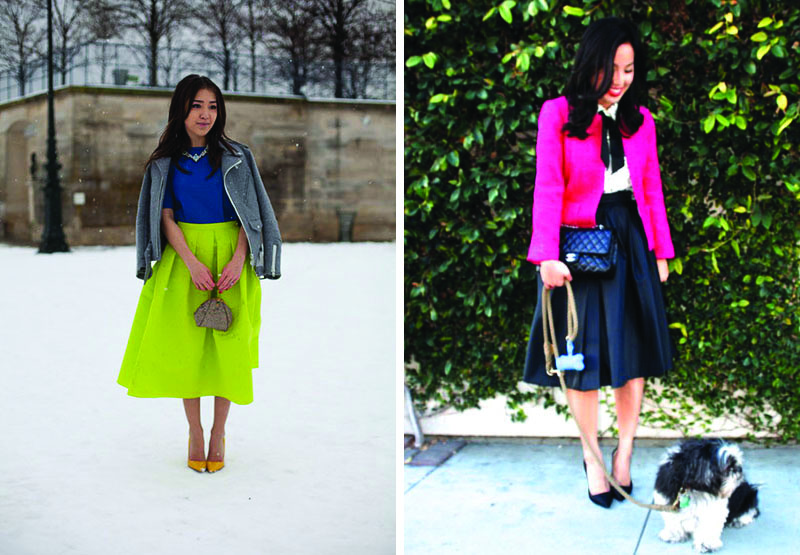
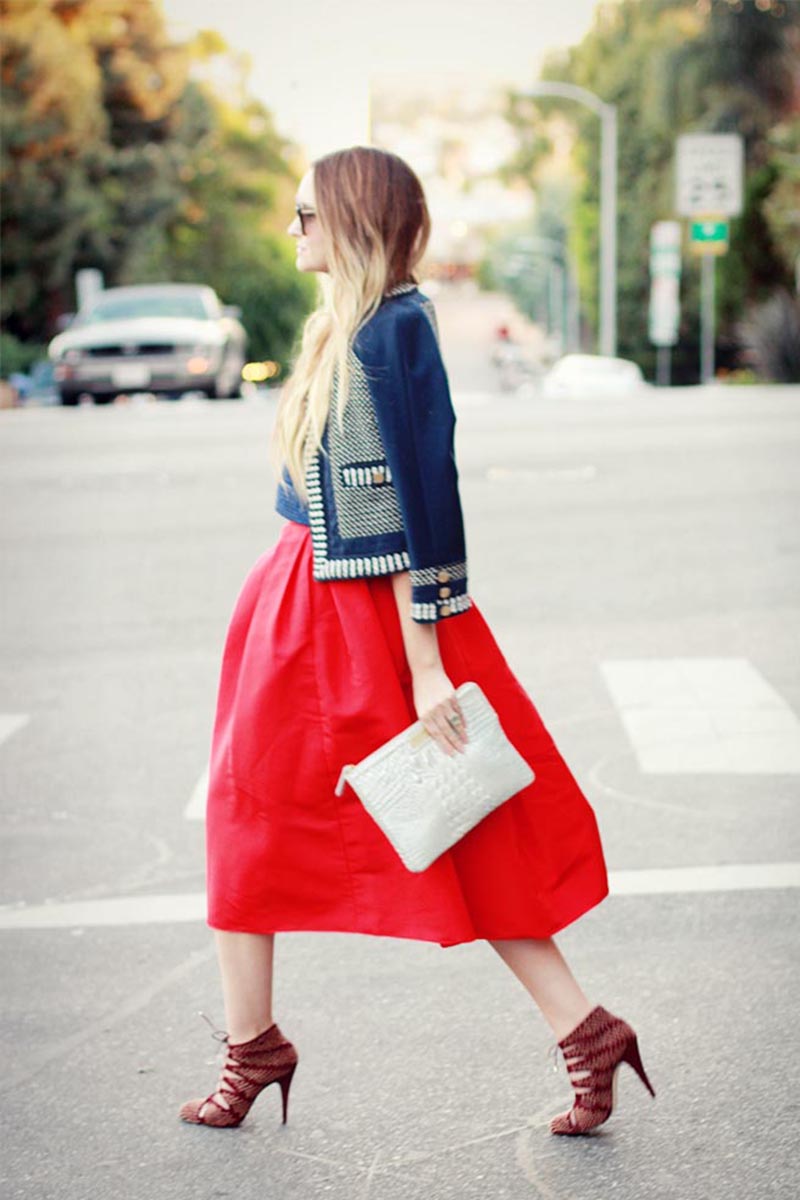
I love the full skirt trend that has been popping back up in the fashion world! The length is modest and reminiscent of the 50s, but packs a punch in a bright, bold color. I want to try and recreate the look with a striped fabric, and maybe some pockets. When I wear full skirts I feel comfortable yet put together. For this time of year, the long cut of a faille full skirt serves as the perfect transition piece from winter to spring!
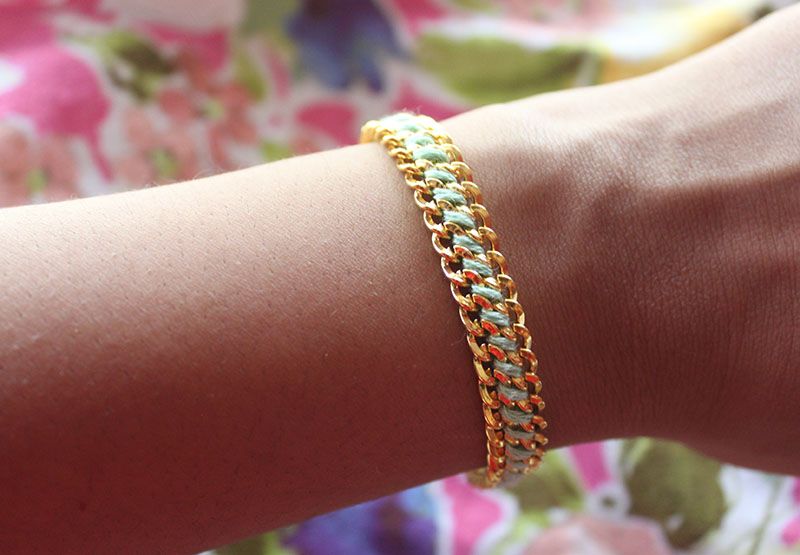
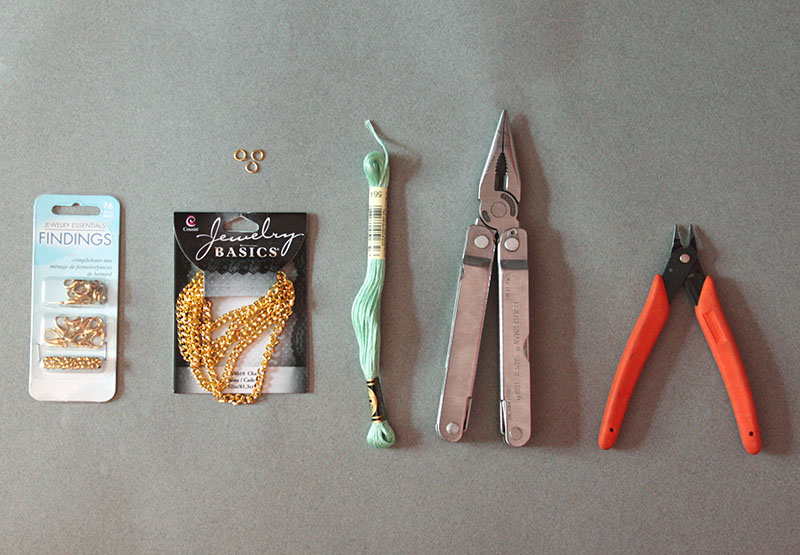
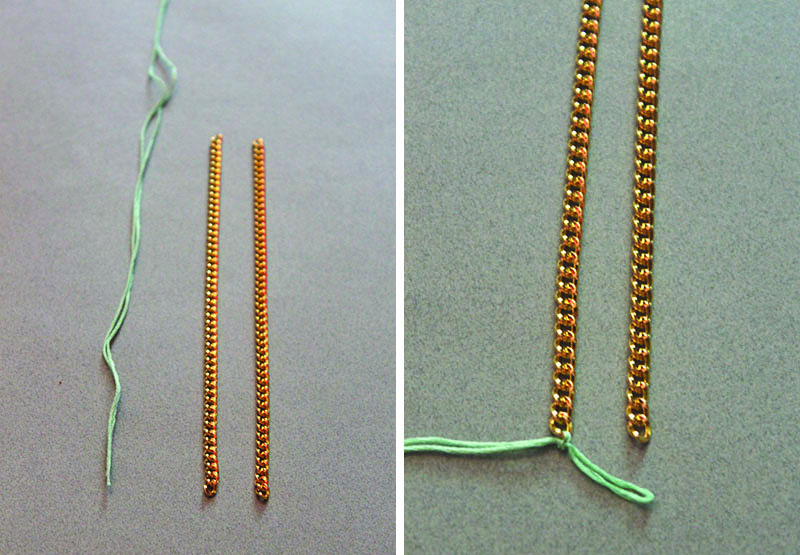
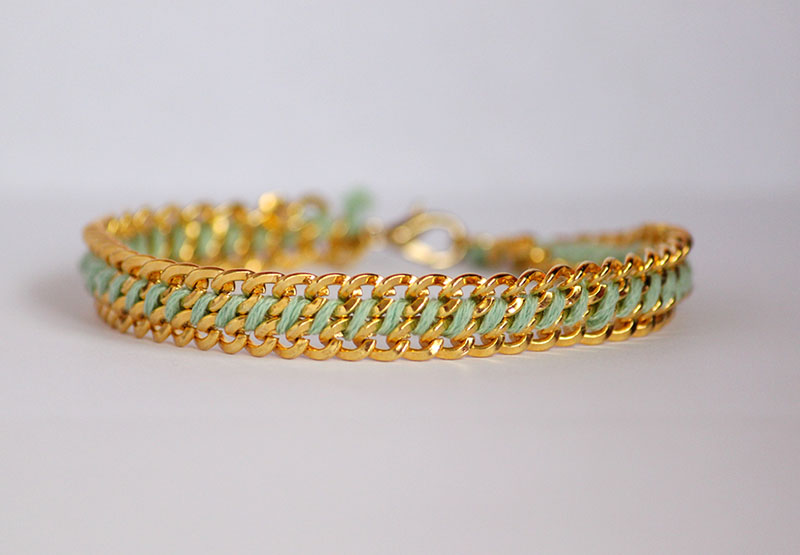
There are many variations of the woven chain bracelet. I had some left over chain and embroidery thread from previous projects, so I decided on a simple method to string two pieces of chain together. I used a hemming stitch to connect the chains, and added jump rings and a finding. I love the way it turned out! I plan to make more and maybe spray paint the chain in different colors!
1. Using your wrist as a guide, measure and cut your chain to the length you want it. Mine came out to about 6 1/2 inches. Cut a 36 inch piece of embroidery thread and fold in half. Attach the thread to one end of one gold chain and tie a double knot.
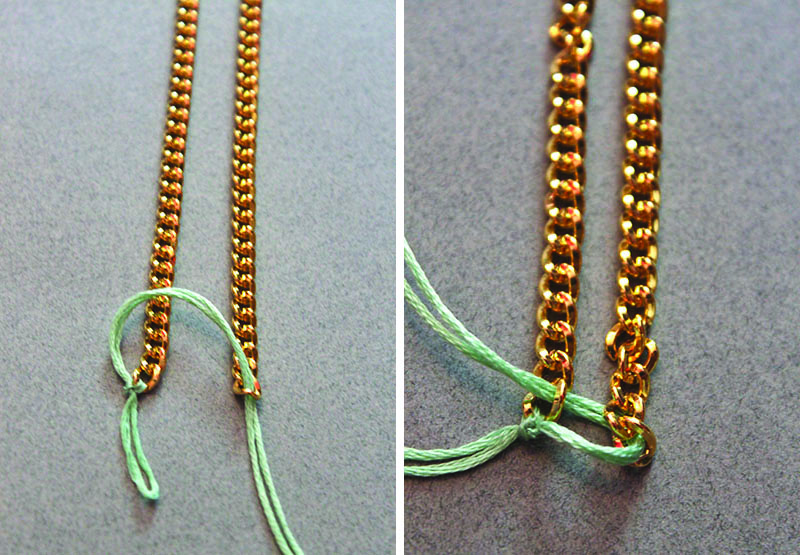
2. Thread the embroidery through the first opening of the second chain. Going underneath the first chain, thread the embroidery through the first opening. (I ended up attaching a large needle to the end of the thread to make the stitching easier.)
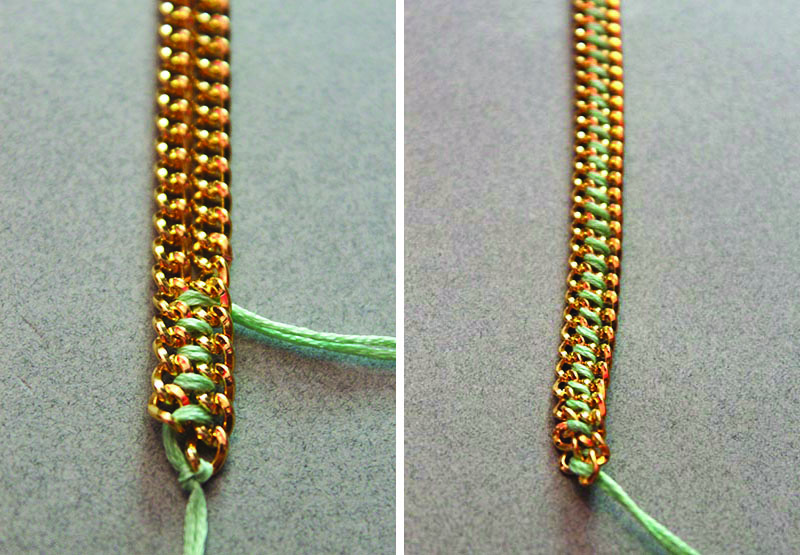
3. Continue to “stitch” the chains together in the over-under pattern until you reach the end of the two chains. Tie a knot on the end of the chain. Cut off any extra thread.
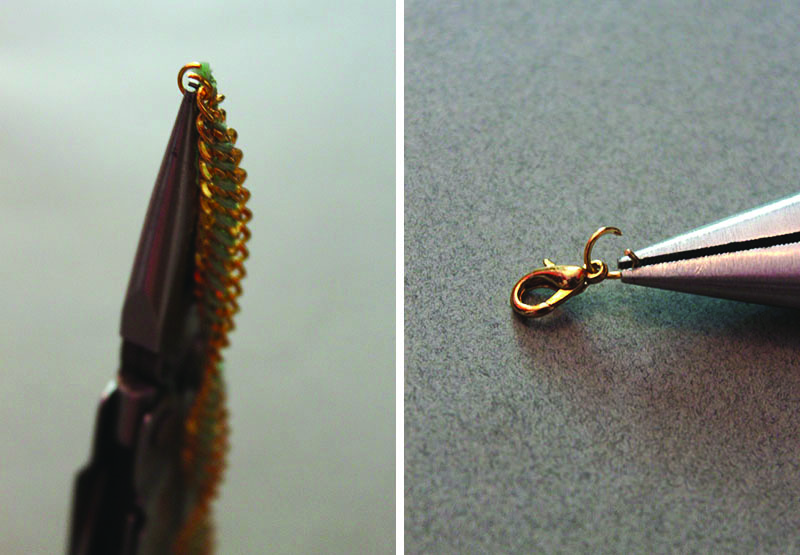
4. Attach jump rings to each end of the bracelet. On one of the jump rings, add a finding.
And you’re done! More bracelets to add to your jewelry collection!
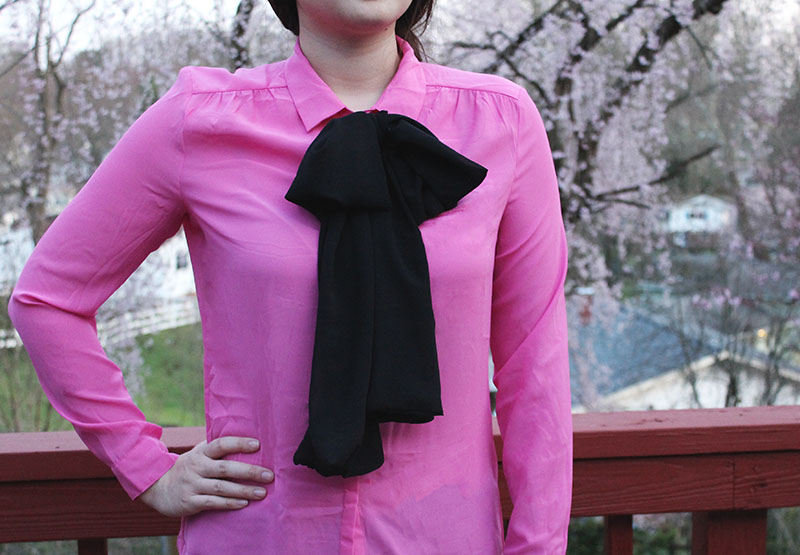
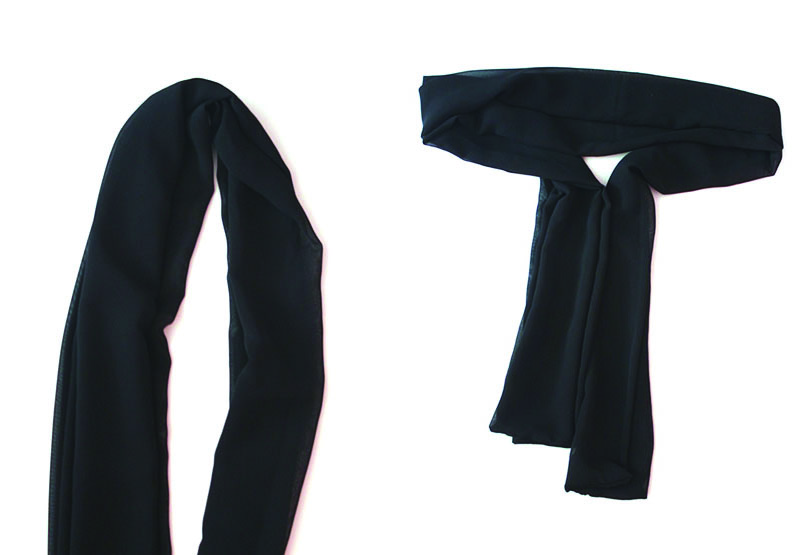
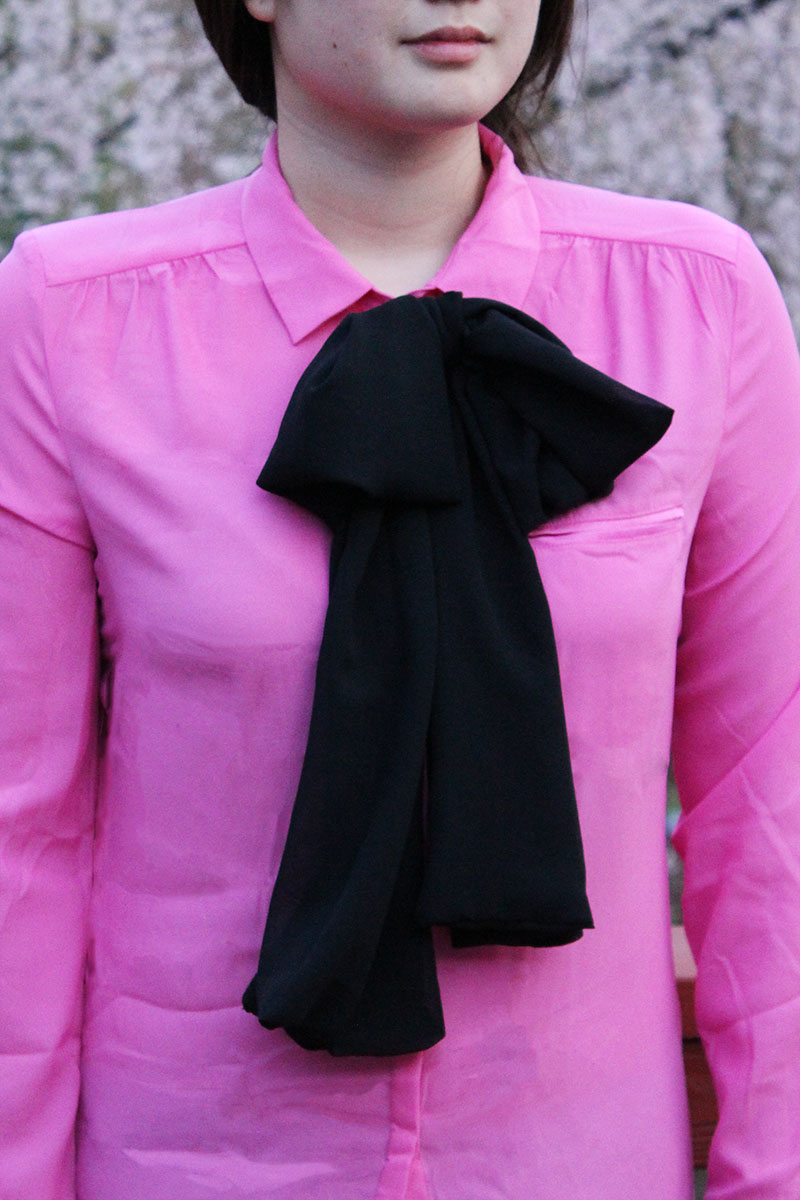
A few weeks ago I posted about oversized bow-ties as DIY inspiration. The bows were a major aspect of the Saint Laurent Spring 2013 fashion show, along with clean lines and floppy hats. Oversized bows in a soft fabric are a great way to add a touch of feminine to a full suit. The best part about this DIY is that it takes less than an hour to make! This is key for someone with big aspirations and a short attention span.
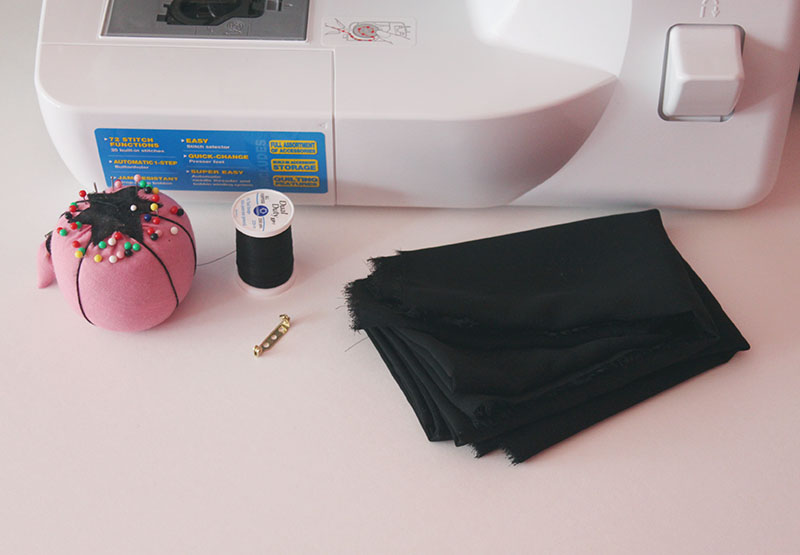
You’ll need:
– Chiffon Fabric (60″ L x 24″ W)
– Matching Thread
– Pins
-Sewing Machine (or you could sew it by hand)
– 1″ pin back
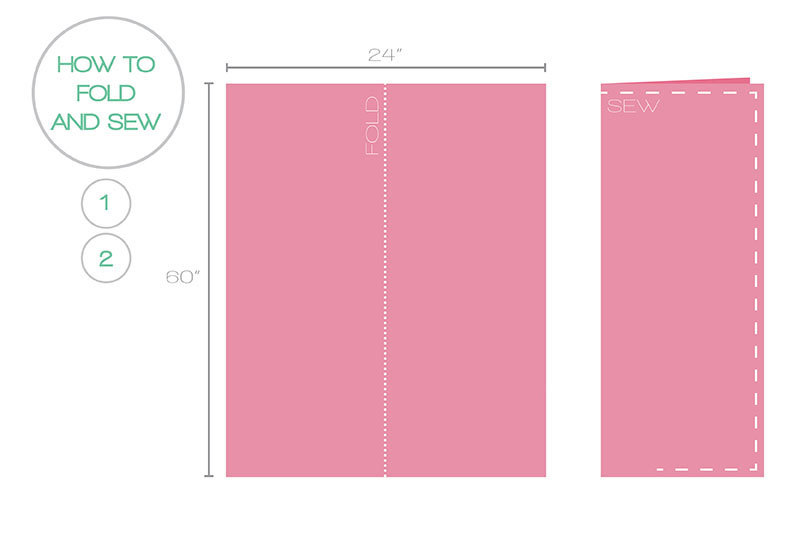
1. Fold the 60″ x 24″ piece of fabric vertically down the middle. Pin along the edges.
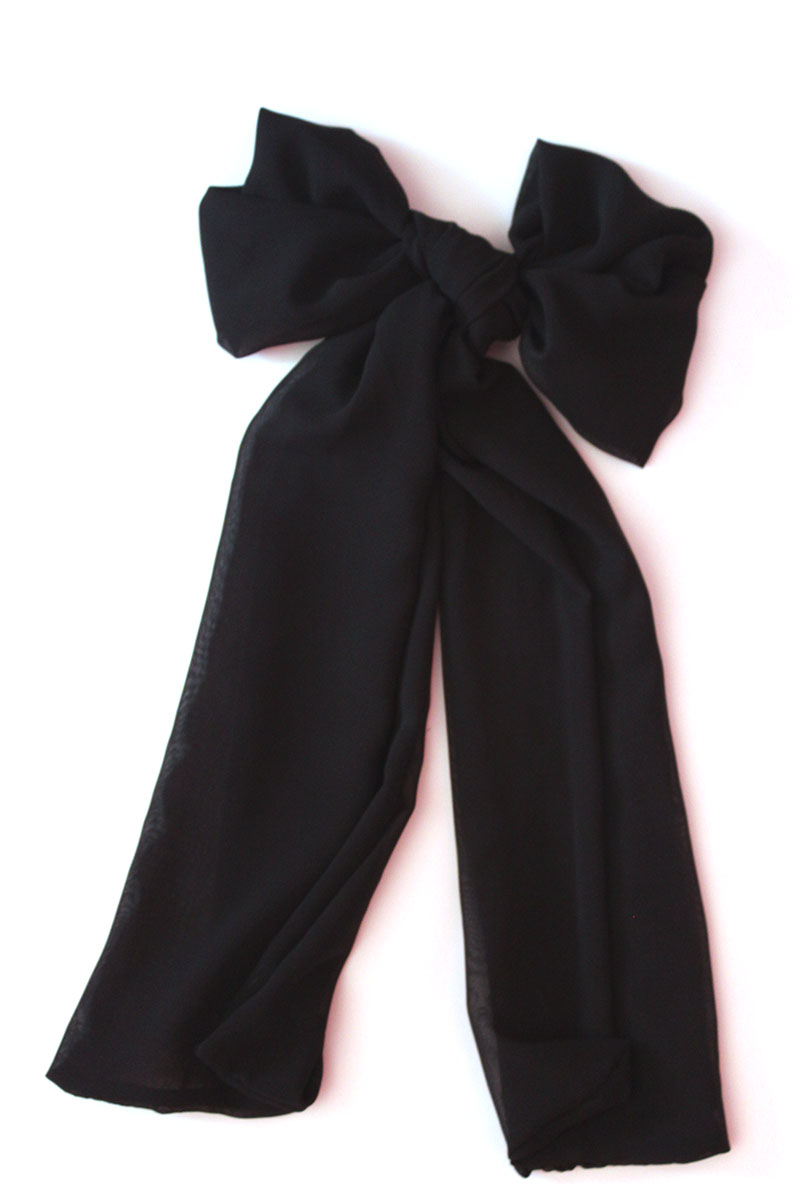
2. Sew along the edges, leaving a 4 inch gap at one end. Turn the bow right-side out, and sew the gap closed. 3. Fold the fabric in half. Bend the two sides upwards and tie as you would to make a bow.
4. Adjust the bow until it is the shape and length you want it.
5. Sew a few stitches through the tie so the bow will hold its shape. (This step is optional if you think you might want to re-tie your bow in the future.) Sew the pin back on the lower backside of the oversized bow.
And you’re done! Pair with your favorite button down and blazer for a flirty yet professional look!