Blog

DIY Bubble Letter Necklace

10.28.13

Bubble-Letter-Necklace

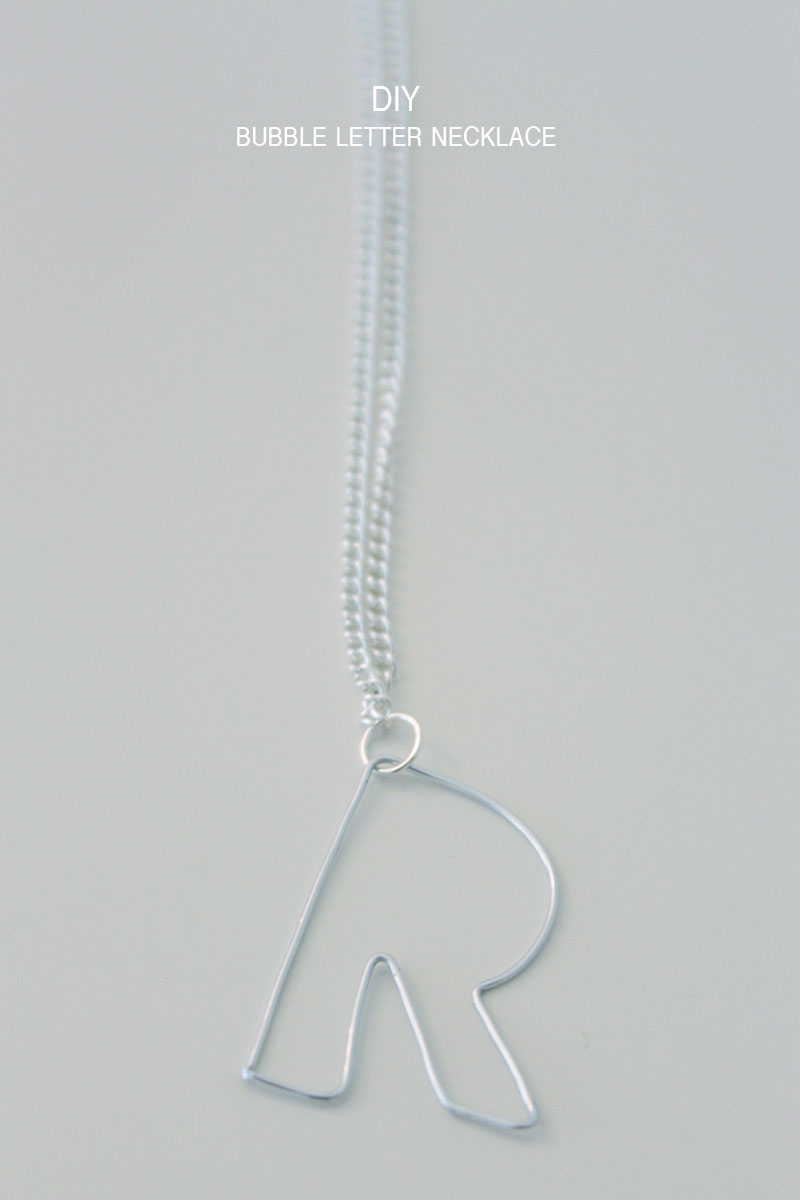
This project is the result of another inspirational Pinterest find. If you have been following my blog, you already know how much I love wire jewelry. I’m obsessed with writing out words, seen here and here, so I love this new twist of writing out just one letter. This project was super easy and quick!
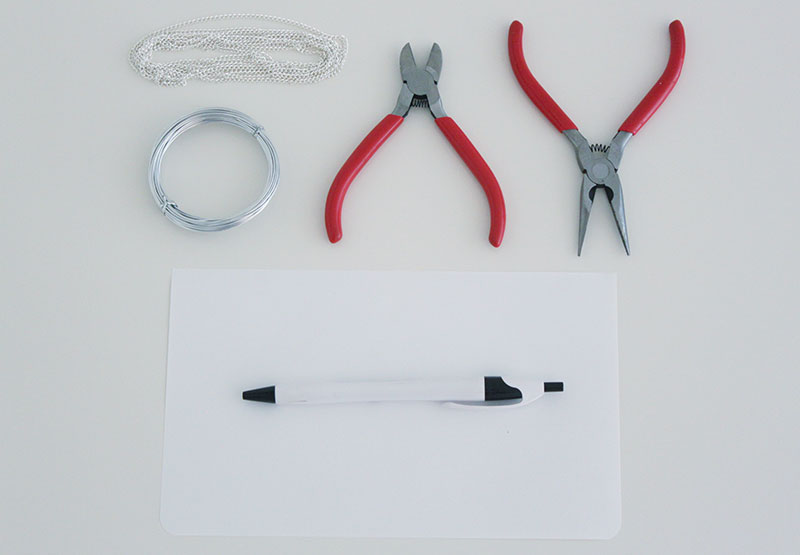
Bubble Letter Necklace

Materials:

– Wire
– Chain
– Pliers
– Wire Cutters
– Paper & Pen

Bubble-Letter-Necklace
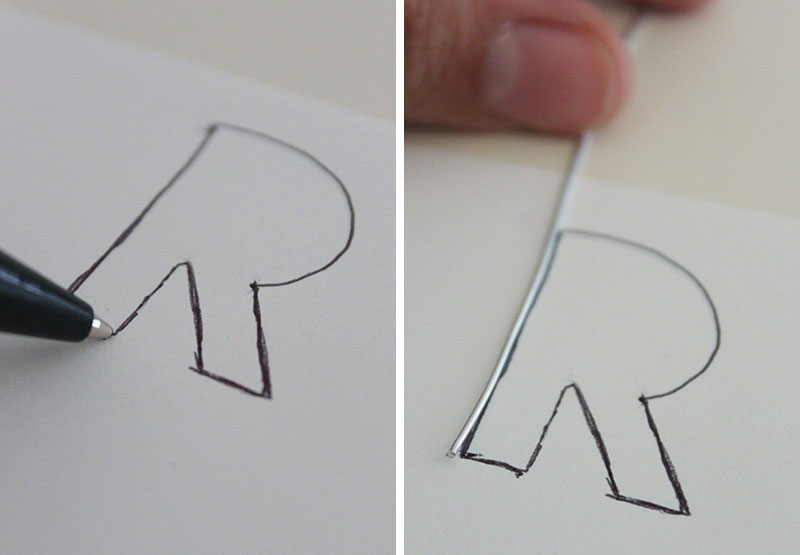
Step 1: Write out the letter you want to make in bubble form. *Do a quick image search if you’re not sure how to draw out your letter!* Choose one point on the letter that will serve as a starting point for the wire.

Bubble-Letter-Necklace
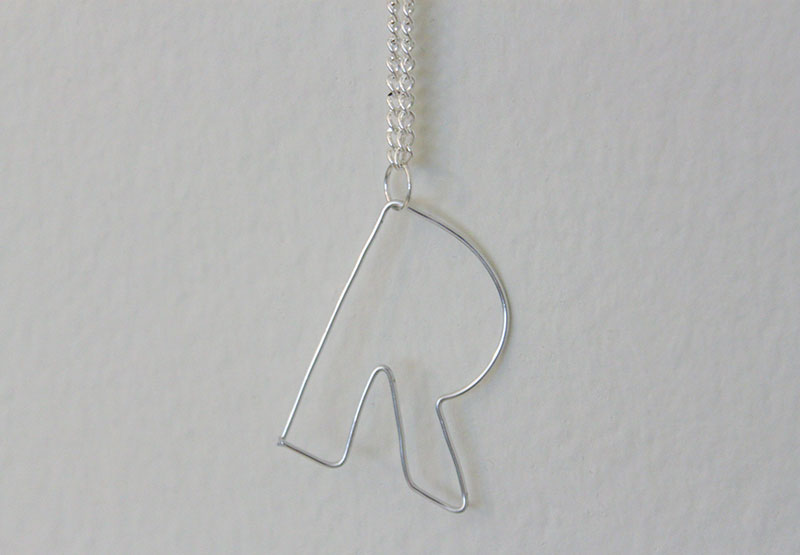
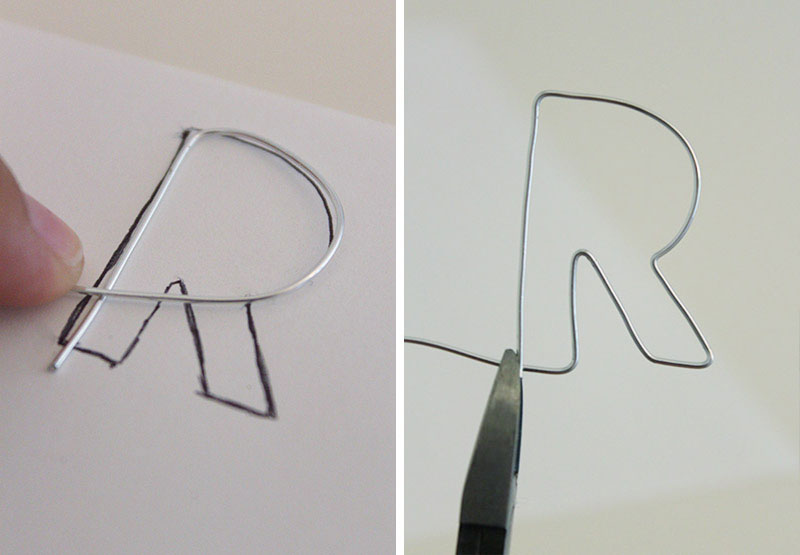
Step 2: Trace out the drawn letter with the wire. Continue until you have reached your starting point. Cut off the excess wire.

Bubble-Letter-Necklace
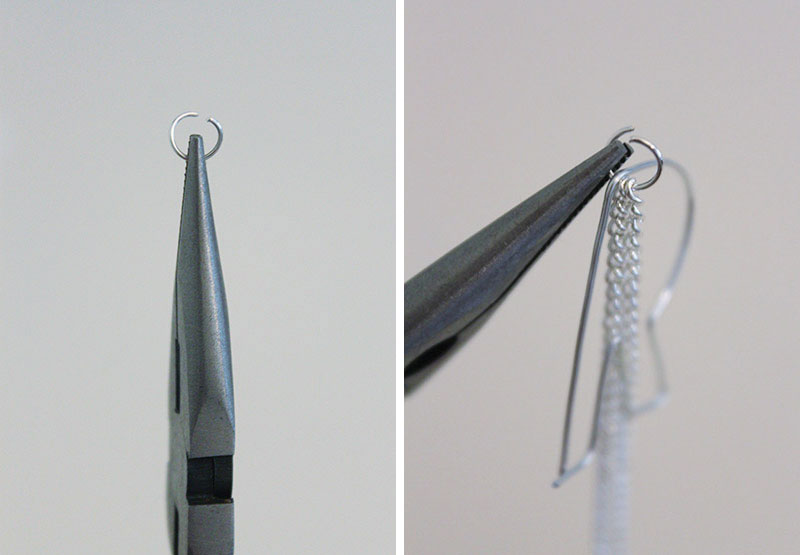
Step 3: Measure and cut a piece of chain however long you want your necklace to be. Use a jump ring to attach the letter to the chain.

Bubble-Letter-NecklaceAnd you’re done! How simple was that? Enjoy!

DIY Clay Floral Headband

10.15.13

Floral-Headband-13When I came across this Crown and Glory headband on Pinterest, I knew I had found my newest DIY project. You can most likely buy the flowers pre-made at a craft store, but I wanted my headband to perfectly match its inspiration, so I made them out of clay. In putting the headband together, I had the opportunity to try a new product called Glu6 by Nine Live Products. It’s a non-toxic glue made from recycled styrafoam…bonus, it smells like lemons! I tried both the craft paste (for attaching the flowers) and the Glu6 original to coat the roses and give them a glossy shine. I’m super happy with how it turned out!!

* The people at Nine Lives Products were nice enough to offer all my readers 25% off of their order just by using the code FALL2013. The code is good until October 31st so be sure to place your order soon!*Floral-Headband

Materials

Glu6 Original
Glu6 Craft Paste
– Headband
– Ruler
– Clay
– Xactor Knife
– Small Paintbrush

Floral-Headband-41. To make the rose, roll out a small ball of clay to about a radius of 1/4″. Roll the ball into a cone shape measuring approximately 1/2″.

Read More →

DIY Watercolor Calendar

10.07.13

Watercolor Calendar

Back home, I have a white-board calendar that sits on my desk. I like that I see it everyday, and it reminds me to stay productive. Since I came to Chicago, I wanted an easily customizable calendar. I decided to take matters into my own hands and paint my own. Here’s how I did it:

Watercolor-CalendarMaterials:

– Watercolor Paint & Paper
– Paint Brushes
– Pencil & Eraser
– White Colored Pencil
– Paint Palette
– Ruler

Watercolor Calendar1. Depending on the size of your paper, create 5 evenly spaced horizontal sections.

Read More →

100th Post!

10.02.13

It’s my 100th post! When I started this blog, I wasn’t sure how far I would take it. It’s grown, and continues to grow, far beyond what I imagined. For now, I love blogging and can’t wait for the next 100 posts! I decided that the 100th post would be the perfect time to make a Facebook Fan Page for Why Don’t You Make Me?. You can follow the blog on Facebook here.

facebook

Stripes and Florals

09.30.13

Stripes-and-Florals

I love the look of mixed prints, and stripes with florals is my favorite combination. When done right, the look can be both adorable and polished. Try choosing different prints in the same color family for a cohesive look. Or, as evidenced by these photos, black and white stripes work well with any color combination!

Stripes-and-FloralsStripes-and-Florals-5 Stripes-and-Florals-3 Stripes-and-Floralsimages: 1, 2, 3, 4, 5, 6