DIY Wire Name Bracelet
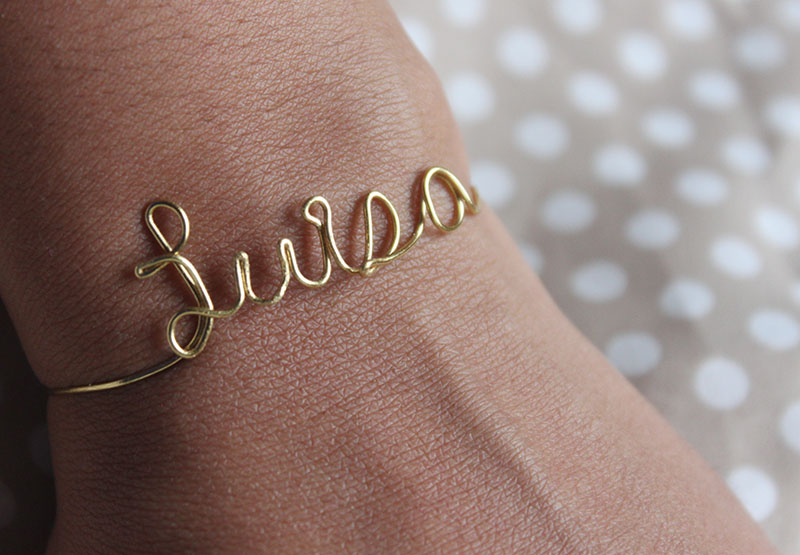
I have a bit of an obsession with making wire jewelry. It’s low-cost, easy, and the end results are amazing. Today, I decided on a name bracelet featuring yours truly. It was similar to the Wire Love Ring I made a few weeks back but with a few tweaks.
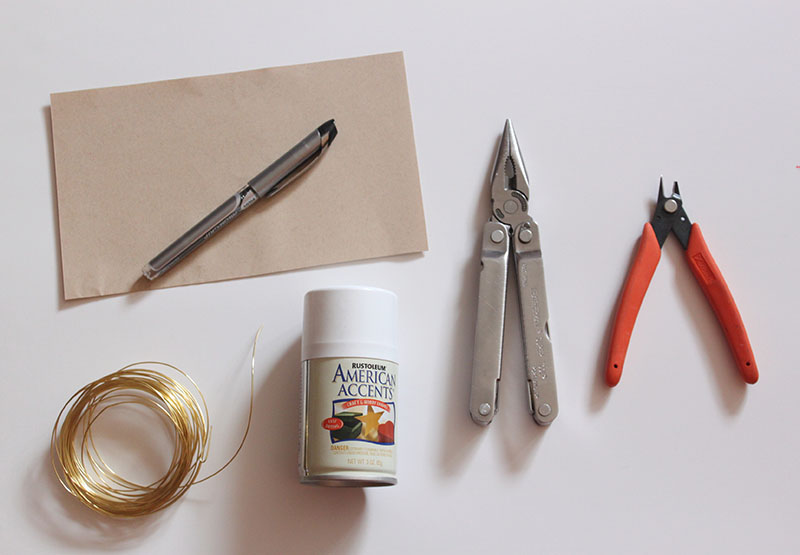
You’ll need:
– Wire (I used 20 Guage)
– Pen and paper
– Pliers
– Wire Cutter
– Something round (I used a small spray paint can)
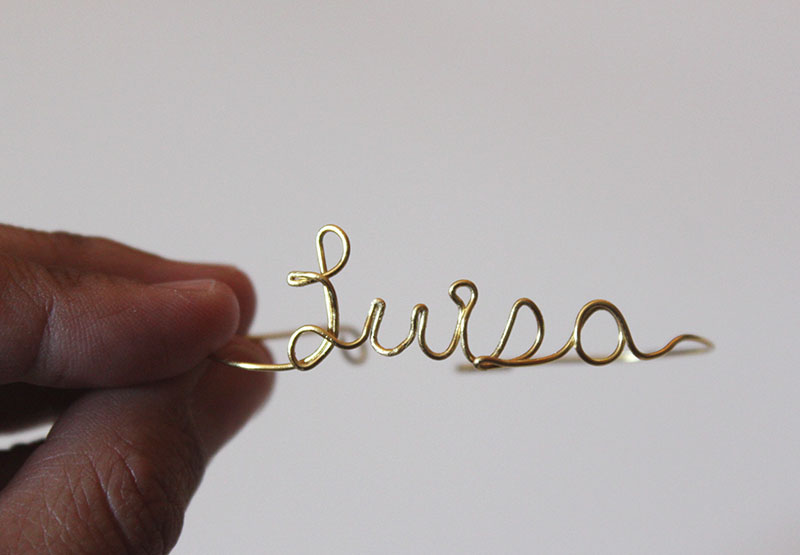
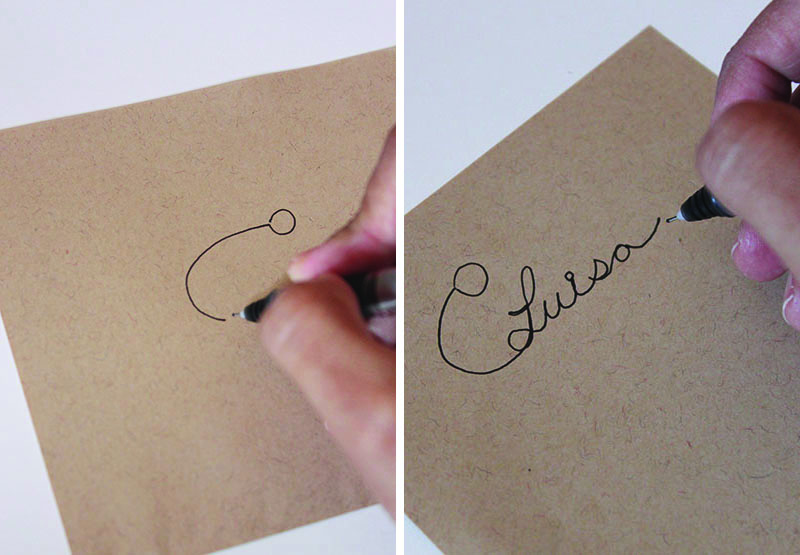 1. Start by drawing out the pattern to follow for your bracelet. One end of the bracelet will be a loop that serves as a fastener. Write out your name in cursive.
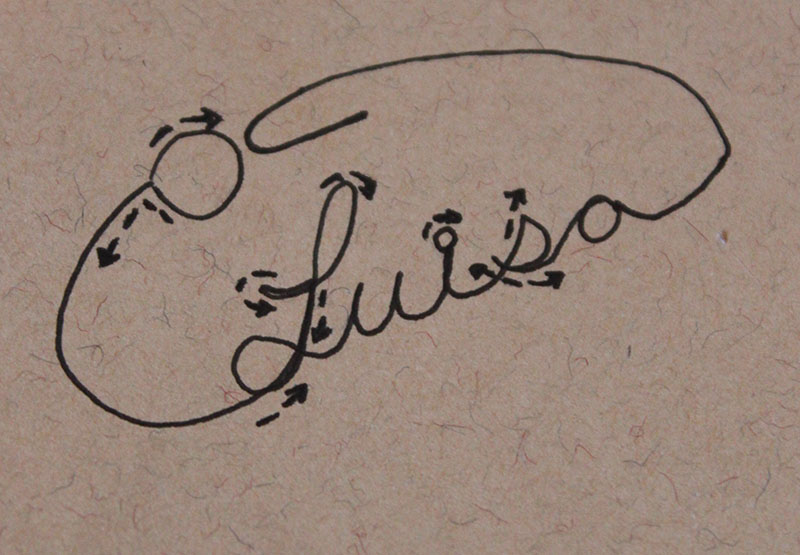 2. Diagram the direction the wire will travel using arrows. This will make forming the name a lot easier. Some letters will require “back-tracking” aka two layers of wire.
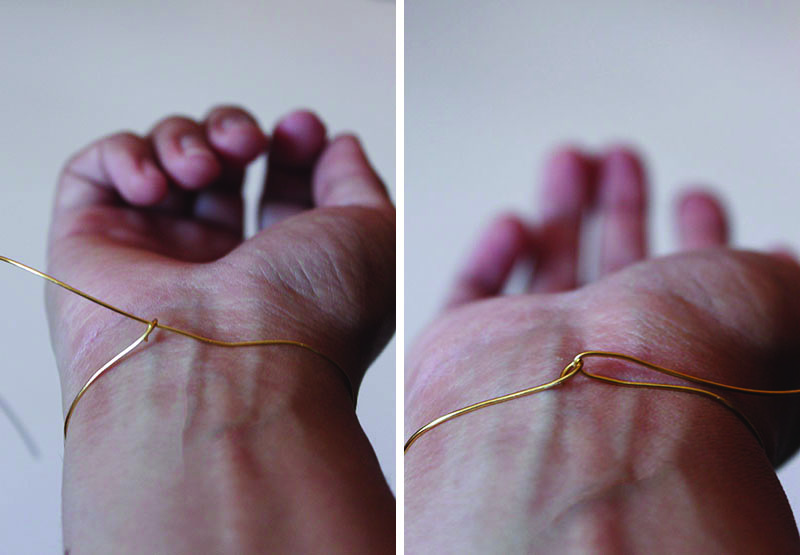
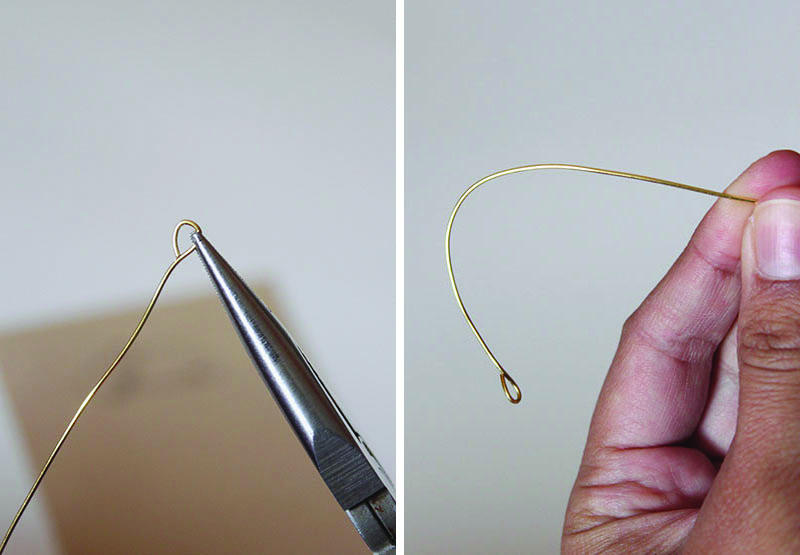 3. Form the loop in your wire. It should only be about a 1/4″ in diameter. Curve the wire to begin to form the bracelet.
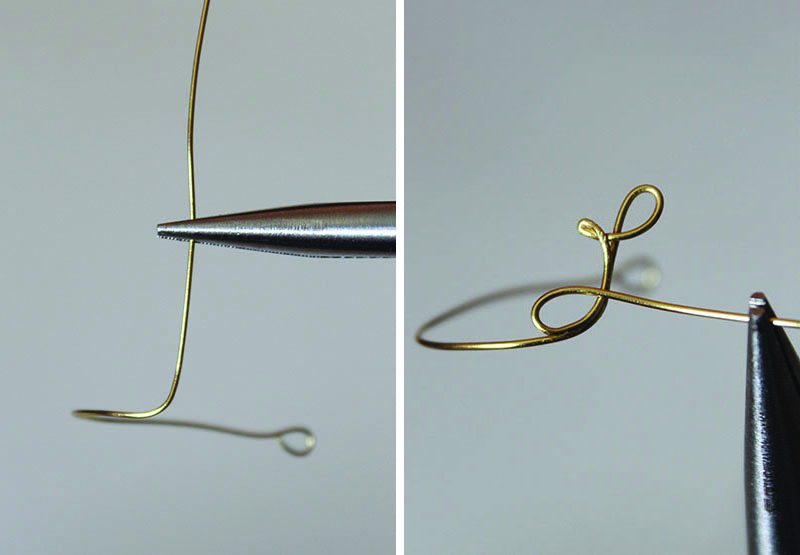 4. Bend the wire upwards. Shape your first letter. The ‘L’ was tricky. The top loop went in the opposite direction of how I would normally write it, which is why it helps to draw and diagram the name first.
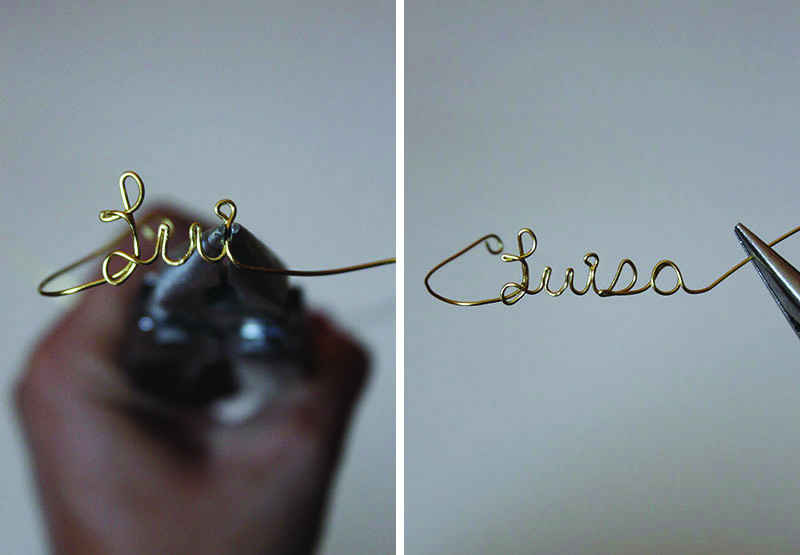 5. For an ‘i’, create a straight line, then bend the wire to create as small a loop as you can. Then go straight back down. Finish the rest of the name or word.
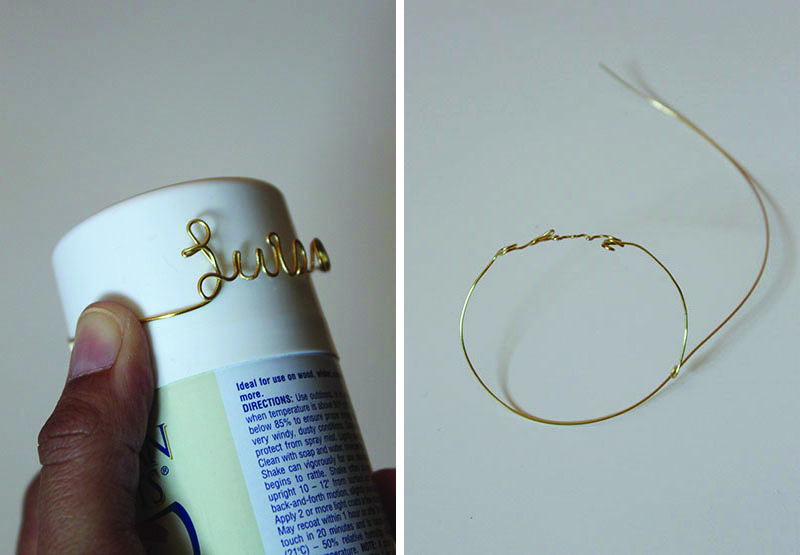 6. After you have finished writing the name, bend the wire over your round object. Loop the unfinished end through the loop you created earlier.
 7. Place the bracelet around your wrist. When you get it the correct size, bend the unfinished end of the wire. Unhook the bracelet and take it off.
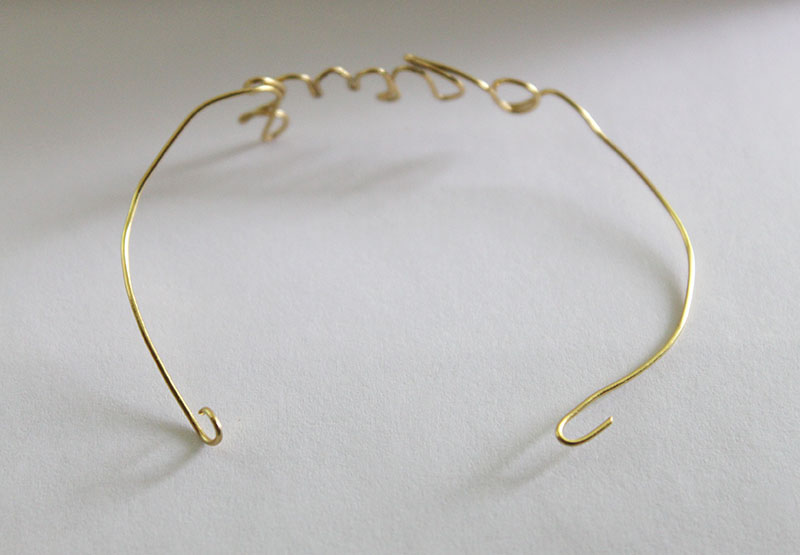 8. Cut off excess wire to create a hook at the second end of the bracelet.
 And you’re done!


Hey this is really well done! I love it! I stumbled upon your blog while looking for a DIY for the Céline knot bracelet. I can’t think how you’d DIY it though…any ideas?
Also, kinda random, but I happened to be on a street style blog at the same time as yours and doesn’t this cat-ears head band look a lot like the one you DIYed?!
http://jakandjil.com/wp-content/uploads/2013/08/kittyearsband.jpg
Alice (mllebrico.blogspot.ie)
Thank you, Alice!
For the Céline Knot Bracelet, any thick wire would be difficult to knot. I actually tried to make a knot ring with a medium gauge wire and it was too difficult. Your best bet would probably be to make it out of clay. Just roll the clay into a long snake and knot.
Yes, it does! I got my inspiration for it from a Taylor Swift music video. I believe the headband is from Urban Outfitters, so it could very well be the same one!
Good luck with the bracelet!
You mean like femo? Great idea! Thanks!
Nice one girl, that was so gorgeous of yours :) Really love it <3
Lauren xoxo
| get youtube subscribers
Nice article! The
longer I read your post, the more I’ll be in love with this source.
vine vera skin care