

This tutorial will show you how you can add a pattern to a font! You’ll need a pattern and the font of your choice. My text is about flowers, so I decided on this gorgeous floral pattern. For the Font I kept it old school and used Impact.
*This tutorial is using Photoshop CS6. Click on images to enlarge.*
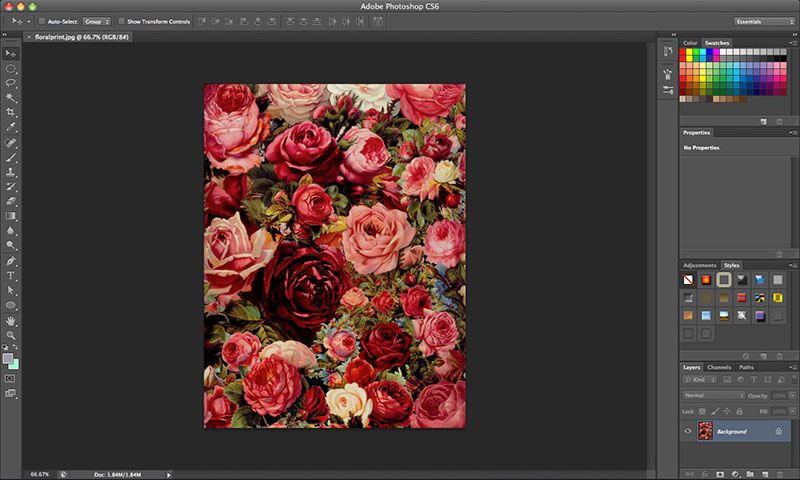 Step 1: First, we need to create the pattern. Save the image and open it in Photoshop.
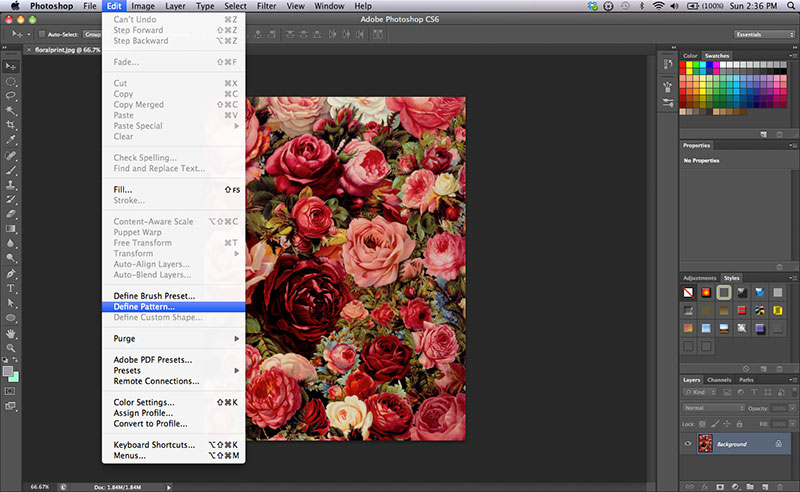 Step 2: Go to Edit>Define Pattern.
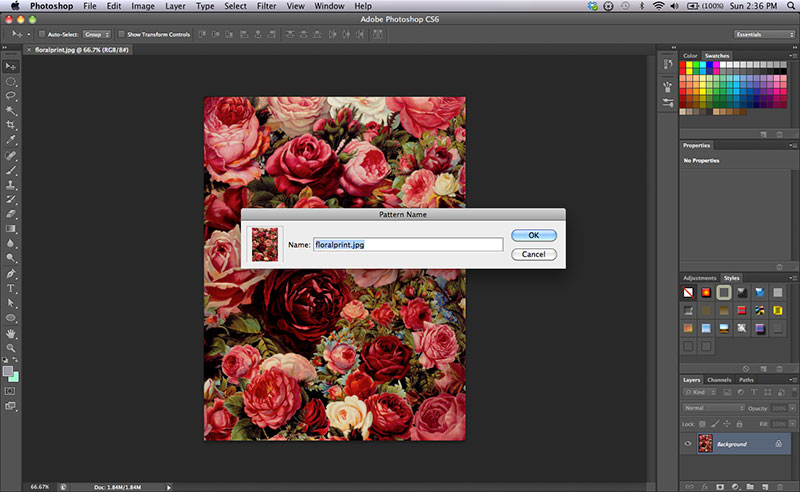 Step 3: Name your pattern and click ‘OK’.
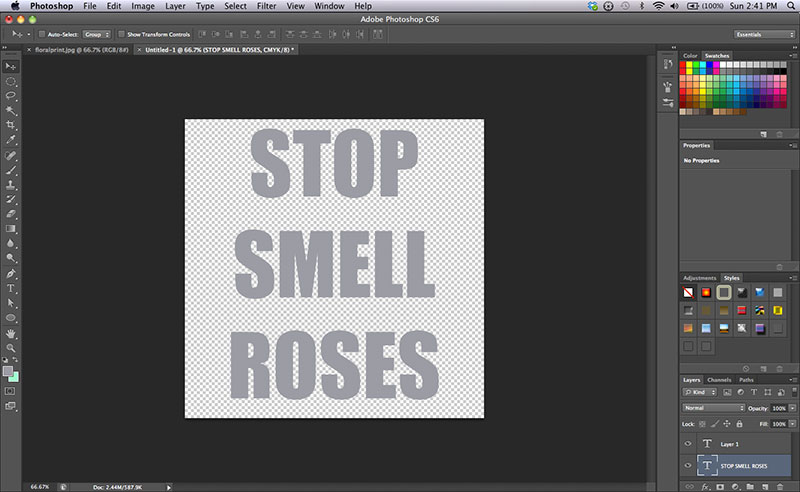 Step 4: Open a new document and make it any size you like. For this tutorial I made my document 800 x 800 pixels with a transparent background. Add a text box and type whatever you’d like. Edit the font however you want it.
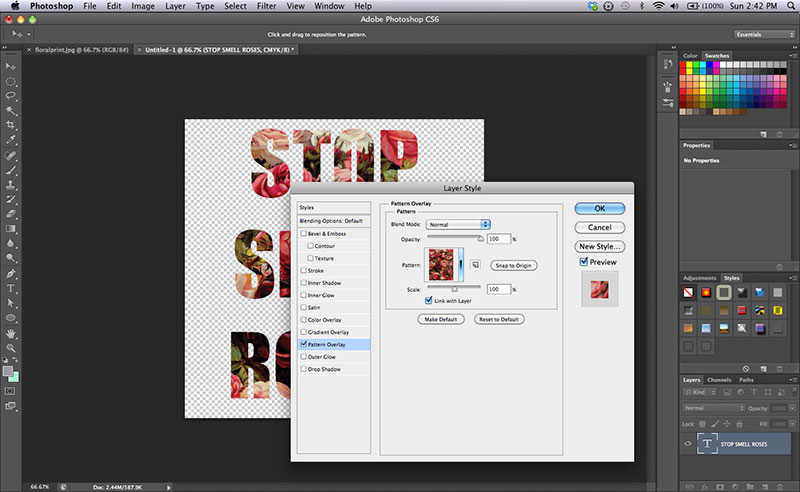 Step 5: Select Layer>Layer Style>Pattern Overlay. Find the pattern we just created and select it. Click ‘OK’.
 Step 6: Play around with opacity, or add additional text.
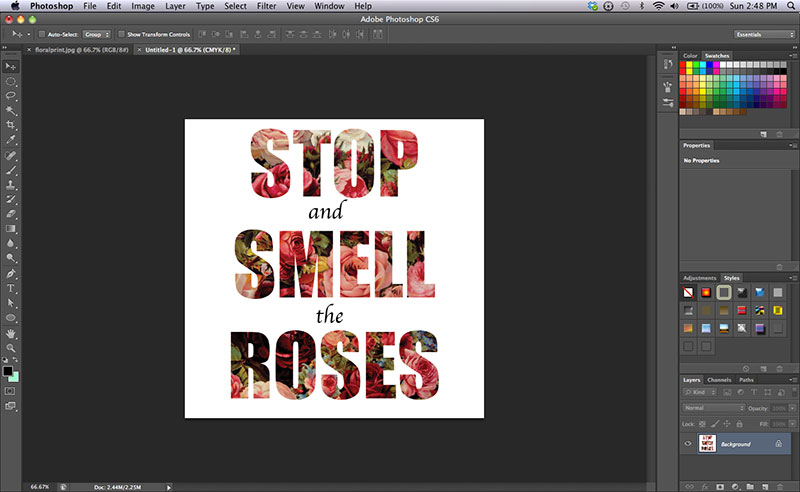 Step 7: If you want to keep the transparent background, save the file as a PNG. If not, flatten the image and save as a JPEG. And you’re done!