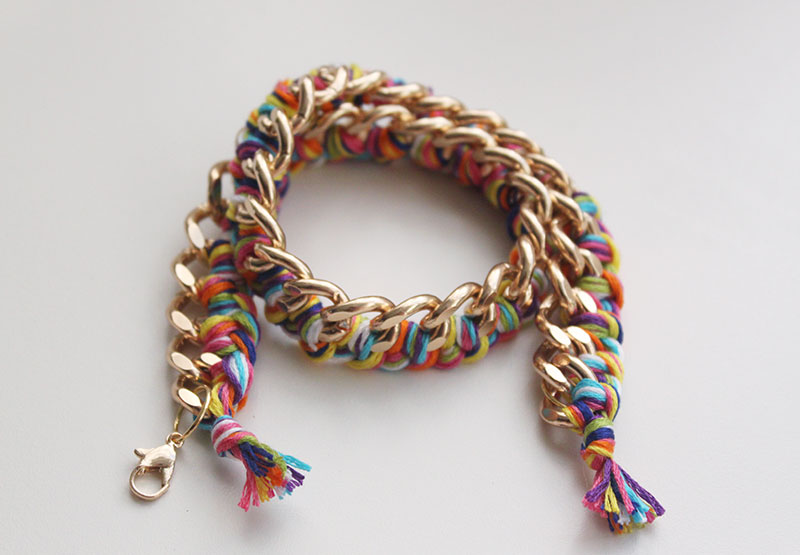
DIY Thread Wrapped Bracelets
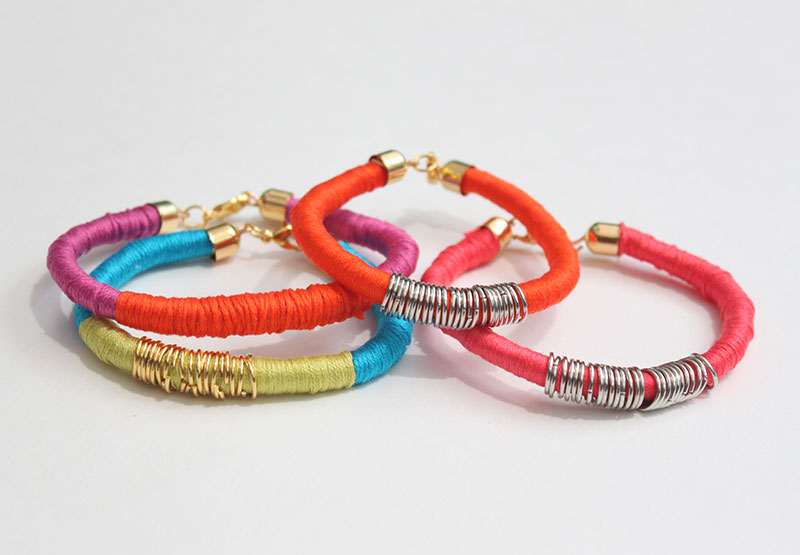
I recently made a trip to Hobby Lobby, my newest obsession since my first visit to one in Chicago. They had the perfect sized rope trim for thread-wrapped bracelets. I decided to add jump rings for a more updated look. I love the way they turned out! They’re perfect for stacking, or on their own.
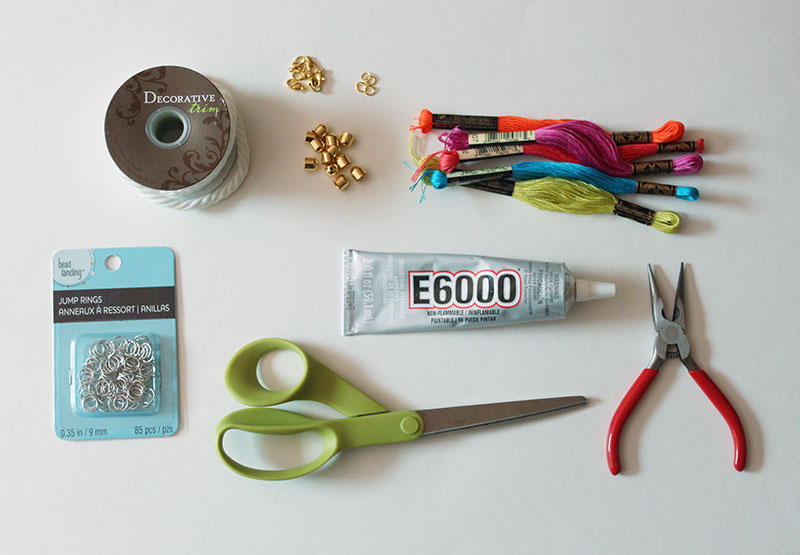
You’ll need:
– Rope Trim
– Embroidery thread
– 9mm Jump Rings
– Jump rings and fasteners
– Glue
– Pliers
– Scissors
– End Caps (similar)
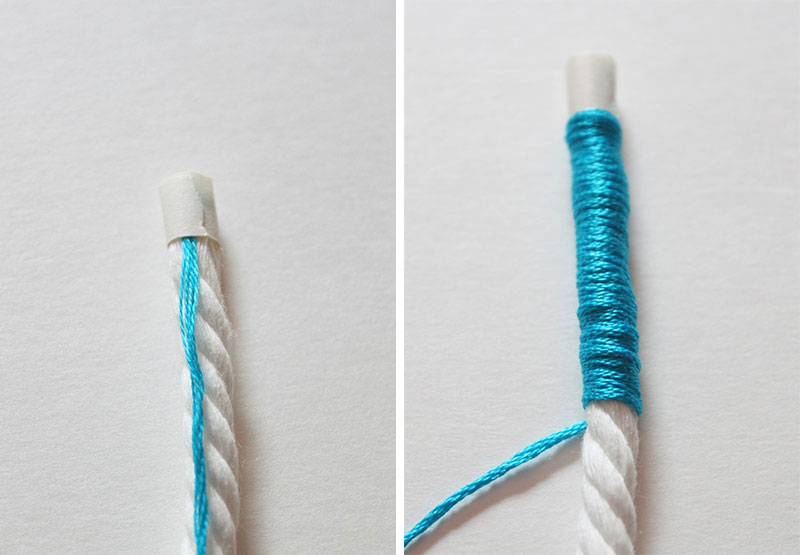 1. Start by cutting a 6″ piece of trim, or long enough to wrap around your wrist. Tape one end of embroidery thread to one end of the trim. Wrap the embroidery thread around the rope trim.
 2. When you reach the end of the rope, tape the thread to the rope and cut off the excess thread. If you want to add a second color, tie a knot wherever you want that color to start. Wrap tightly around.
 3. Check to make sure the second color is relatively even when you bend the bracelet in half. Tie a knot to finish the second color. Secure the knot with a dab of glue.
 4. If your jump rings slide over your rope you can easily add them to your bracelet. If they don’t, open your jump rings and add them one by one.
 5. Add as many or as few jump rings as you’d like.
 6. Add a dab of glue to the insides of the end cap. Place one end cap on each end of the bracelet. On one end, add a jump ring and fastener.
 And you’re done! Play around with different color combinations, or stick to a single color.


![]()


COOL! Thanks for sharing – doesn’t appear to be too hard – might give it a try! :-D
♥ Paula Shoe Fiend.
http://shoe-fiend.blogspot.co.uk/
Nice cool…..design.I just love the design and specially the variation of colors. They can also be used as bangles I think.
These are awesome and I totally understand your Hobby Lobby Addiction! I was so thrilled when ours finally came to town!
Such a magical place!
Very cute idea. Thanks for sharing.
Thank you, Regina!
These are cute! The jump rings absolutely make these bracelets. I think I would take a bit of a shortcut and wind wire around instead… 22 gauge maybe? You wouldn’t get the same movement…but I hate opening and closing jump rings!
Allie, you are so right! Where were you before I made these?? I actually ended up finding larger jump rings the week after that could have easily slide into place. Oh, well..
Thanks for reading :)
I’m a little late, back to the game here, but, browsing, I came across these pretty bracelets… and then I came across… myself! lol
Anyway sliding on rings had not occurred to me, either. It all depends on point of view. Designing.. I’ve not been making jewelry lately, but I do try to jot things down when I have a new-to-me idea. This is a good one :)
These are beautiful! Someone just donated a ton of yarn scraps to me and I want to try to make these. What size end caps did you use? I can’t seem to find any locally so I need to know what size to get online. Thanks!
This is a super idea! How much did you spend on supplies for these bracelets?
Hi Pamela,
Minus the tools (glue, scissors, and pliers) I’d say no more than $20!
Thanks so much for getting back to me. Would that be $20 for all 4 bracelets?
And then some…I had supplies leftover so I could had made more bracelets! Though I think I already had the findings and smaller jump rings which run about 3-4 dollars
just a note, aluminum jumprings are easier to open and close. jumprings should be twisted to open rather than pulled apart. they will maintain the round shape thatbway.
Thanks for the tip!!
You are welcome. I’ve been using my embroidery thread (vintage) for Kumihimo creations for sale in my Etsy & Handmade Artists’ Shops. Looks like I have to go shopping for some more brilliant colors like the ones you used above. I had no idea they were available in such bright colors.