
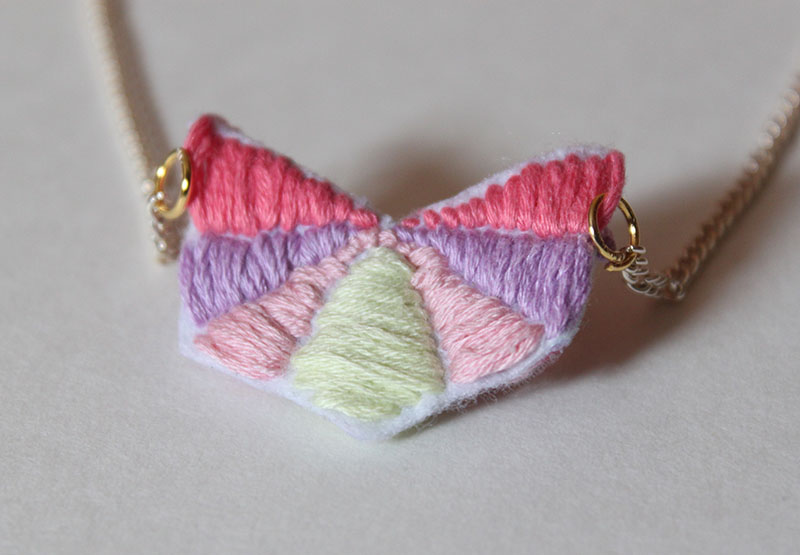
A few weeks ago I made a post about embroidered collars by the talented Lorena Marañón. Her work is incredibly intricate and colorful. She also makes beautiful pieces of jewelry which inspired me to try my hand at making an embroidered necklace. While nowhere close to the amazing work of Miss Marañón, I loved the way it turned out! Keep reading for the tutorial and see more of Marañón’s work here!
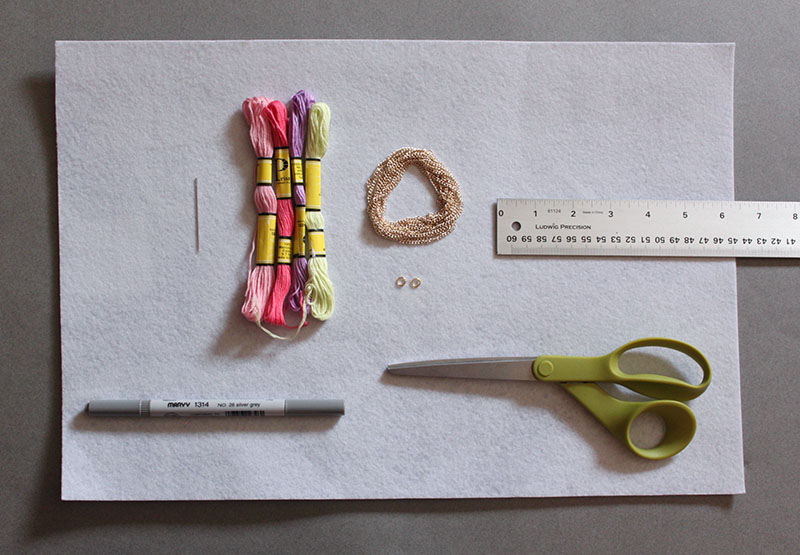
You’ll Need:
– Stiffened Felt
– Embroidery Thread
– Pen
– Scissors
– Large Needle
– Ruler
– Jump Rings
– Pliers
– Gold Chain
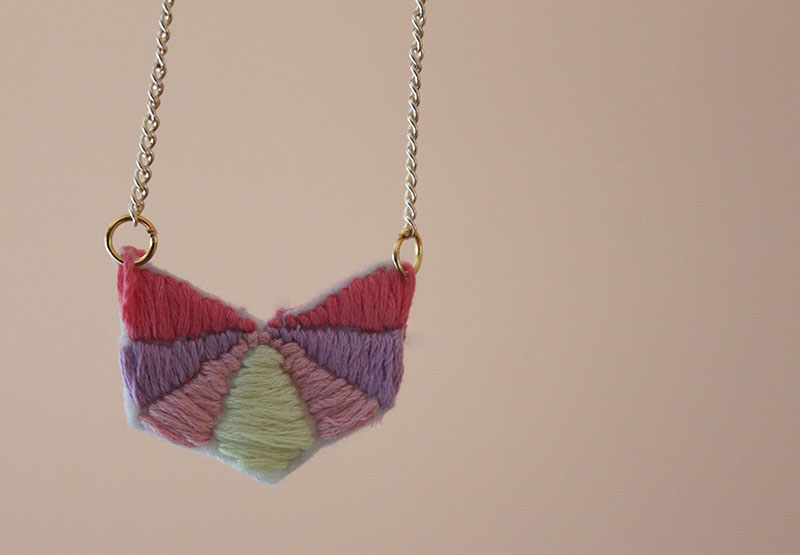
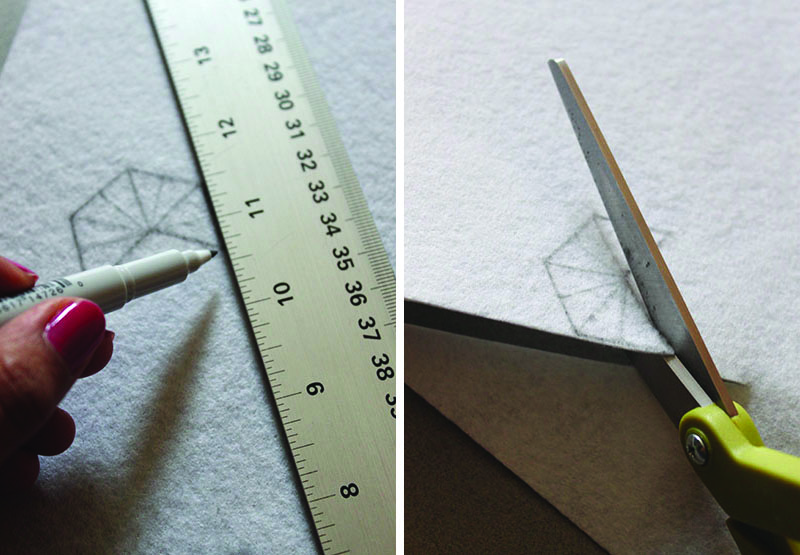 1. Determine what shape you want your embroidered necklace to be. I was inspired by this kaleidoscope image. Use a ruler if you’re doing straight lines, and a marker to draw out your pattern. Cut out your shape.
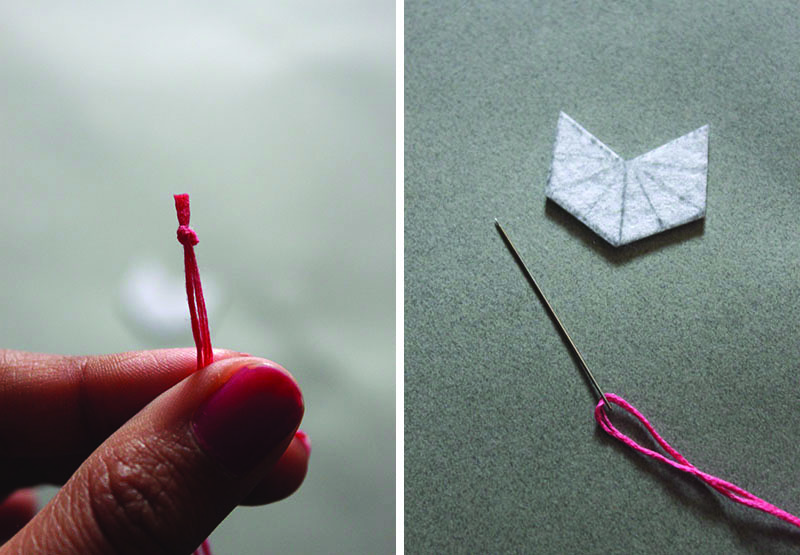 2. Using a large needle, thread your embroidery thread through the eye of the needle. I used about 20 inches of embroidery thread at a time. Tie a single knot at the end of the thread.
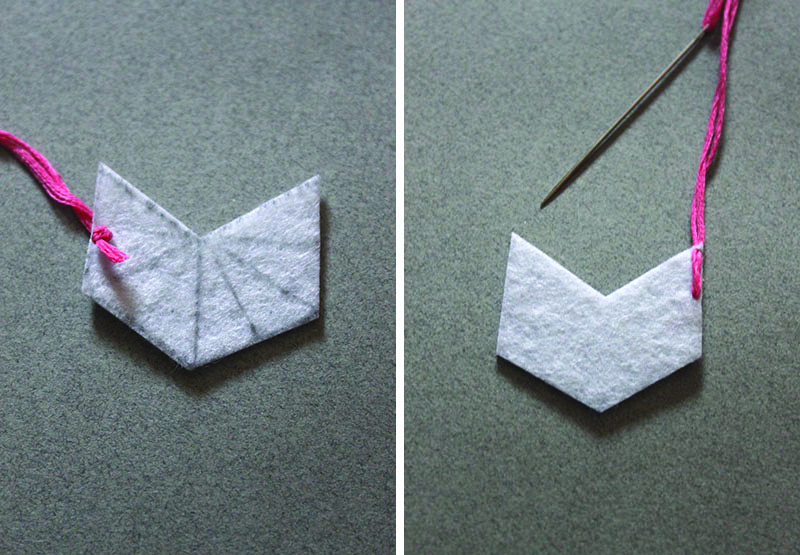 3. Starting on the backside of the pattern, stitch the needle through the felt to the other side, following the lines as a guide. Do the same thing on the front side. Continue to stitch from the backside to the front.
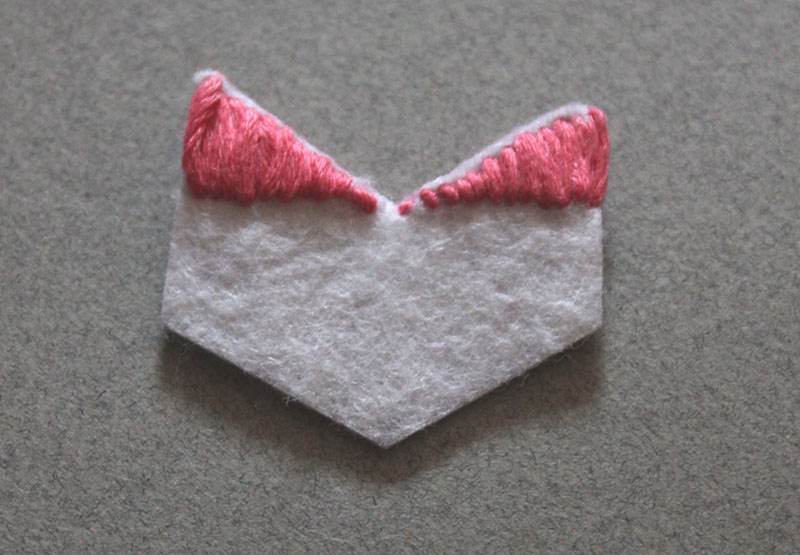 4. It is helpful to determine what colors you want, and where. Then work with one color at a time.
 5. Repeat steps 2 & 3 for the second color.
 6. Continue to follow your pattern to complete the embroidered design.
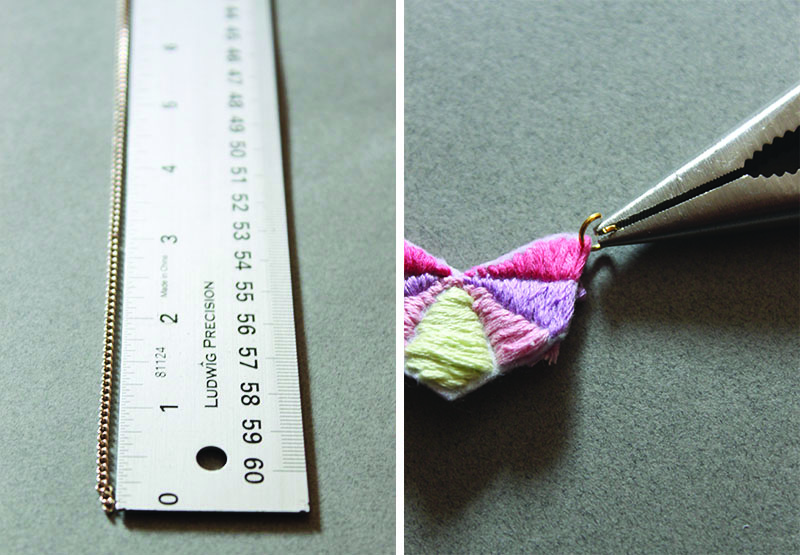 7. Figure out how long you want your necklace. I made mine 22 inches so I could slip it over my head. Cut your chain to the desired length. Attach jump rings on either end of your design and add the chain.
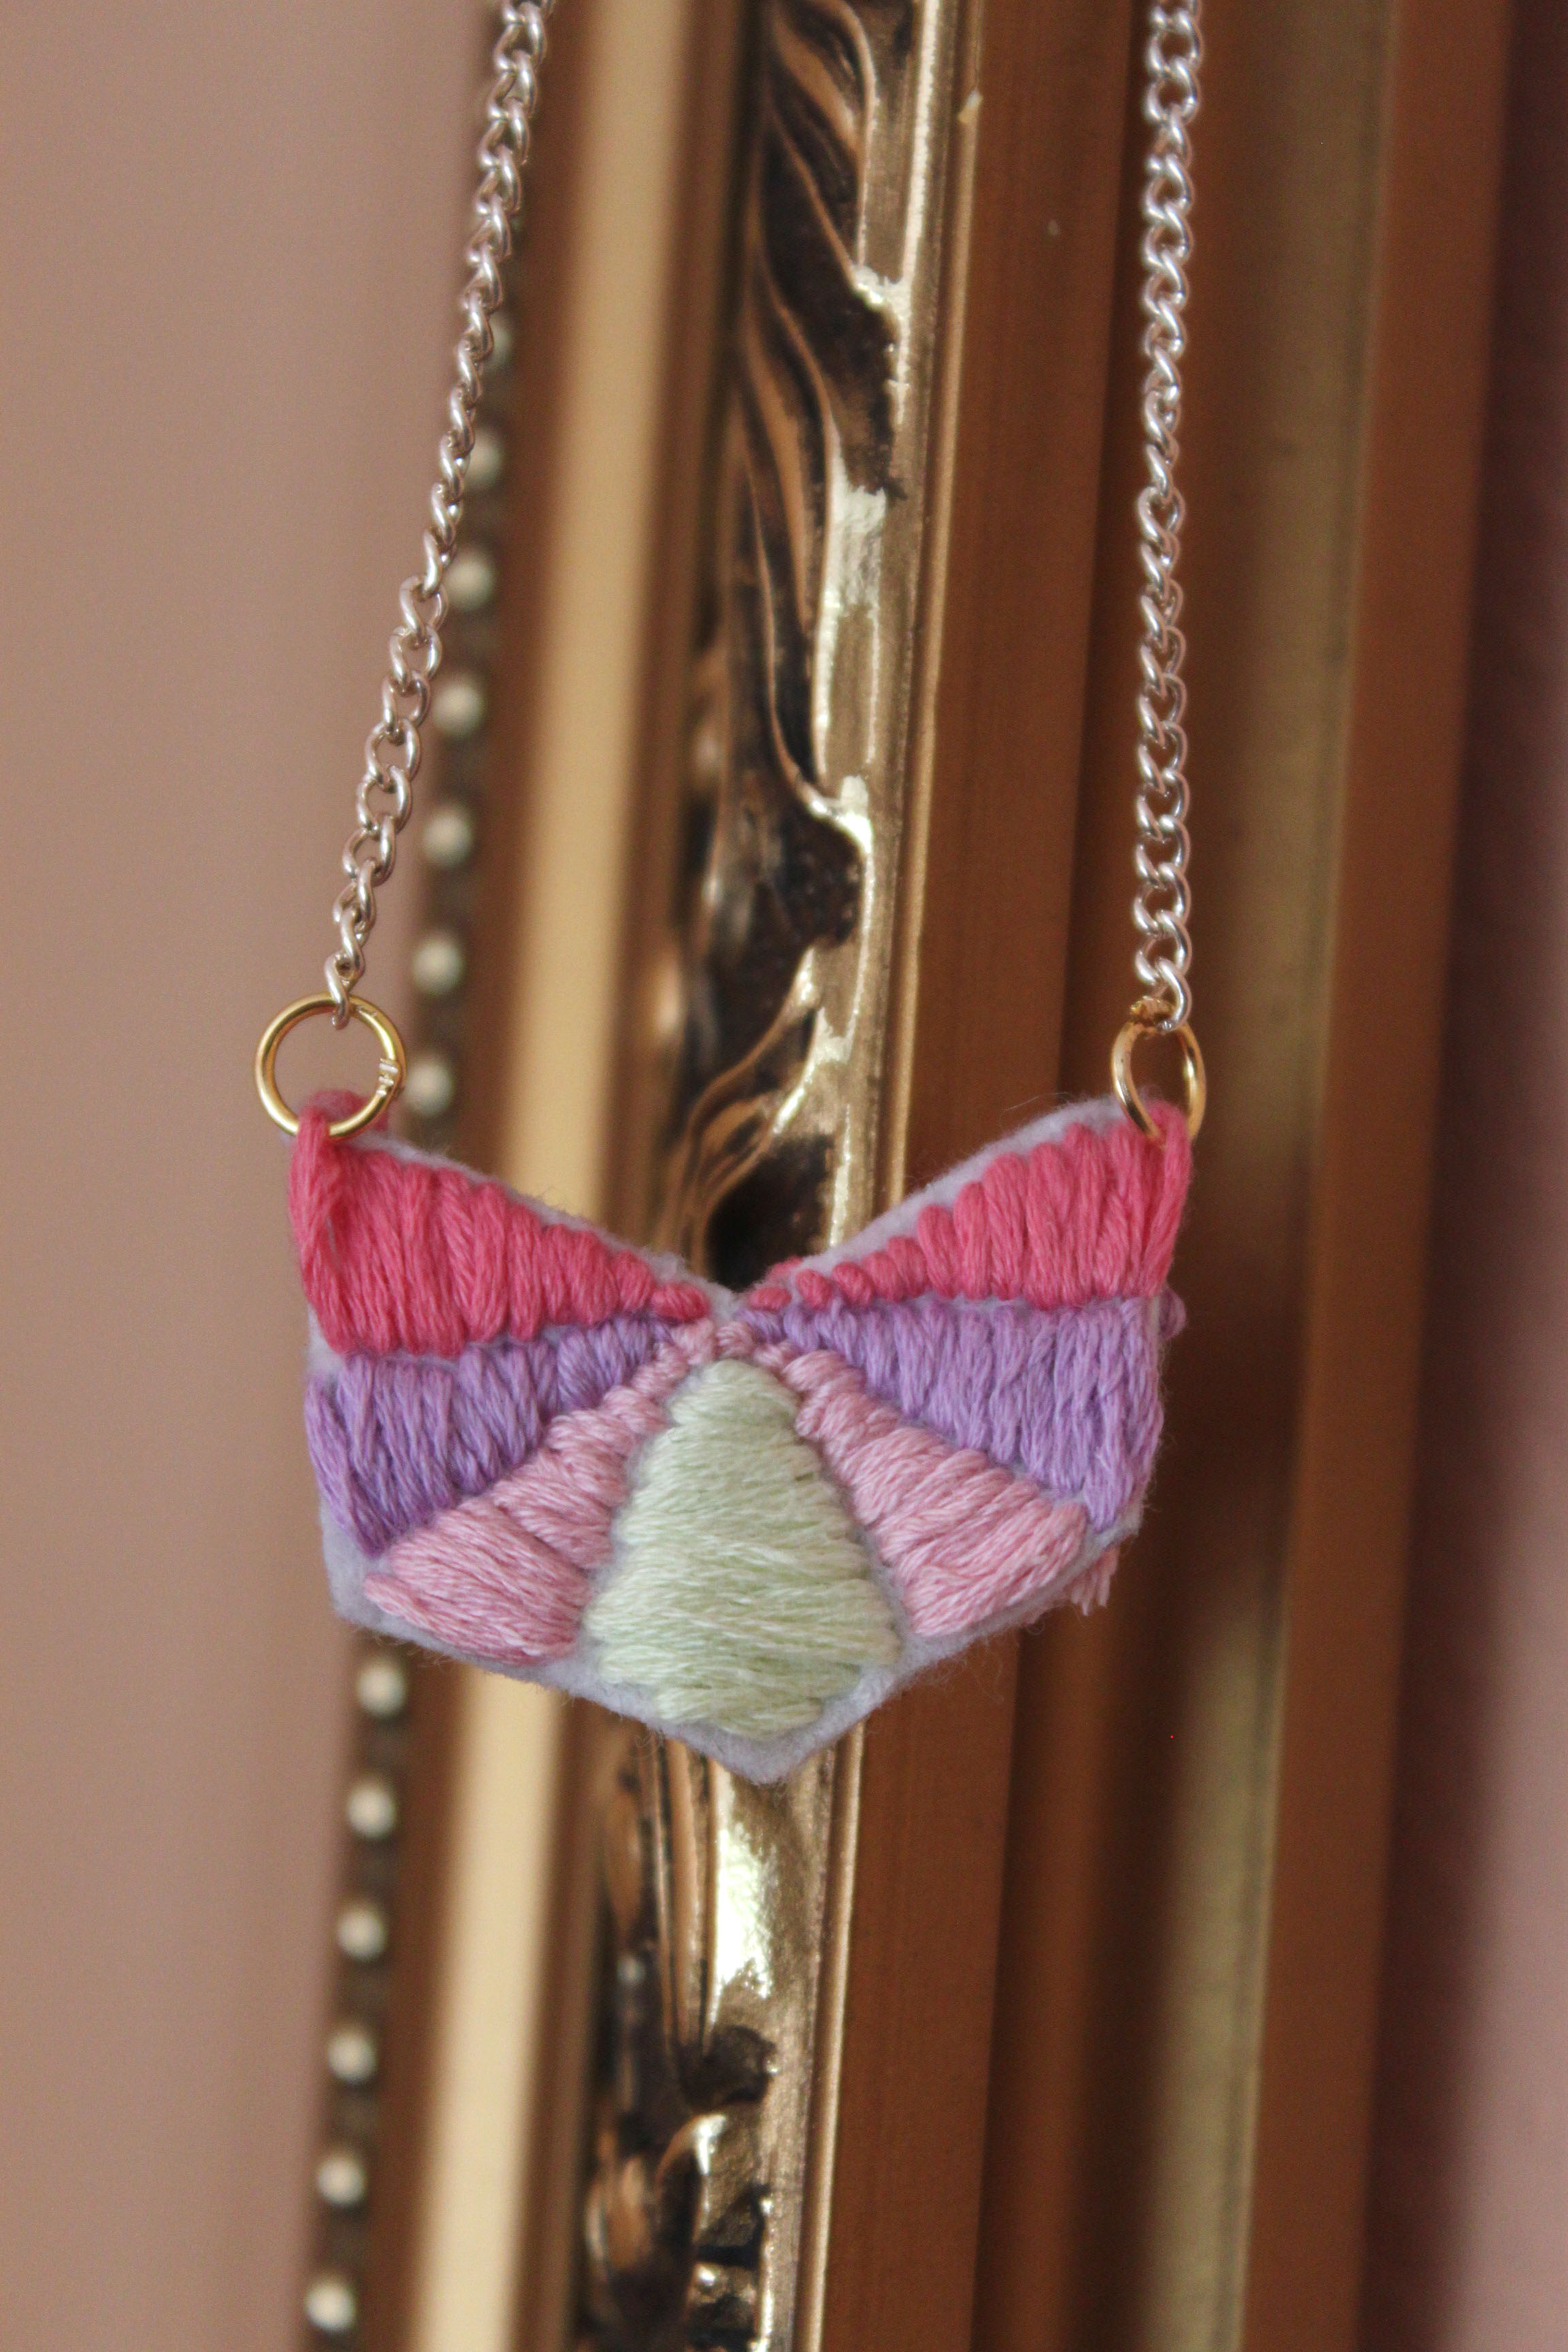
 Imagine all the shapes and colors you could play with! Be creative!!