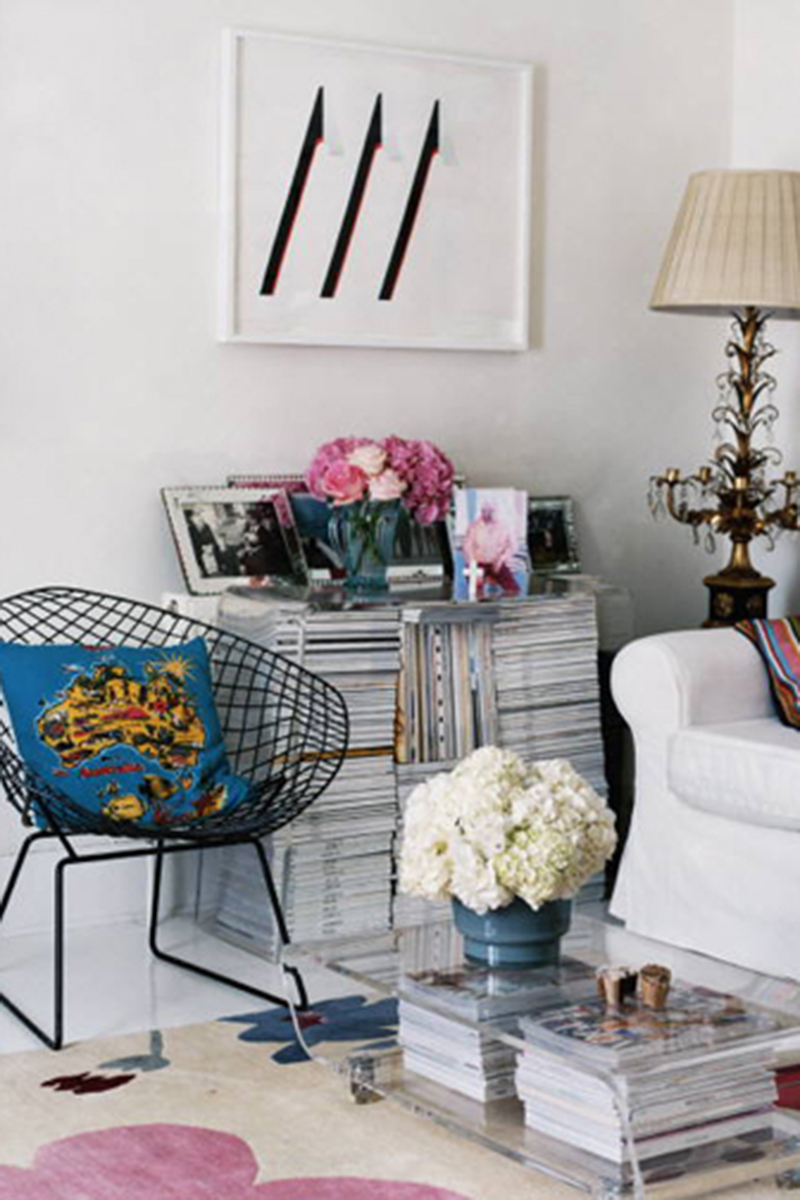
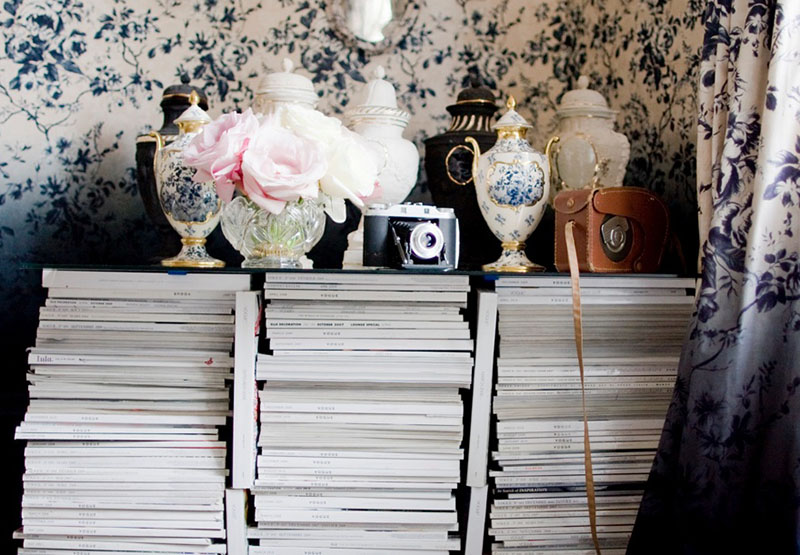
I currently have monthly subscriptions to 6 different magazines. (They are the Christmas gift that keeps on giving.) So naturally, I have a growing stack of magazines, read and unread. I usually think stacks of magazines look sloppy but these images prove otherwise. I love the idea of turning a stack of magazines into a table or stand for decor, such as flowers or picture frames. Or, in extreme cases of magazine hoarding, using them to fill an inactive fireplace. Time to get stacking!
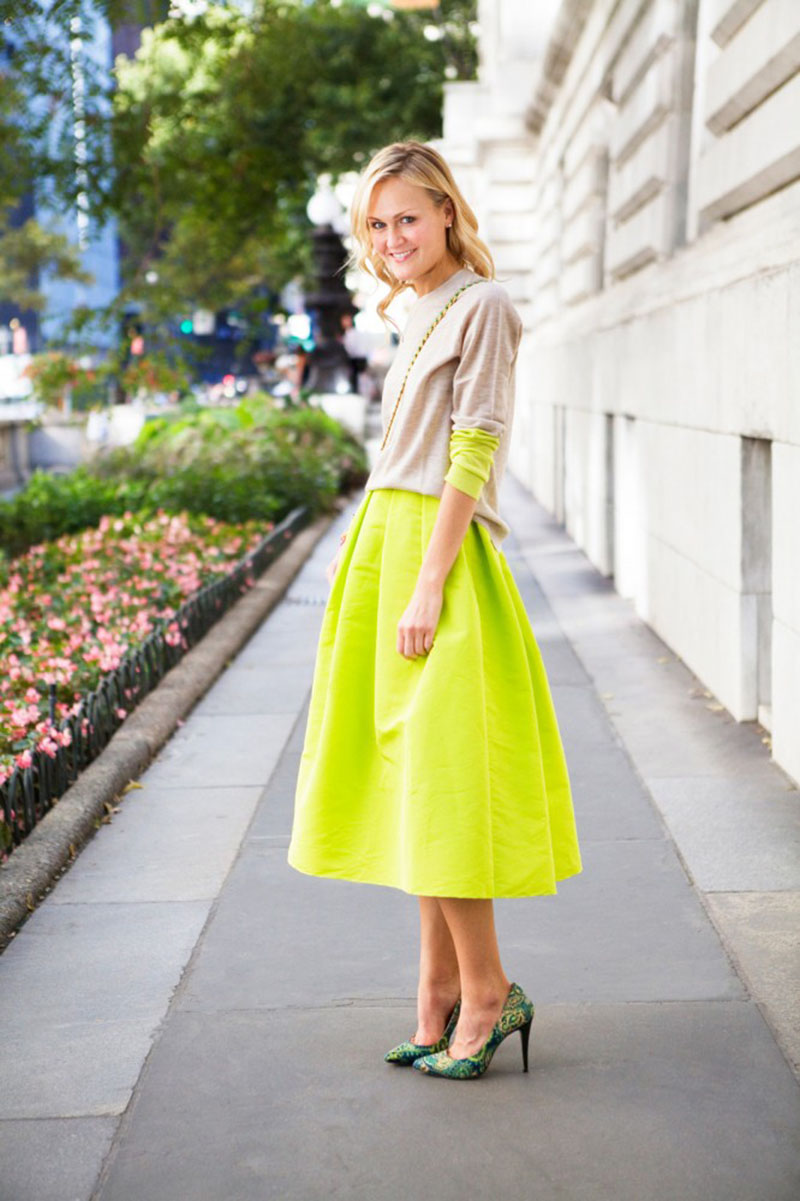
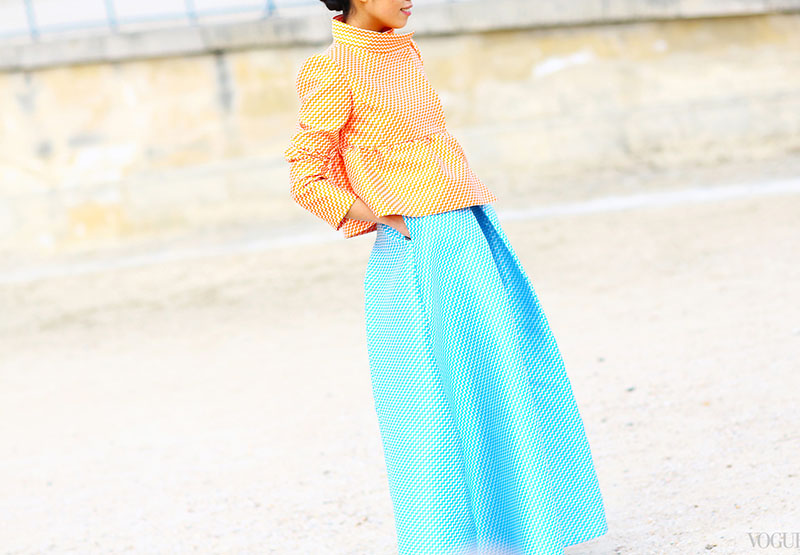
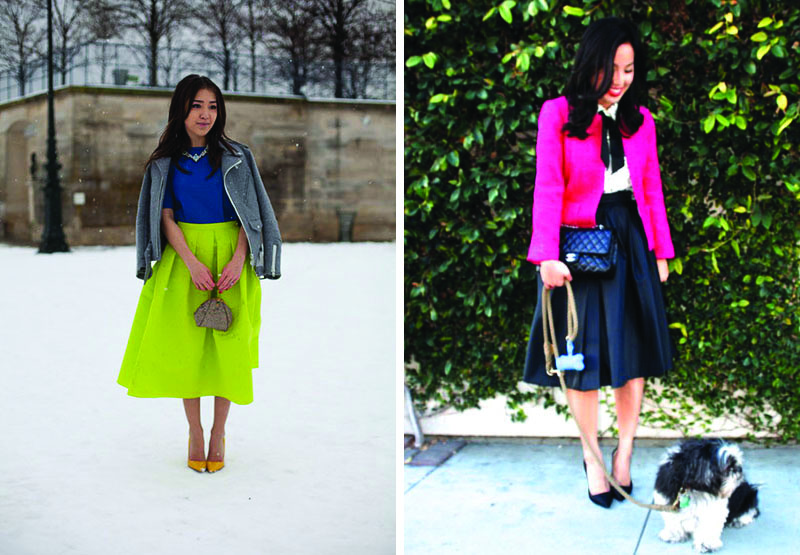
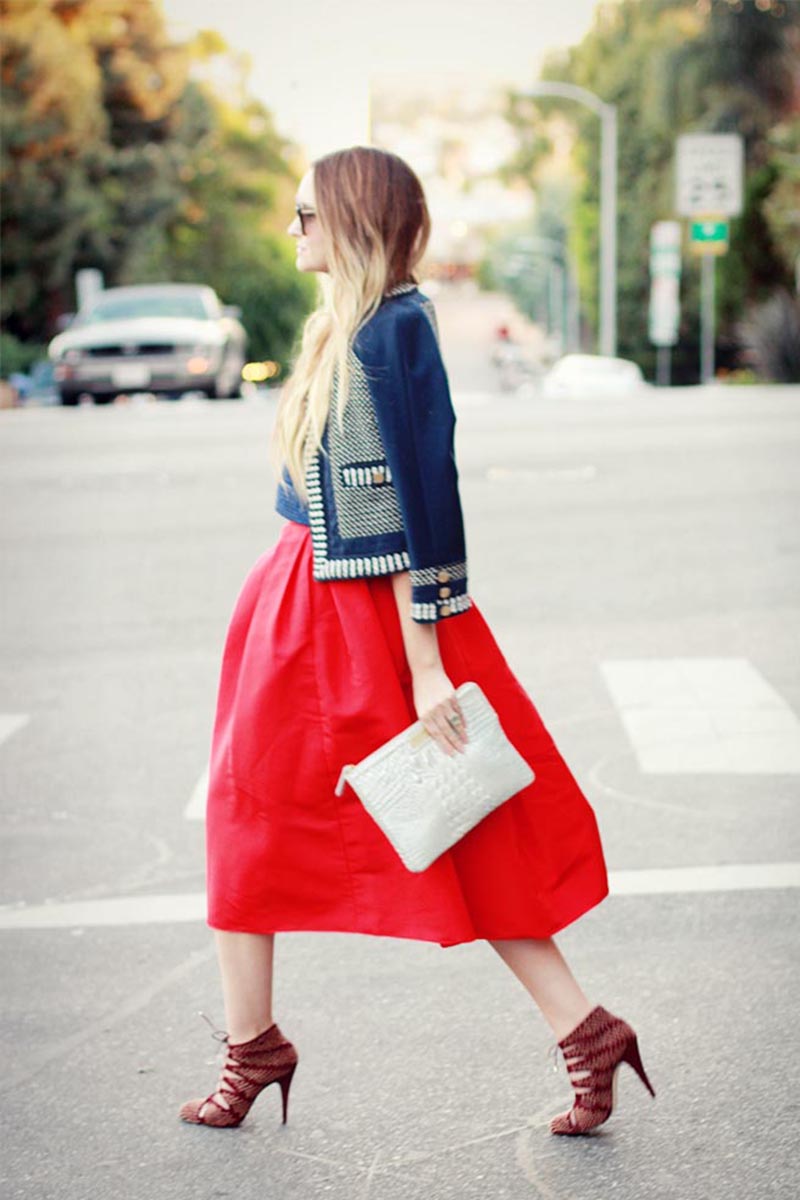
I love the full skirt trend that has been popping back up in the fashion world! The length is modest and reminiscent of the 50s, but packs a punch in a bright, bold color. I want to try and recreate the look with a striped fabric, and maybe some pockets. When I wear full skirts I feel comfortable yet put together. For this time of year, the long cut of a faille full skirt serves as the perfect transition piece from winter to spring!
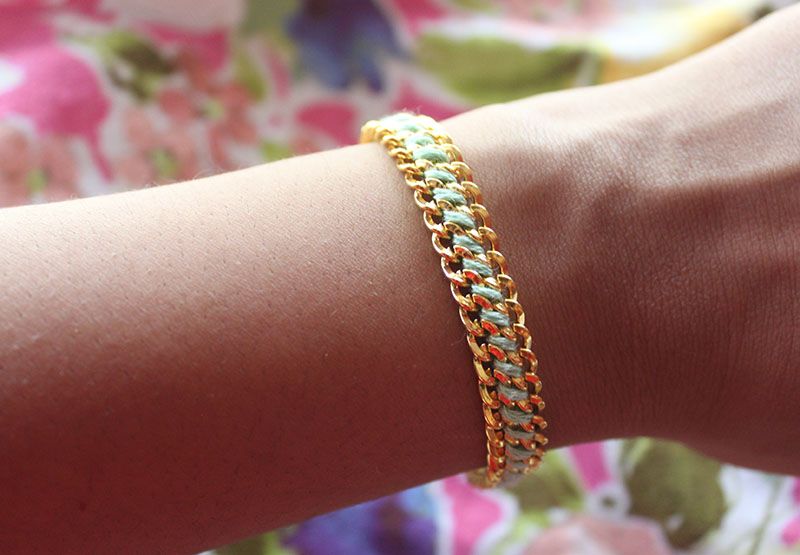
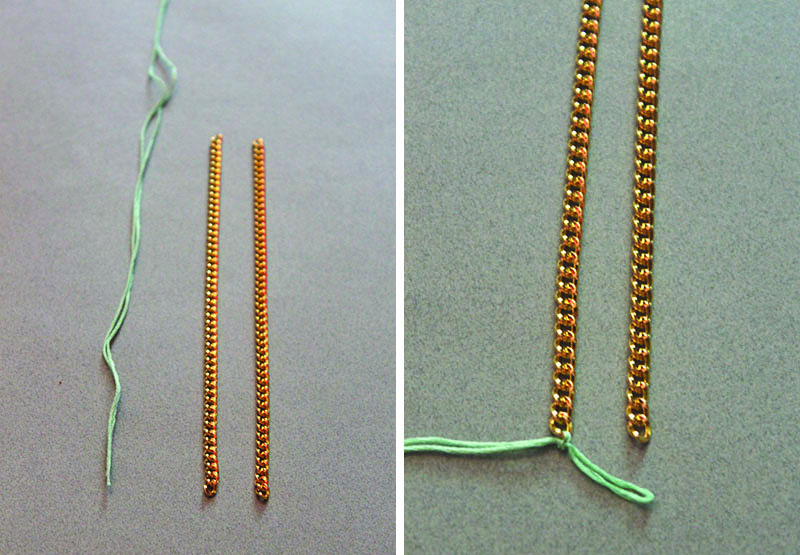
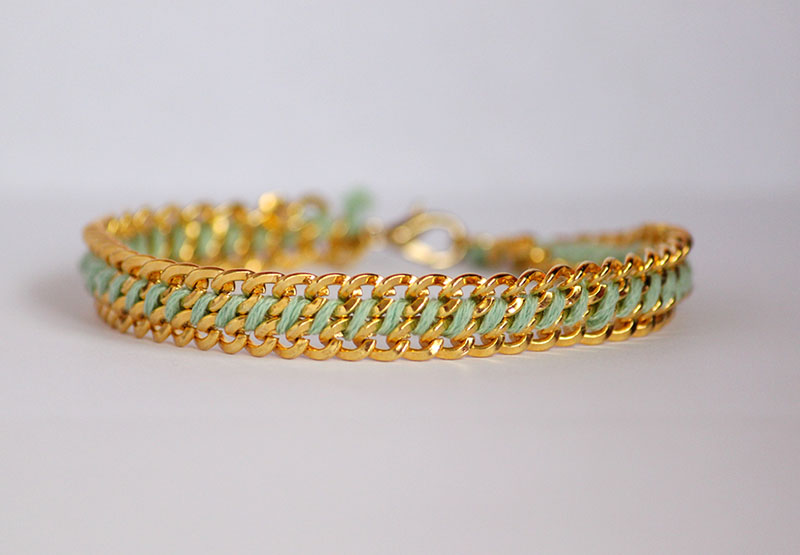
There are many variations of the woven chain bracelet. I had some left over chain and embroidery thread from previous projects, so I decided on a simple method to string two pieces of chain together. I used a hemming stitch to connect the chains, and added jump rings and a finding. I love the way it turned out! I plan to make more and maybe spray paint the chain in different colors!
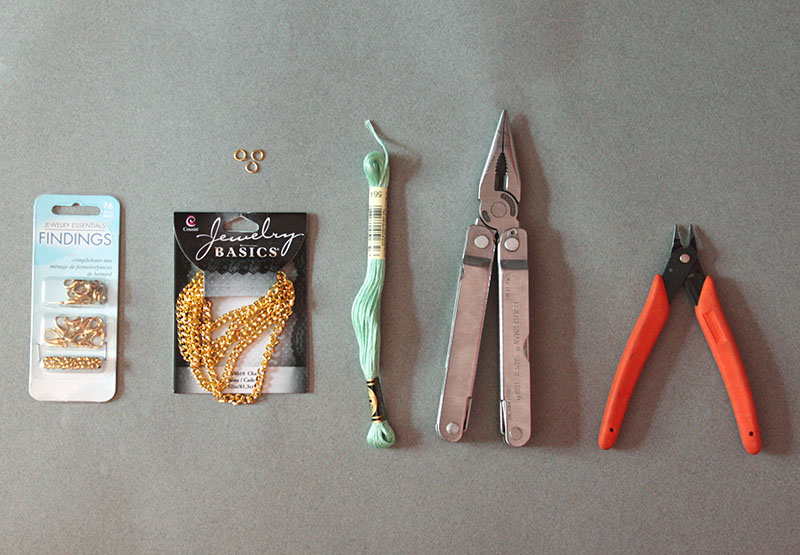
1. Using your wrist as a guide, measure and cut your chain to the length you want it. Mine came out to about 6 1/2 inches. Cut a 36 inch piece of embroidery thread and fold in half. Attach the thread to one end of one gold chain and tie a double knot.
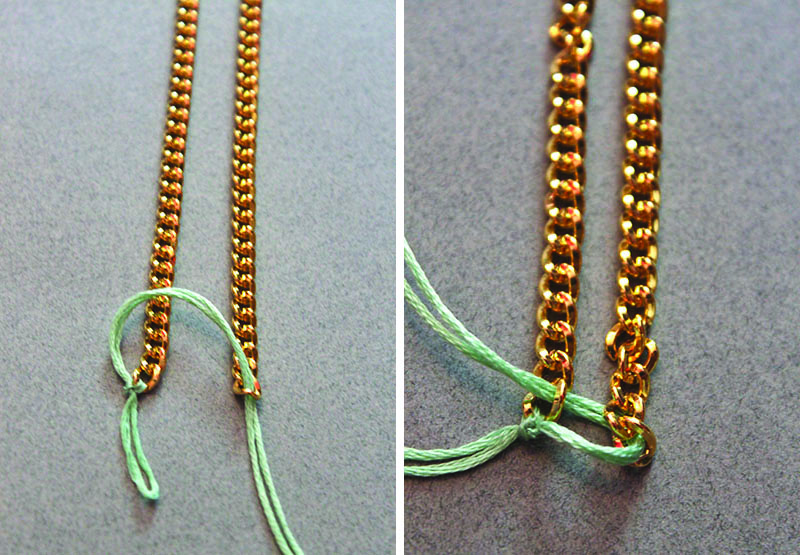
2. Thread the embroidery through the first opening of the second chain. Going underneath the first chain, thread the embroidery through the first opening. (I ended up attaching a large needle to the end of the thread to make the stitching easier.)
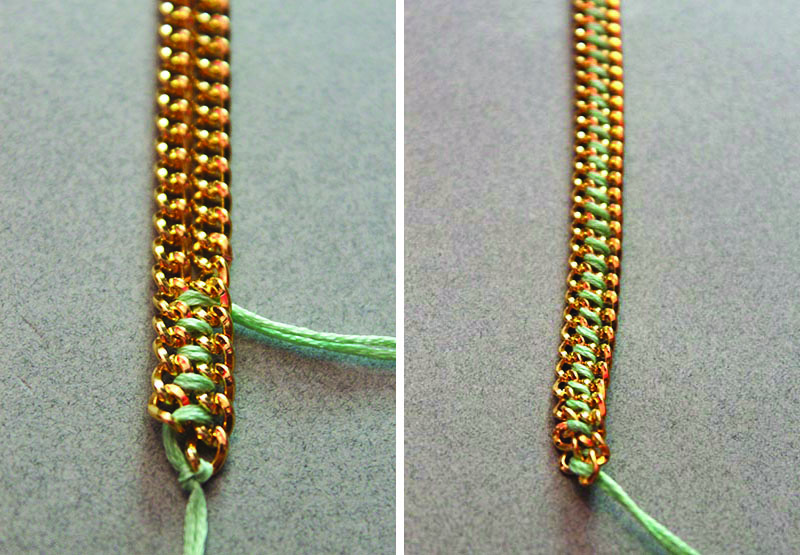
3. Continue to “stitch” the chains together in the over-under pattern until you reach the end of the two chains. Tie a knot on the end of the chain. Cut off any extra thread.
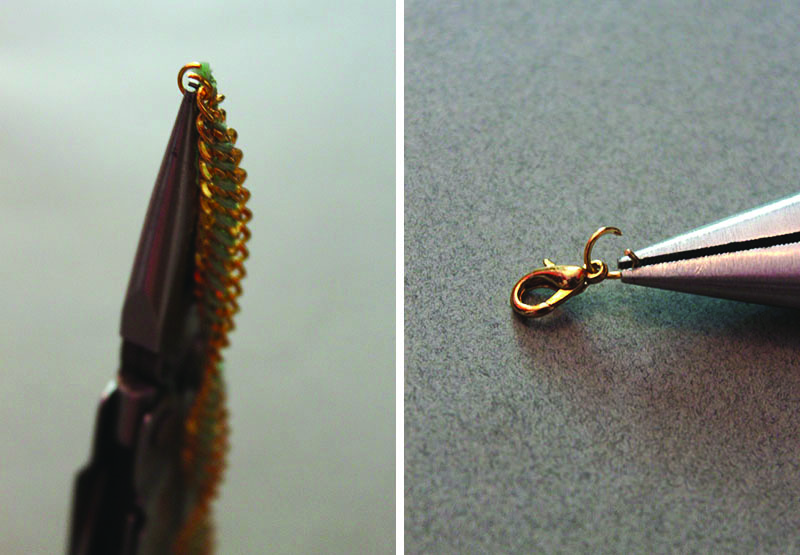
4. Attach jump rings to each end of the bracelet. On one of the jump rings, add a finding.
And you’re done! More bracelets to add to your jewelry collection!
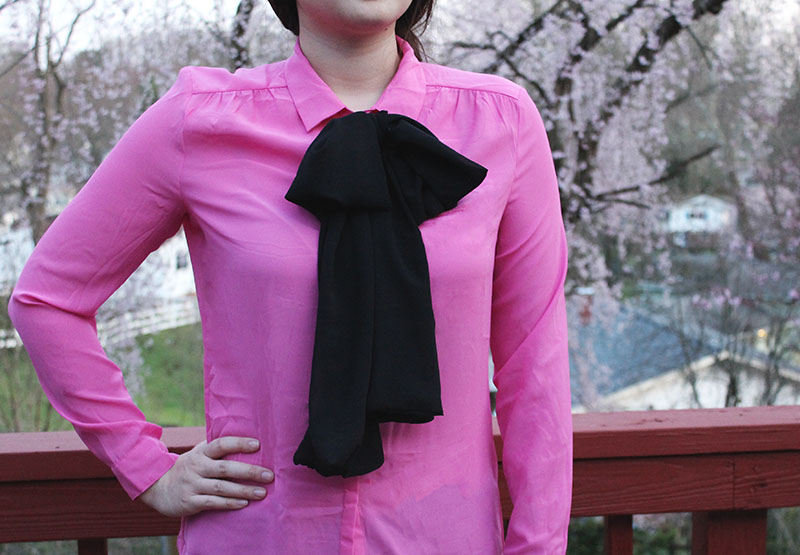
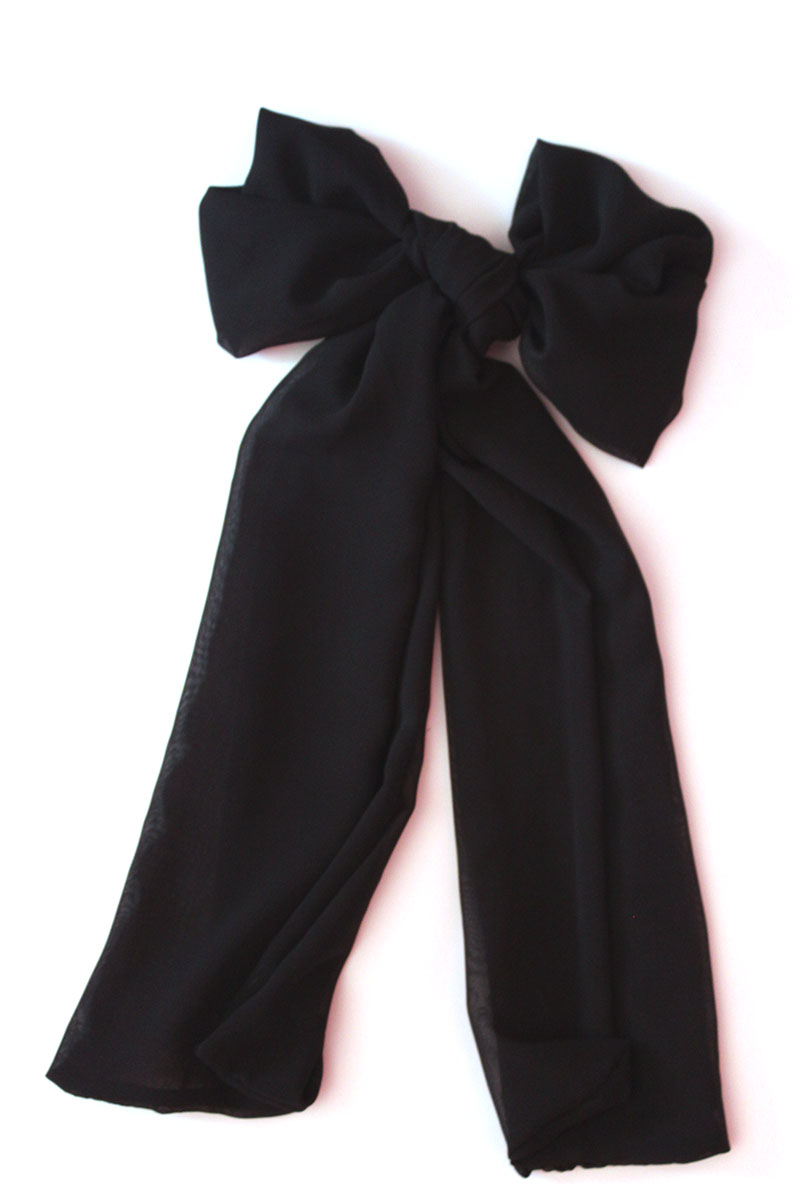
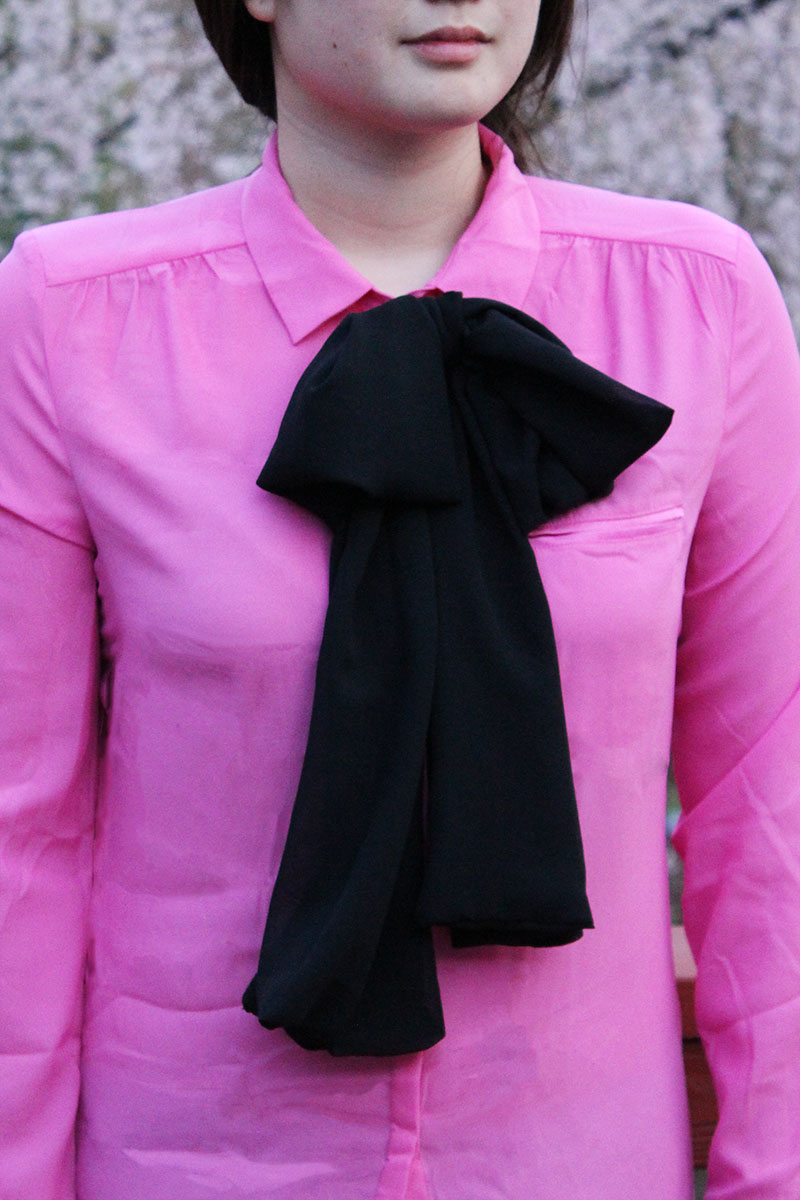
A few weeks ago I posted about oversized bow-ties as DIY inspiration. The bows were a major aspect of the Saint Laurent Spring 2013 fashion show, along with clean lines and floppy hats. Oversized bows in a soft fabric are a great way to add a touch of feminine to a full suit. The best part about this DIY is that it takes less than an hour to make! This is key for someone with big aspirations and a short attention span.
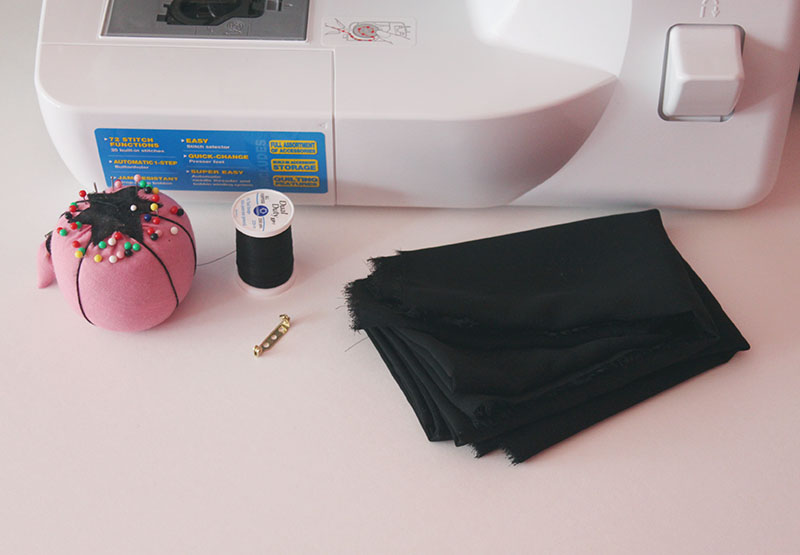
You’ll need:
– Chiffon Fabric (60″ L x 24″ W)
– Matching Thread
– Pins
-Sewing Machine (or you could sew it by hand)
– 1″ pin back
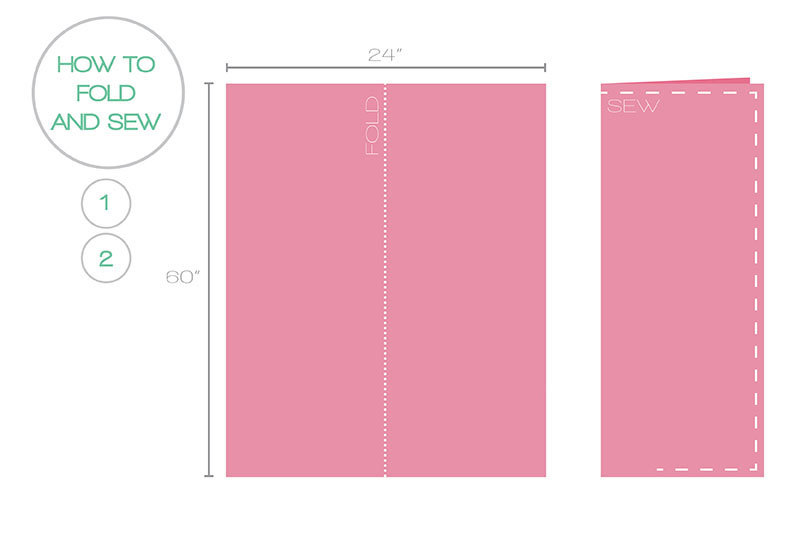
1. Fold the 60″ x 24″ piece of fabric vertically down the middle. Pin along the edges.
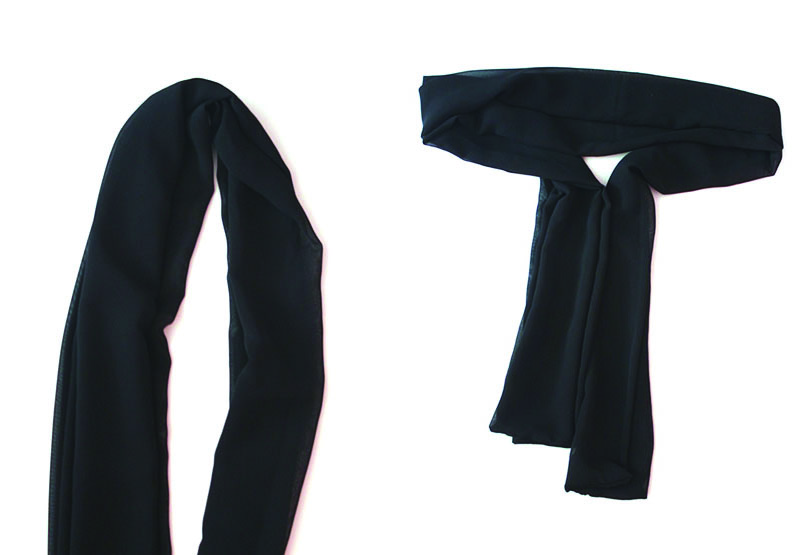
2. Sew along the edges, leaving a 4 inch gap at one end. Turn the bow right-side out, and sew the gap closed. 3. Fold the fabric in half. Bend the two sides upwards and tie as you would to make a bow.
4. Adjust the bow until it is the shape and length you want it.
5. Sew a few stitches through the tie so the bow will hold its shape. (This step is optional if you think you might want to re-tie your bow in the future.) Sew the pin back on the lower backside of the oversized bow.
And you’re done! Pair with your favorite button down and blazer for a flirty yet professional look!
This past weekend was the National Cherry Blossom Festival in DC. Everyone was hoping to see some great blossoms, but the weather was not cooperating. There were few blooms, and you could tell people were disappointed. However, it seems this week we have skipped Spring all together and went straight to summer. With temperatures in the high 80s (it hit 90 yesterday, eek!) the blossoms are starting to peak. Hopefully I can see them again soon!