Earlier this week I posted on how to brighten up a clay planter with yarn. Today I’m featuring another easy way to add a bit of color to your home. All you need is some paint!
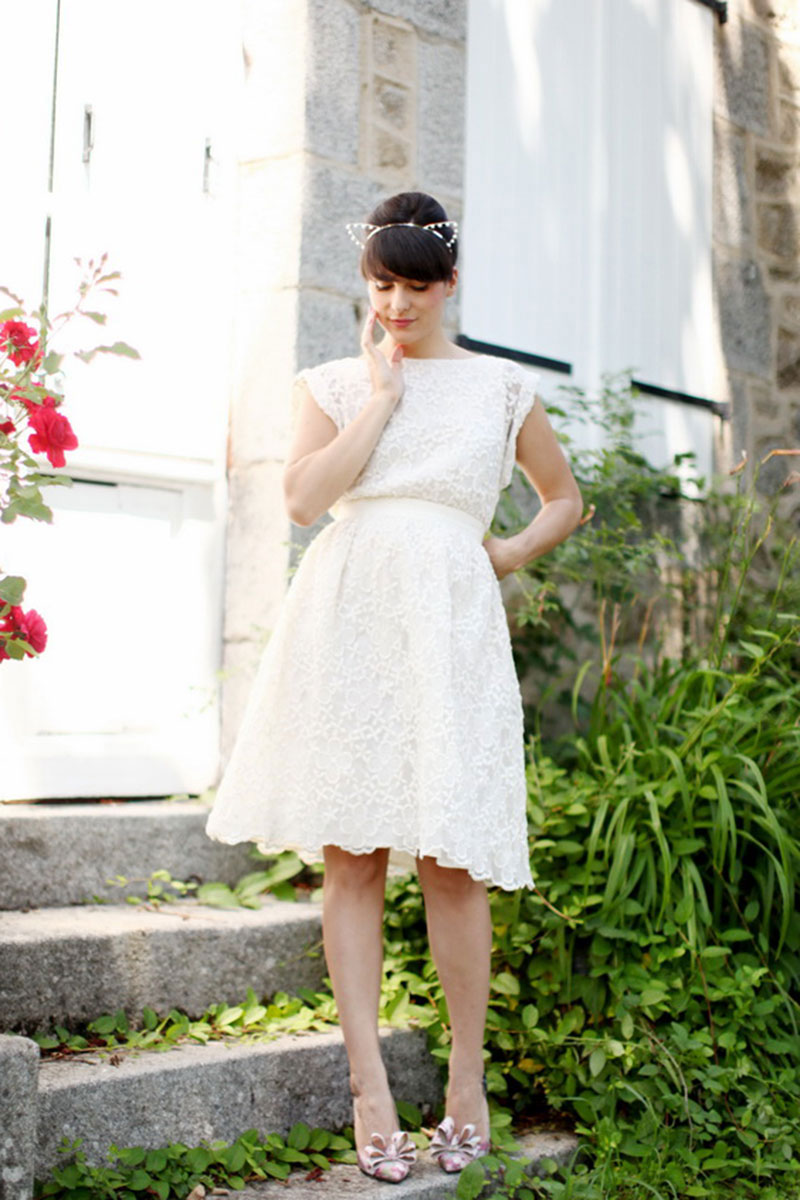
I’ve loved these cat ear headbands ever since I saw them in Taylor Swift’s “22” music video. They are sweet and playful, and a great way to add interest to a simple ensemble.
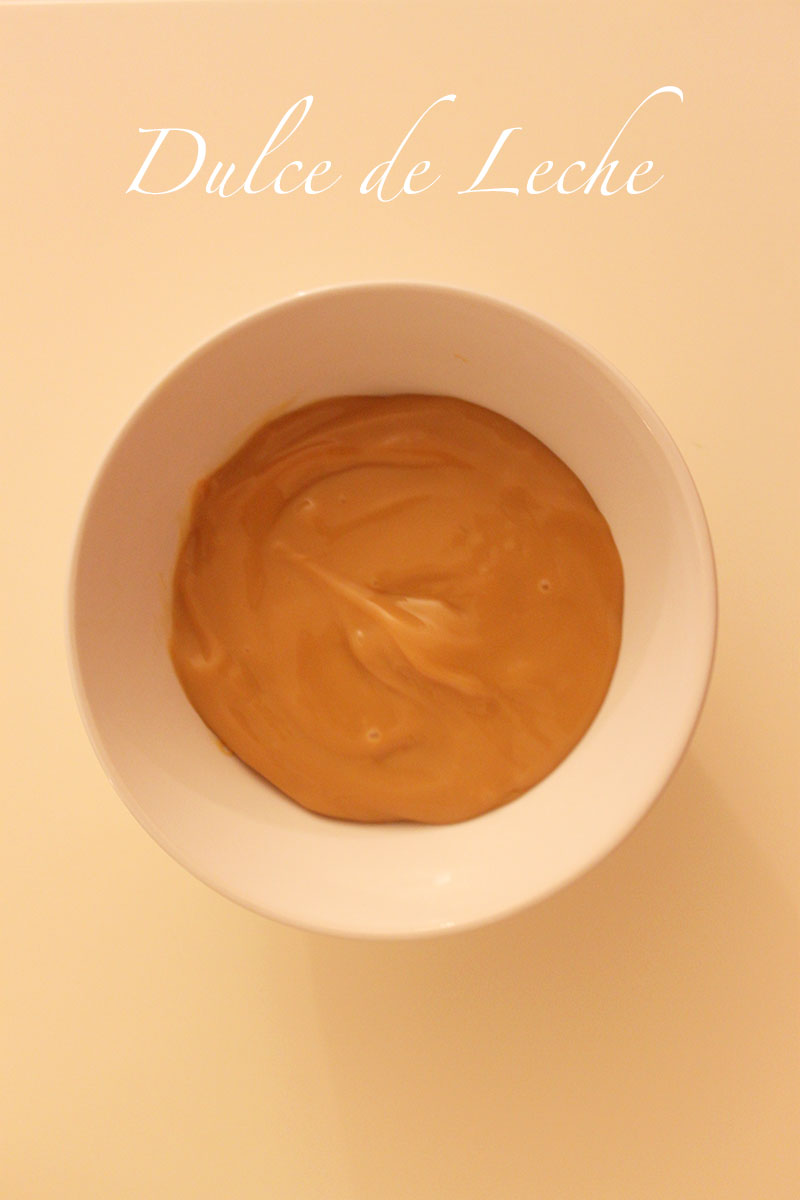
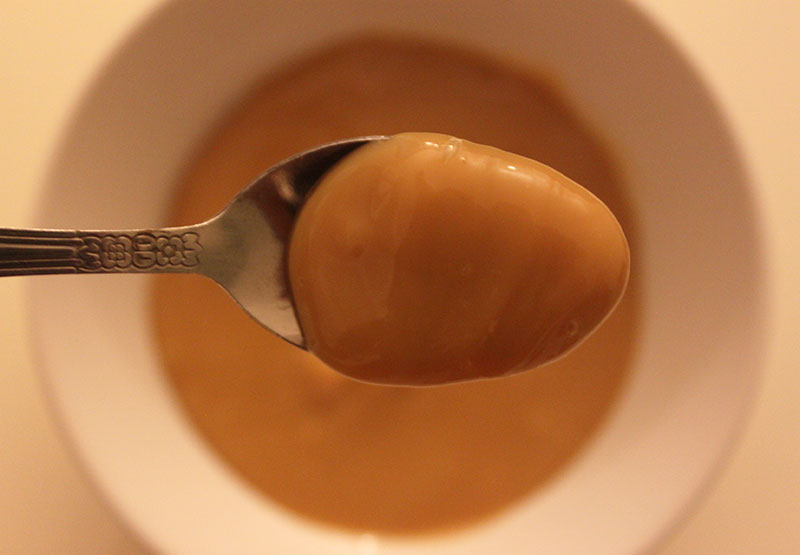
If you’ve never tried dulce de leche, then you are seriously missing out. If you don’t know what Dulce de Leche is, it’s a rich confection made by heating sweetened condensed milk. You can eat it on cookies or crackers, use it to fill cupcakes, or just eat it on it’s own! There are many different ways to make dulce de leche. I like to make it on the stovetop. Normally, I have my mom’s pressure cooker and cooking time only takes an hour. However, if you don’t own a pressure cooker, you can still make dulce de leche by following these steps.
Stove-top Dulce de Leche Recipe
1. Start by removing the label from your can of sweetened condensed milk.
2. Pierce three holes at the top of the can in a triangle formation. *This step is critical as it helps release the pressure from the heat, preventing the can from exploding.*
3. Place the can in a pot, and fill it with water 3/4 of the way up the side of the can.
4. Bring the water to a simmer and let the milk cook for about 3-4 hours. (Longer if you want a thicker consistency.) I usually cook mine for approximately 4 hours. If milk comes out of the piercings at the top of the can, make sure it doesn’t spill over.
5. Use tongs to remove the can from the water, and place it somewhere to cool.
6. Mix the dulce de leche until it is smooth. Let it cool before refrigerating.
As part of the ongoing series of decorating my sister’s Chicago apartment, today I’m featuring this painted Ikea Tullsta chair. My sis really wanted a yellow chair to brighten up her living room. We couldn’t find one at a reasonable price, so I suggested she just paint one. We decided on this Ikea chair. We used Simply Spray Fabric Paint in Brite Yellow (about 10 cans total). We also spray painted the legs of the chair gold. I love the way the chair turned out! Add an equally bright cushion for an extra pop of color!
1. Work on a protected work surface.
2. Following the instructions on the can, start by painting the chair cushion.
3. Begin by painting the front of the chair. *Remove or cover the chair legs if you don’t intend on spray painting them later*
4. Work your way around the chair. We found that the paint would not soak in quickly enough in certain spots so dripping would occur. Use a paper towel to rub away the drips.
Remove the legs to easily spray paint, let dry and reattach.That’s it! Let the chair dry for a few hours before sitting or placing any pillows.


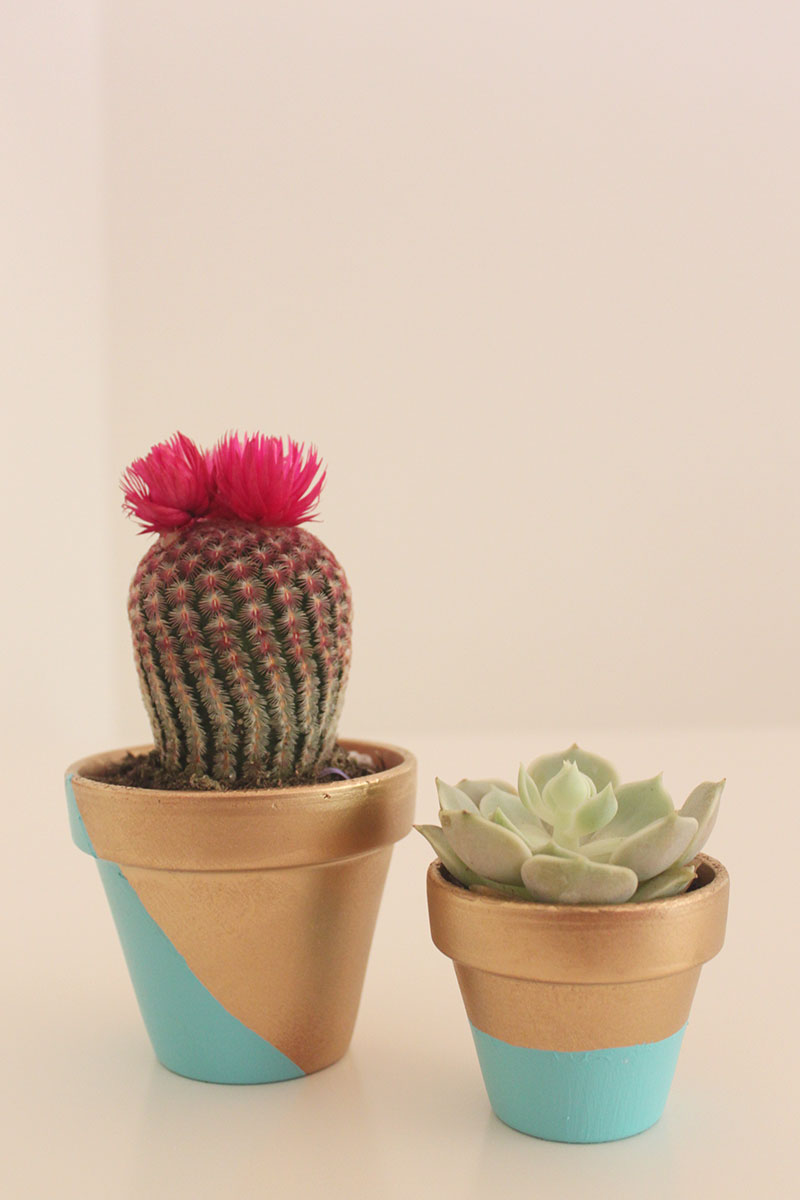
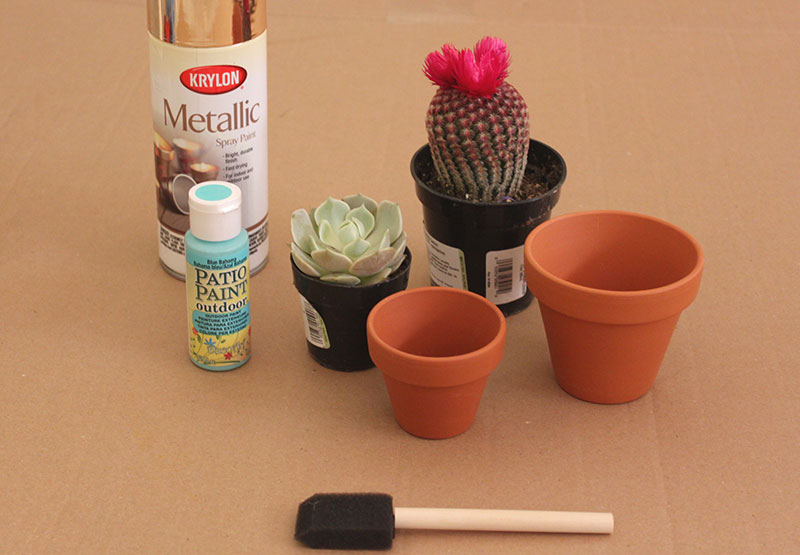
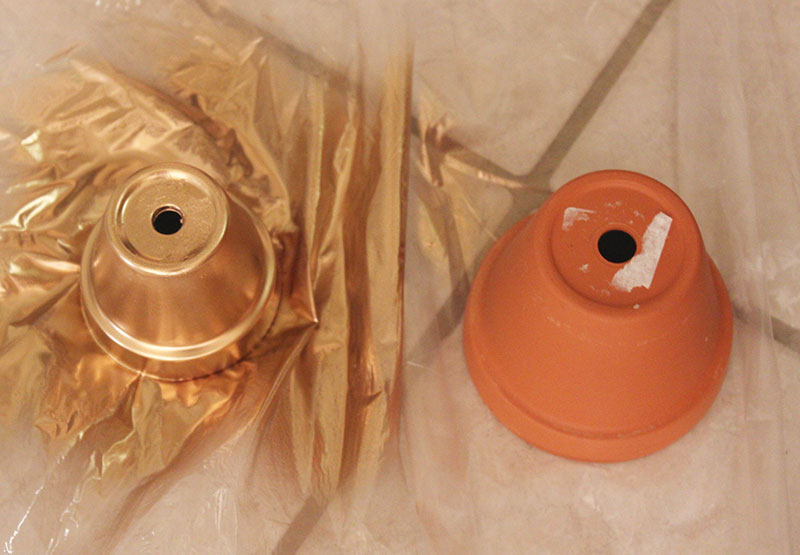 1. Start by spray painting the pots. Let them dry.
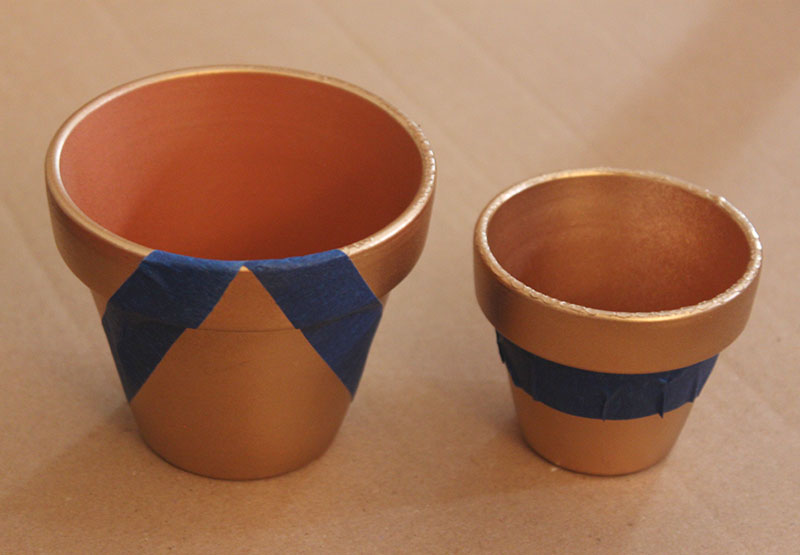 2. Using painters tape, tape off the section you want to paint.
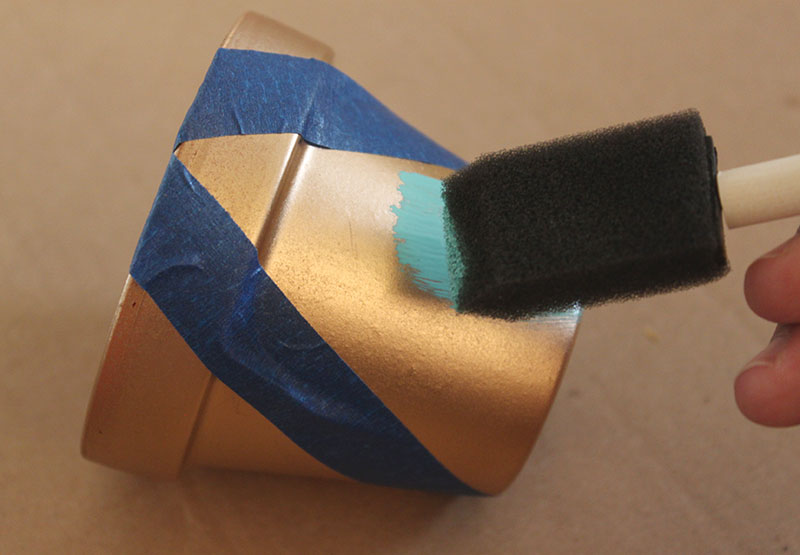 3. Paint the taped off section. I did two coats.
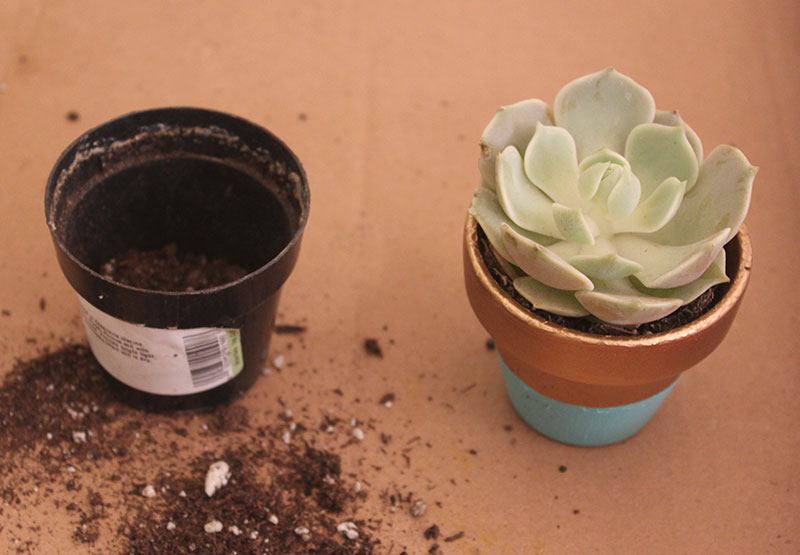 4. Transfer your plant to your painted pot.
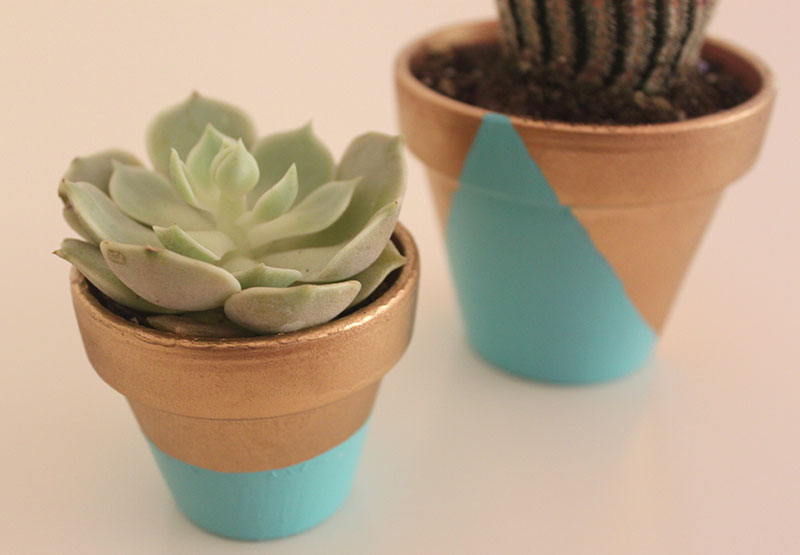 And you’re done!
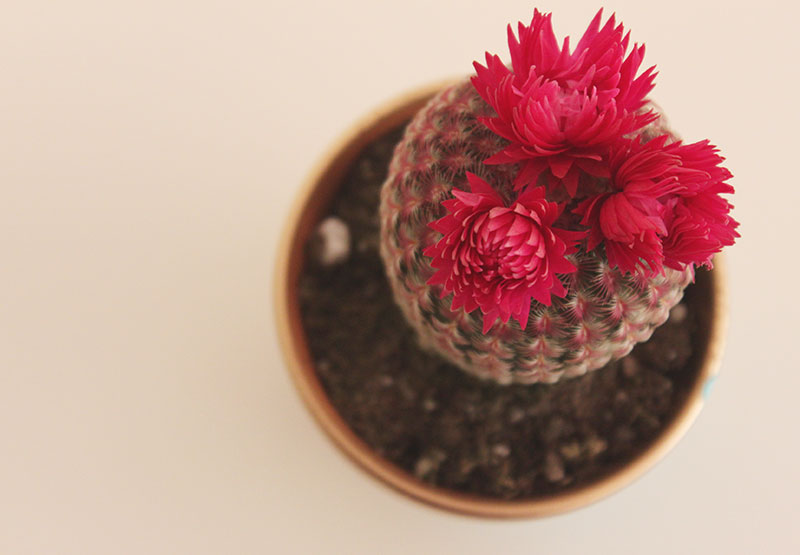 *How cute is this cactus?*