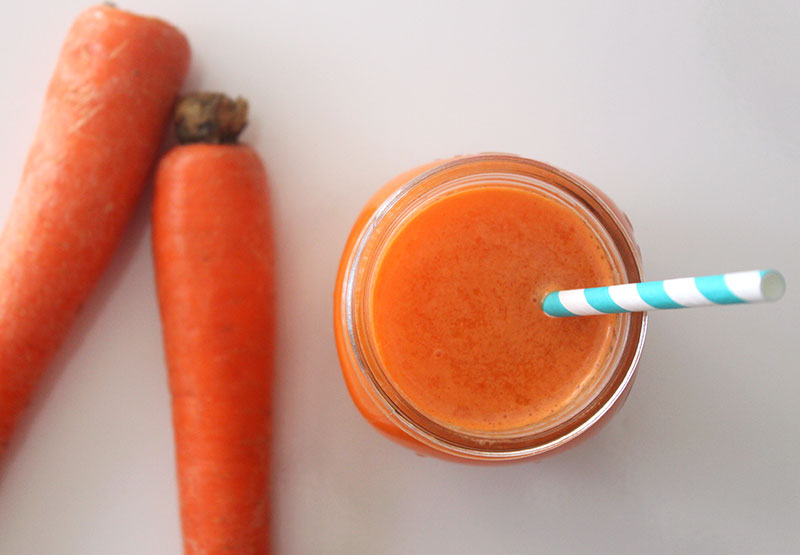
I’m pretty spoiled in the juicing department. My parents make sure I get my daily serving of vegetables with a green juice every morning. This time however, I was craving a simple and refreshing carrot juice. I also wanted something sweeter so I decided to add pineapples and mangoes. It was the perfect combination. Though I wouldn’t drink this everyday because of the natural sugars, it is perfect for a warm day!
I used about 6-8 carrots, a whole mango, and half a pineapple, all diced and thrown in the juicer.
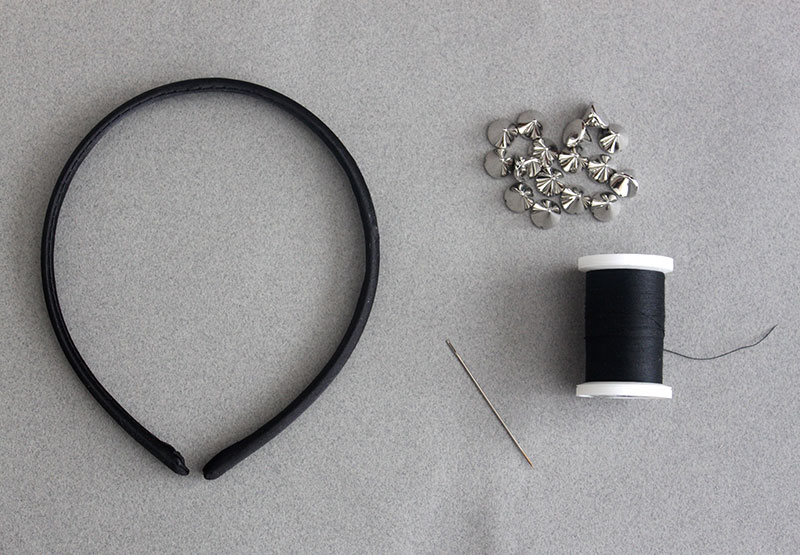
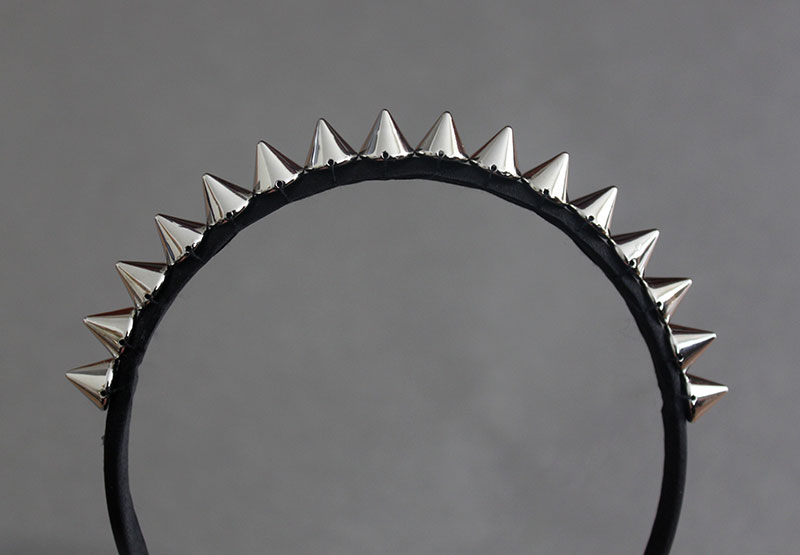
I feel as though I’ve been living in headbands lately. My job as a cake decorator requires me to wear my hair pulled back at all times. My refusal to wake up earlier in the mornings usually means I quickly pull my hair back in a messy bun. When my hair is particularly unruly, I throw on a headband. My hair accessories were definitely in need of some updating, and what better way than with a studded headband? Now my messy buns can at least have some edge!
Materials:
-fabric covered headband
-sew on studs (I got mine at A.C. Moore)
-sewing needle & matching thread
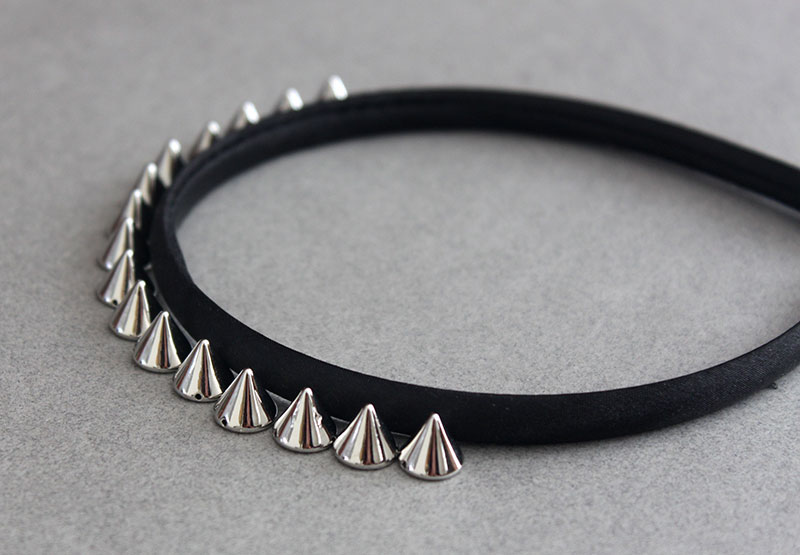
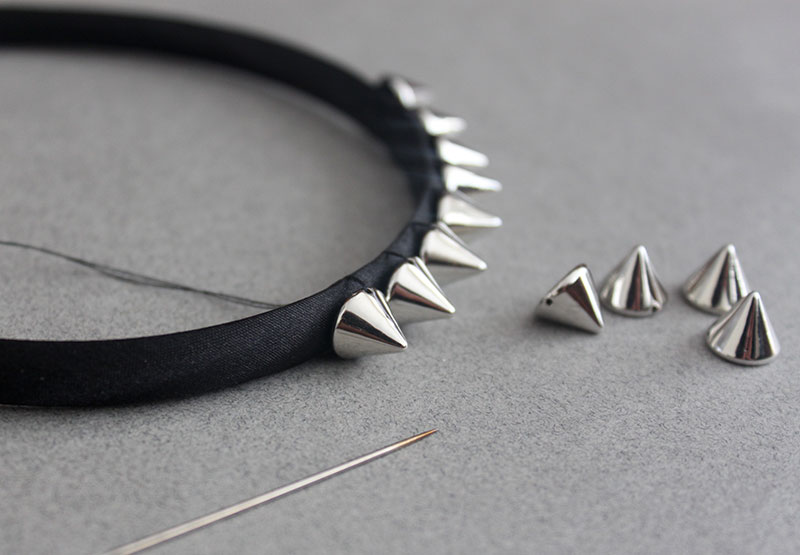
1. Decide how many studs you want to add to your headband by arranging them alongside your headband.
2. Cut a piece of thread that is about twice the length of the headband. Start sewing on the stud one by one. Sew into the cloth of the headband, and then through the stud.
3. Continue sewing the studs to the headband until you reach the end.
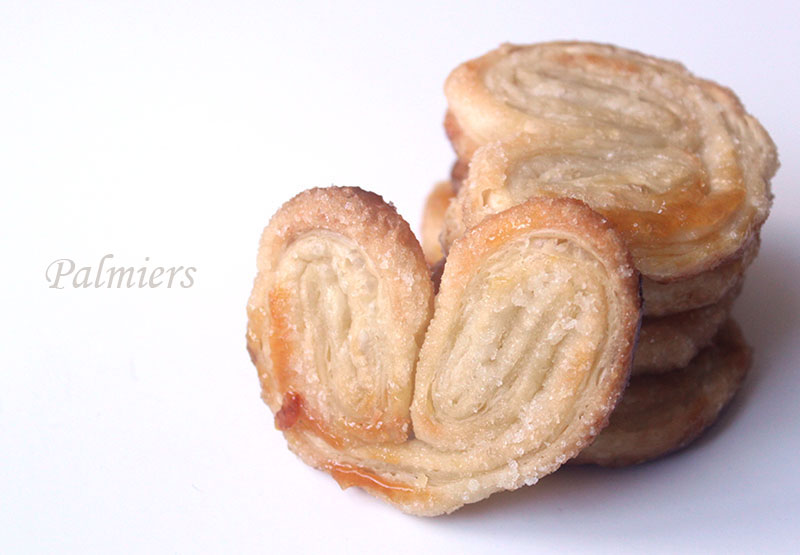
Palmier, elephant ear, corazón…whatever you call them, these cookies were a staple from my childhood. I would almost always pick out an oversized palmier to enjoy all by myself. I don’t know how these cookies aren’t more popular. They’re made from a puff pastry similar to a croissant dough (minus the yeast) and are the perfect amount of sweet and flaky. Just typing this reminds me of why I wanted to make these so badly! Though technically I am a pastry school grad, I cheated and bought puff pastry instead of making it myself. I do recommend buying a quality brand of puff pastry as it could make all the difference!
Recipe
Ingredients
– 1 sheet frozen all butter puff pastry (I used Dufour brand. *Seriously, it’s the best!*)
– 1/2 cup -3/4 cup granulated sugar
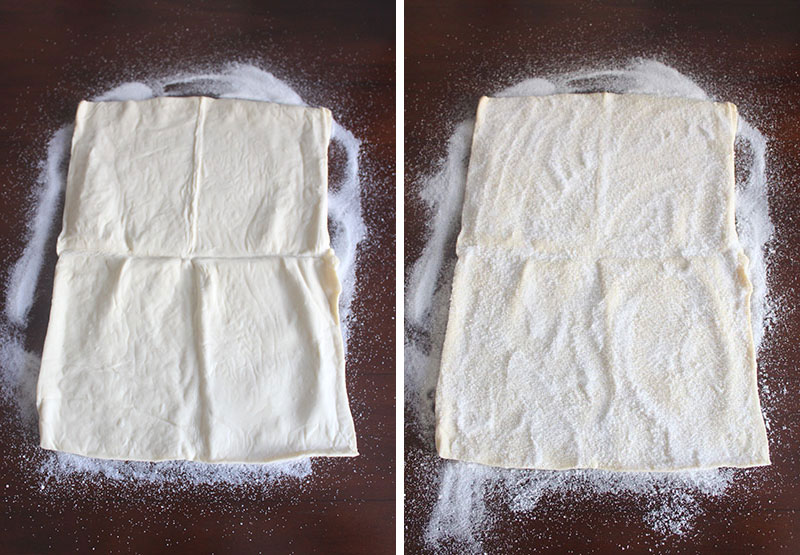
Measure out your granulated sugar. I started with about 1/2 cup. Pour half of the sugar onto a clean work surface. Unfold the thawed puff pastry and place it directly onto the sugar. Sprinkle the top of the puff pastry with the remaining sugar, adding more until the top is evenly and generously covered.
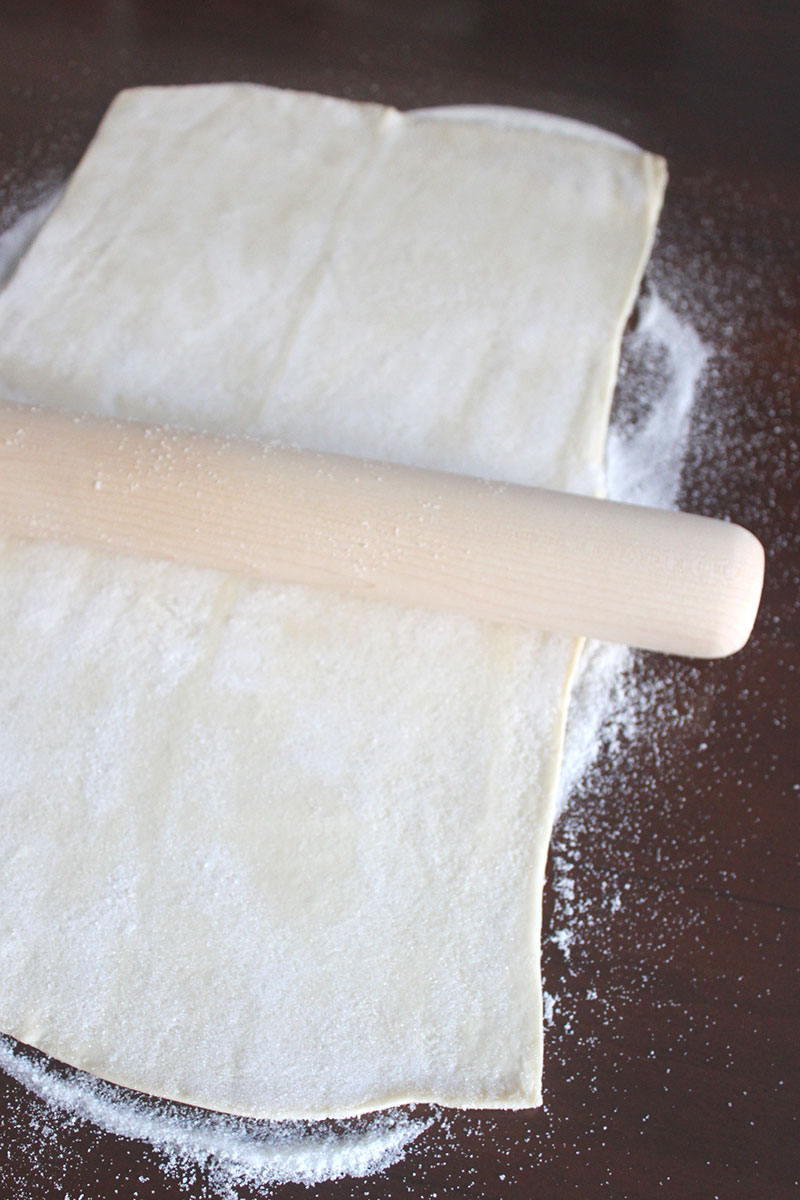
Gently roll out the puff pastry to press the sugar into the dough.
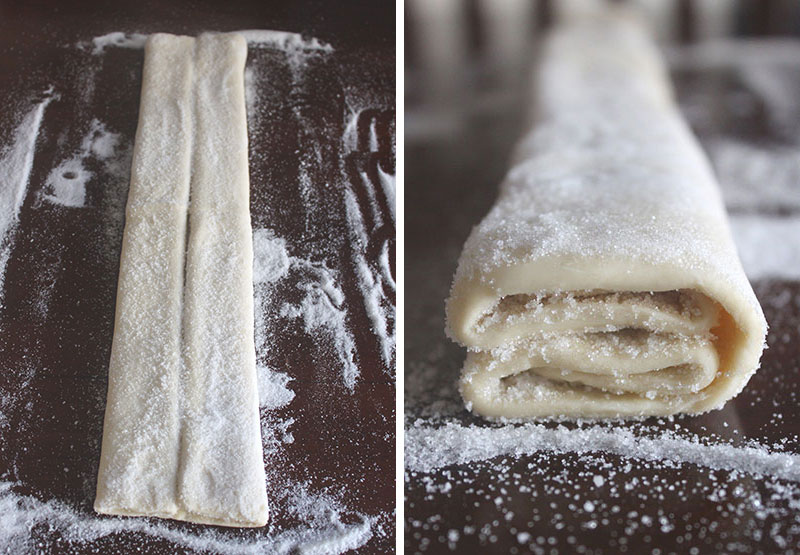
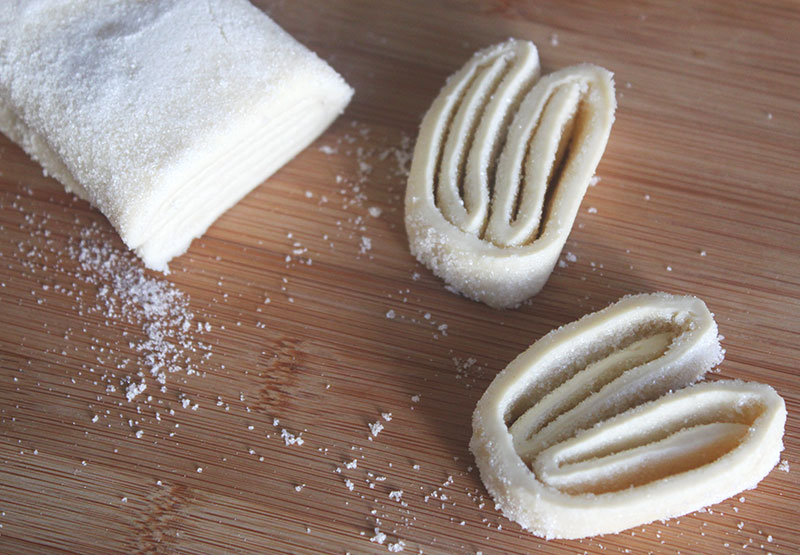
Now comes the rolling or the folding. You can either fold the puff pastry into quarters until you get a heart shape, or you can roll the dough from the outside edges in. I’ve found that folding gives me taller and narrow palmiers, while rolling gives me shorter and wider cookies. It’s all about personal preference! Wrap the folded log in plastic and refrigerate for about thirty minutes to an hour, or until cold.
Remove dough from the fridge and slice into cookies roughly 1/2 inch thick.
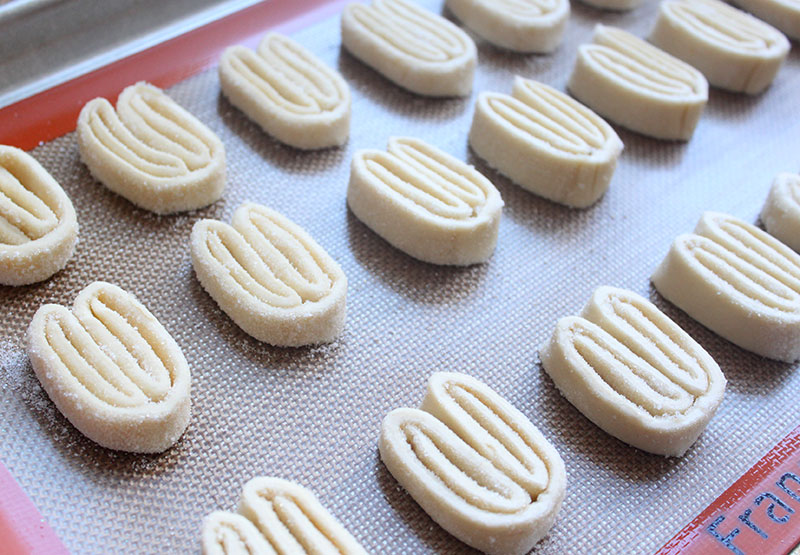
Arrange cookies onto lined baking sheet. Bake in 400 degree F oven for 15 minutes or until golden brown.
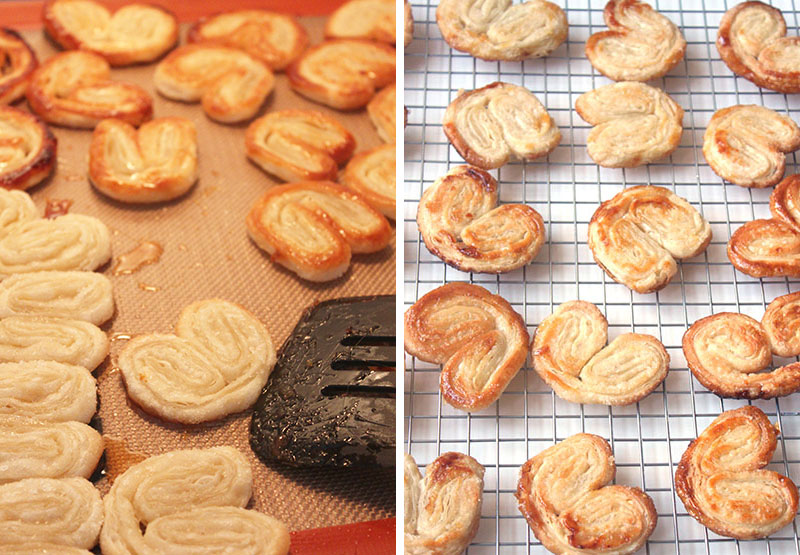
Halfway through baking, flip the cookies so they brown on both sides. Remove cookies from the oven and allow to cool slightly before transferring to a wire cooling rack.
Perfection. I won’t even say how many I ate as they came out of the oven!
One of the goals on my 26 before 26 list is to build a piece of furniture. After watching The Mindy Project, and scrolling through these behind-the-scenes photos, I had to have a new headboard. I love how elegant upholstered and tufted headboards look. The only downside of them is the price tag…yikes! Though I’ll probably wait until the summer to start the project, I couldn’t help but put together some inspiration for different DIY headboards!
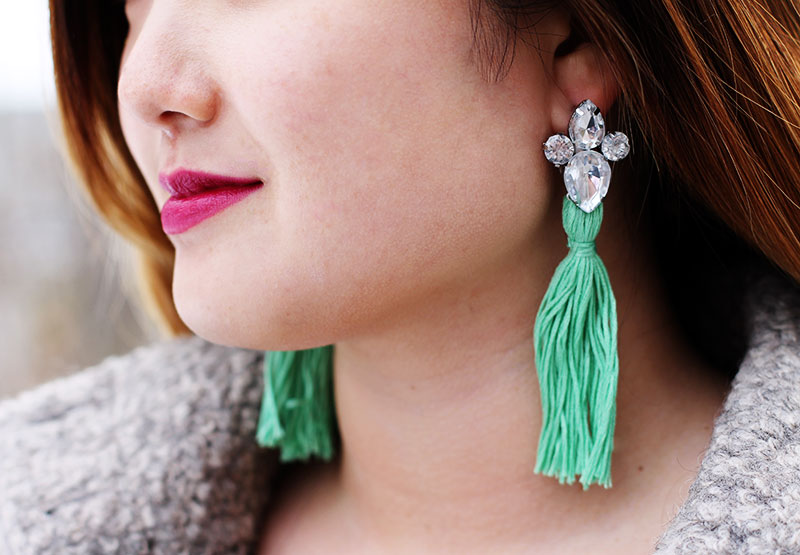
So much of my DIY inspiration comes from seeing something and instantly saying “I could totally make that!” That’s what happened when I saw these neon tassel earrings on Pinterest. Instead of a bright neon, I went with a more subtle seafoam green. Though I wish I had chosen a thinner style of thread, I still love the way this project turned out!
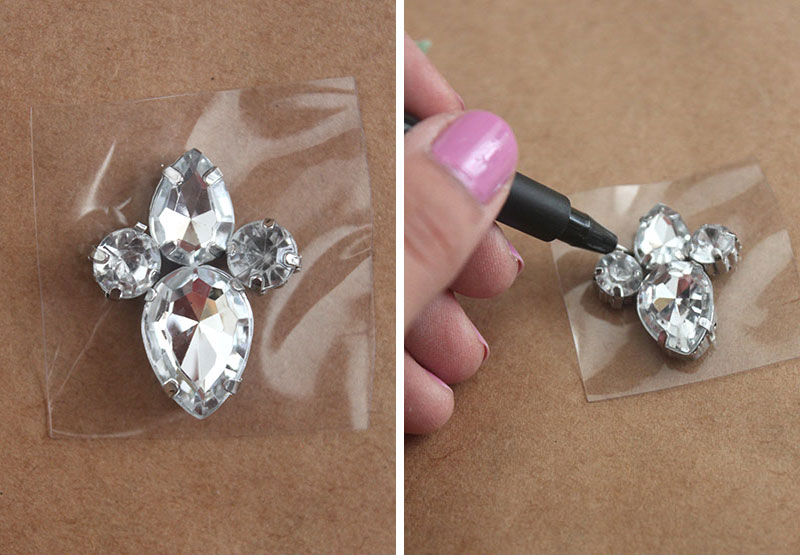
1. Arrange the rhinestones into a simple pattern overtop of the clear vinyl. Trace the pattern with the marker.
2. Cut out the traced pattern on the vinyl. Next, glue the two largest rhinestones to each other.
3. Glue the attached rhinestones to the piece of vinyl. Add the additional rhinestones to complete the pattern.
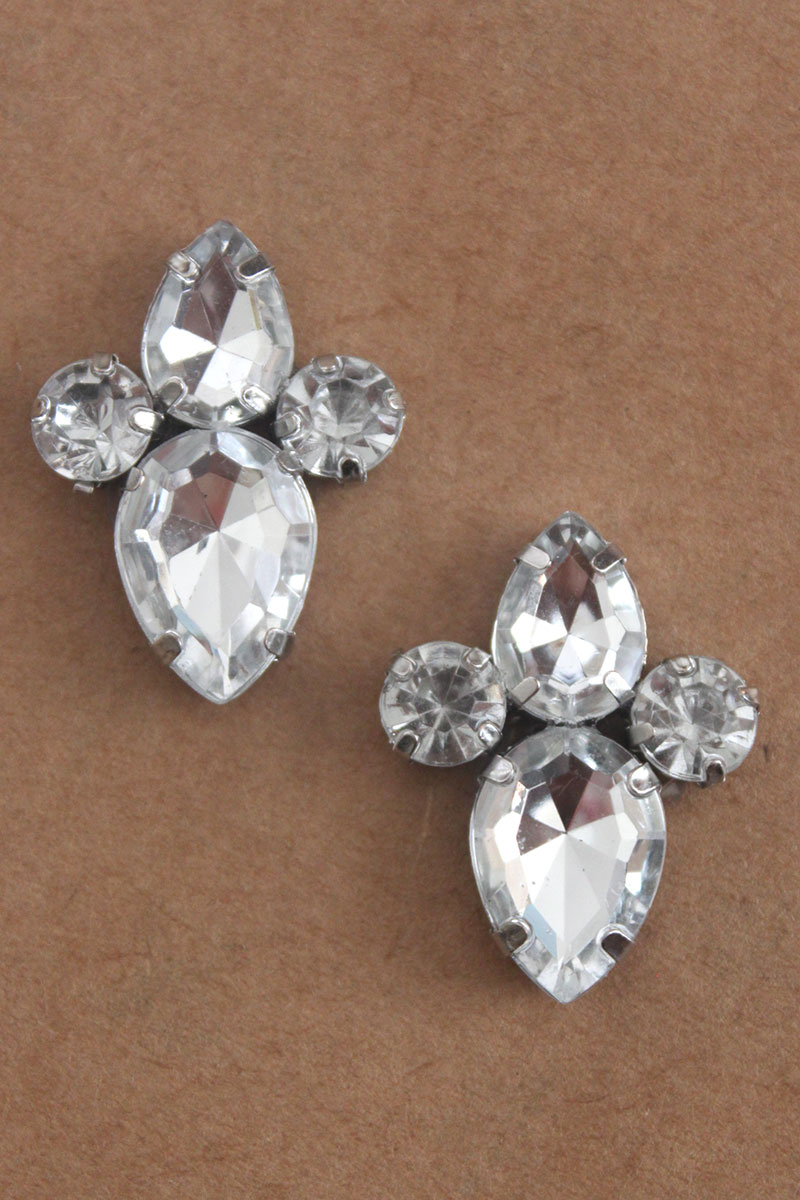
4. Repeat steps 1-3 until you have two identical rhinestone pieces.
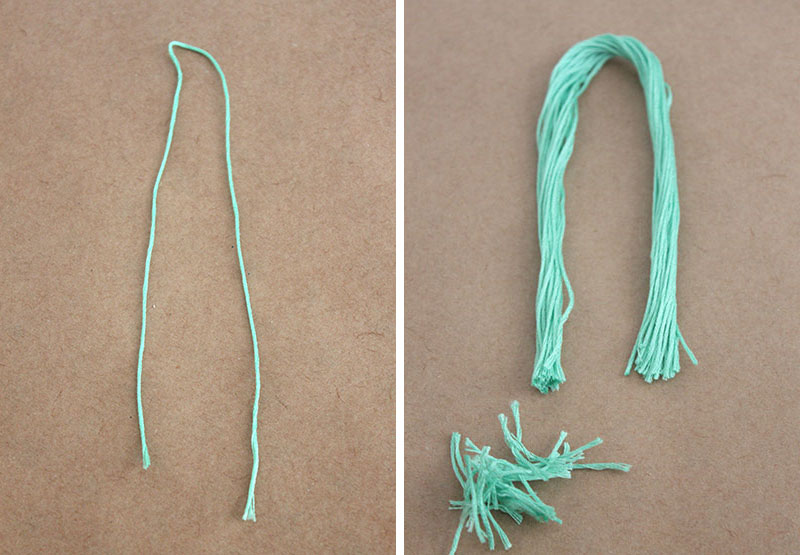
5. Cut a piece of embroidery thread to a length longer than you want for the earrings. Continue adding embroidery thread in the same length.
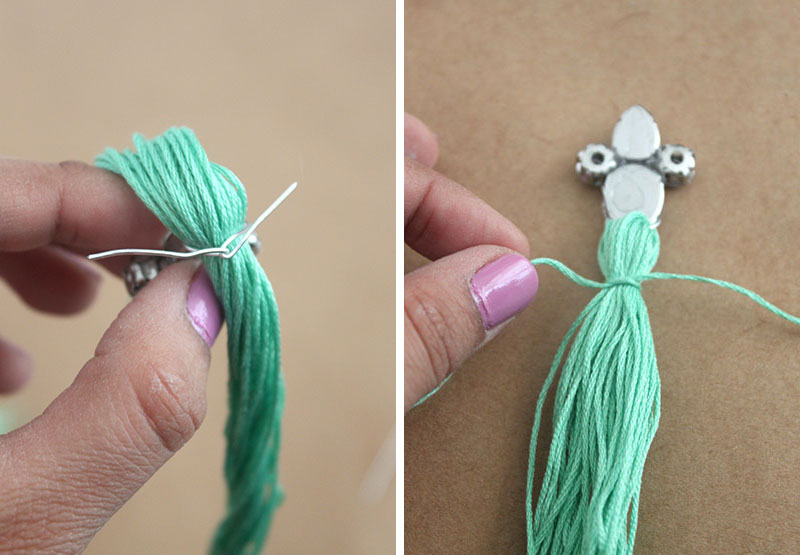
6. Cut a small piece of wire and hook it through the bottom rhinestone piece. Bring the ends of the wire together to make a small loop. Insert the thread pieces through the wire.
7. Secure the thread in place by twisting the end of the wire. Trim the excess wire with a pair of cutters. To make the tassel shape, wrap a piece of thread around the top of the gathered thread pieces. (Similar to this tutorial)
8. Glue earring backs to the top rhinestone piece on your earrings. Let them dry fully before wearing. And voila! Beautiful rhinestone tassel earrings!!


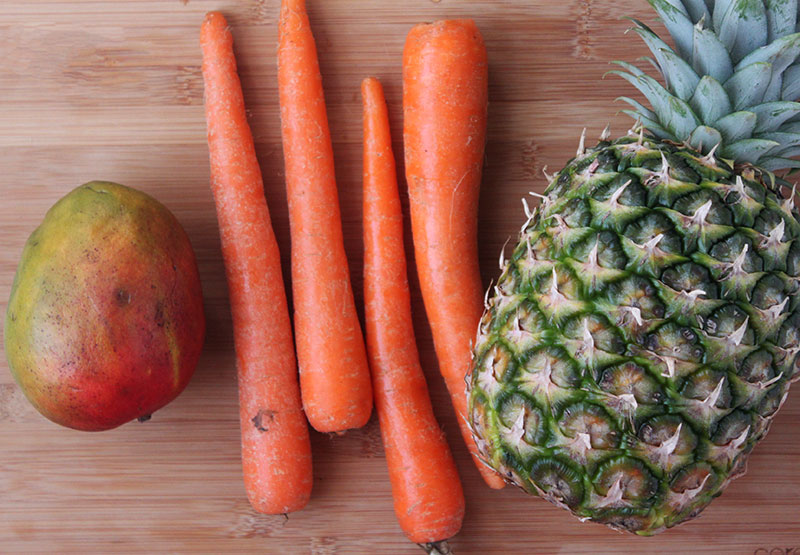 I used about 6-8 carrots, a whole mango, and half a pineapple, all diced and thrown in the juicer.
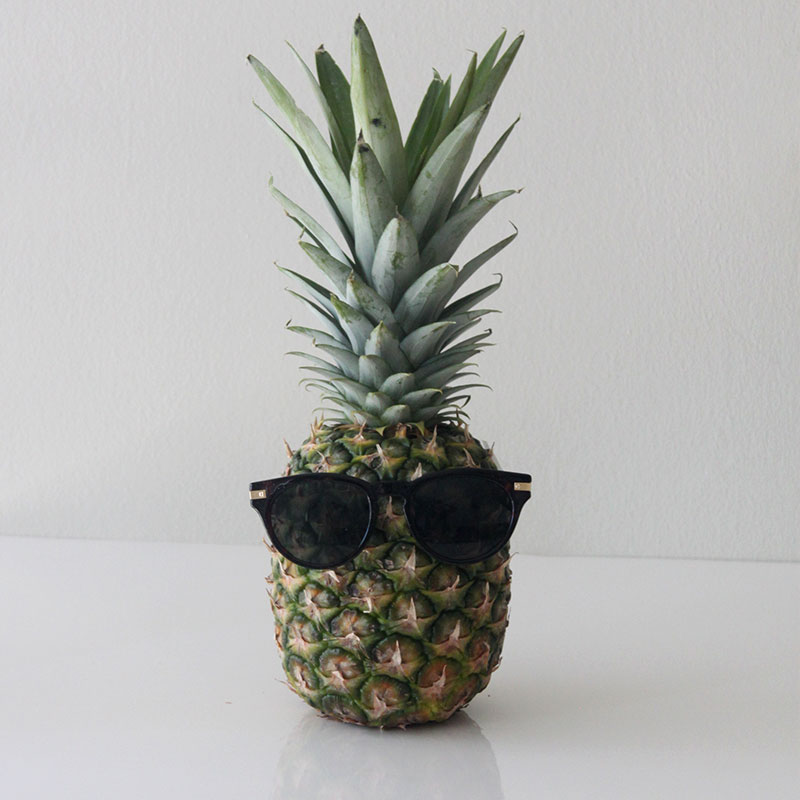 *Take a break to play with your food!*
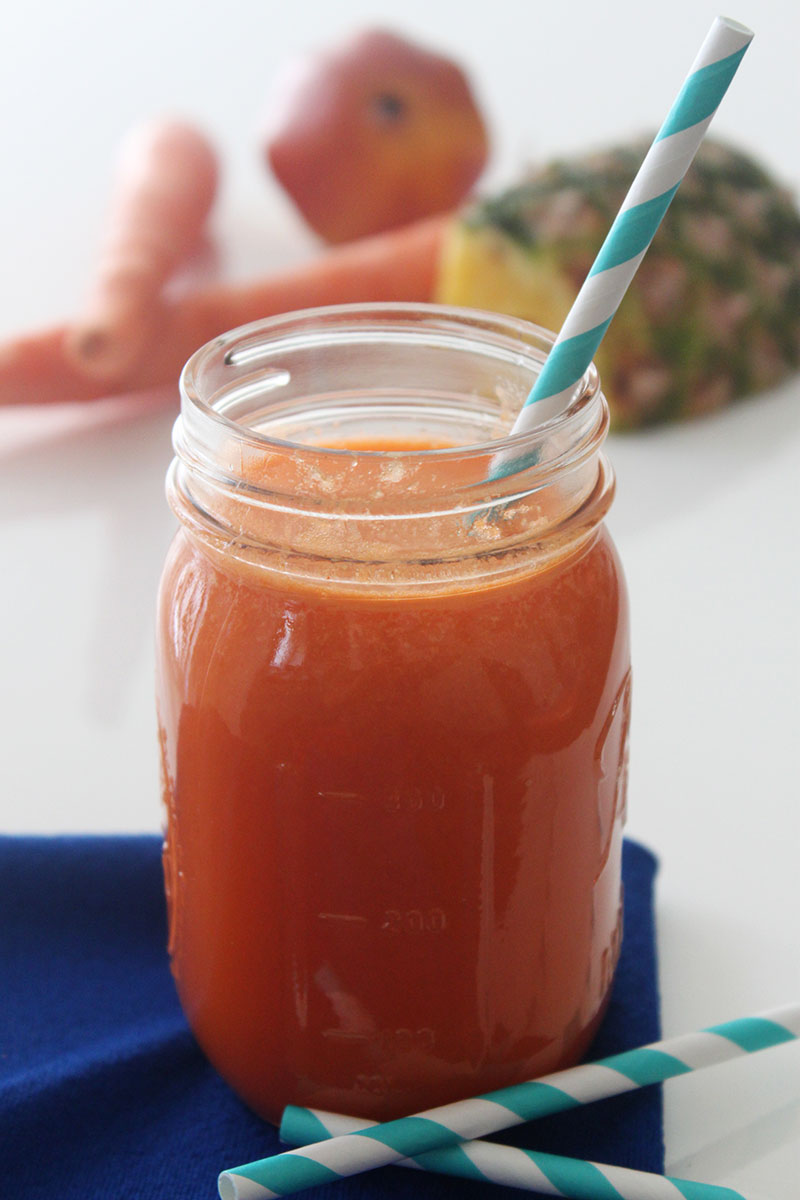 Seriously, so good!