DIY Gold Foil State Print
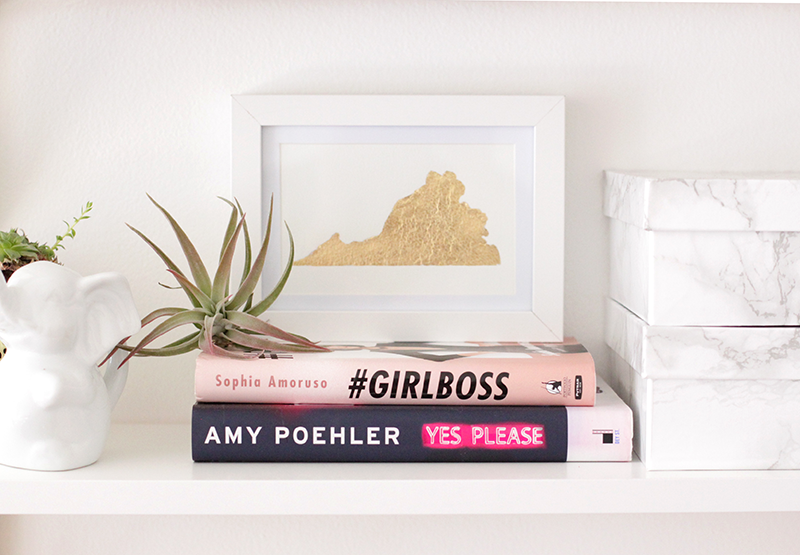
If you follow my blog, you already know I’m in the process of making over my bedroom. I recently installed a few gold bracket shelves after writing this post. I wanted some art to style my shelves and was really inspired by my latest post on gold foil prints. I’ve seen some state prints online and loved the idea!
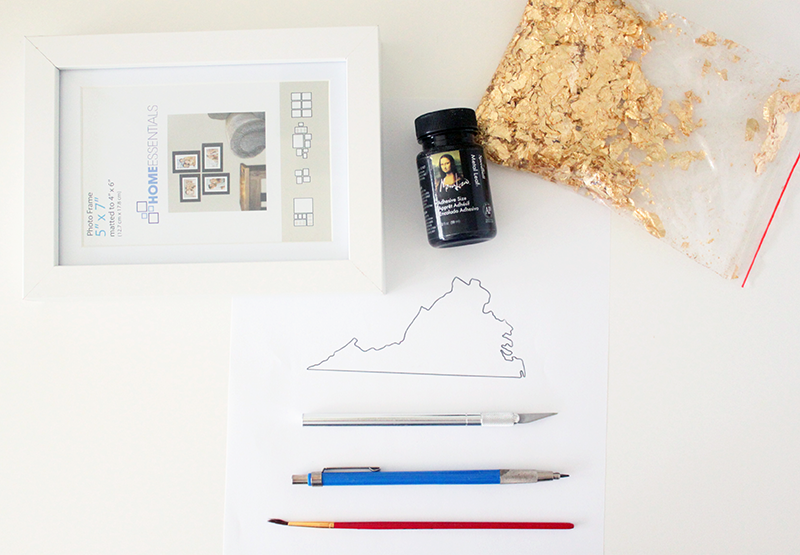 You need:
-Gold Foil and Adhesive
-Paintbrush
-Paper and Pencil
-Xacto Knife
-Frame
 1. Print out a picture of your state sized to fit your frame. (If you have a printer that lets you print on a high weight paper, feel free to skip the next few steps!)

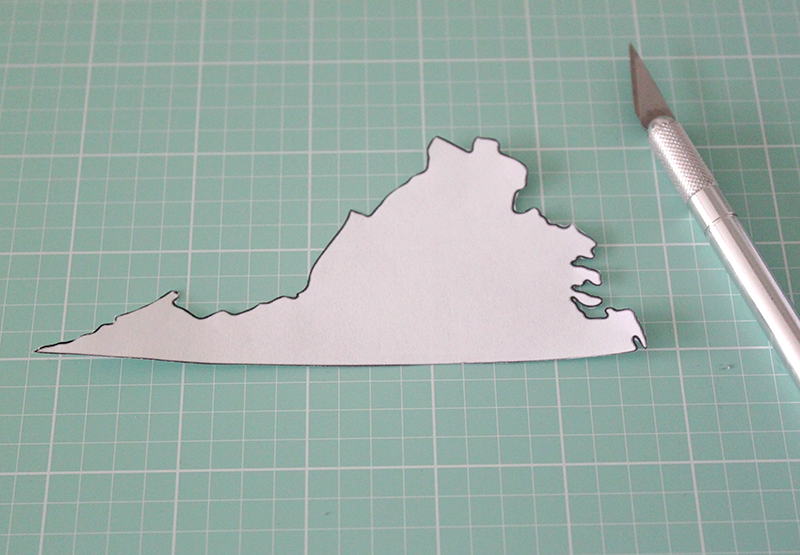 2. Using an Xacto knife, cut out the state.
 3. Cut out a piece of heavy weight paper (I used watercolor paper) to fit your frame. Place the cut out state in the center of your paper and tape it down for extra hold.
 4. Lightly trace around the state.
 5. Using a small paintbrush, paint around the outline of the state. Then fill in the rest of the state completely covering in the gold leaf adhesive. Normally you would let the adhesive dry about 30 minutes, but because of the texture of the paper, I only wait about 15 minutes.
 6. Once the adhesive is set, work quickly to adhere the gold leaf.
 7. If some of the adhesive dried before the gold leaf could adhere, just go back and add more adhesive and gold leaf to fill in the spaces.
 8. Once you have completely filled the state with gold leaf, use a larger brush to get rid of any excess gold leaf and refine the state’s edges.

 And you’re done!

One Comment