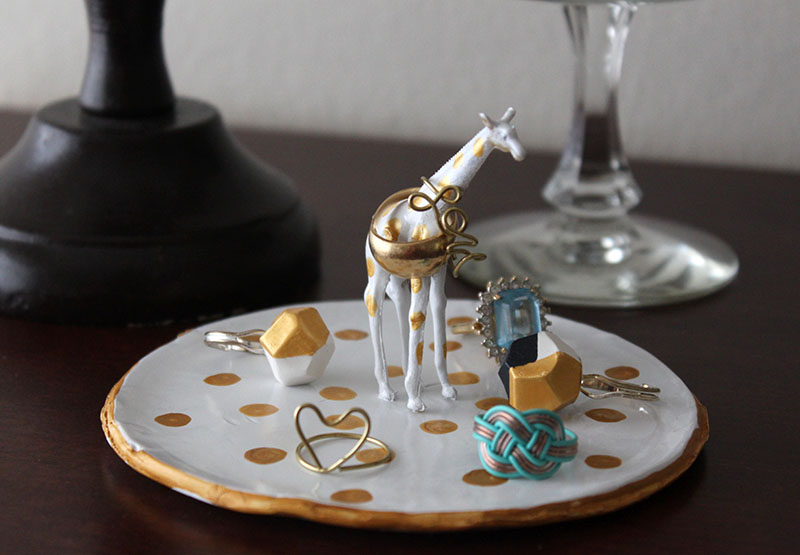
I love this DIY Ring Dish. The base is made out of polymer clay, one of my favorite materials to work with. It’s cheap, easy to use and oh so versatile. I bought a pack of plastic animals at Michaels, and decided on the giraffe. The long neck is perfect for holding multiple rings.
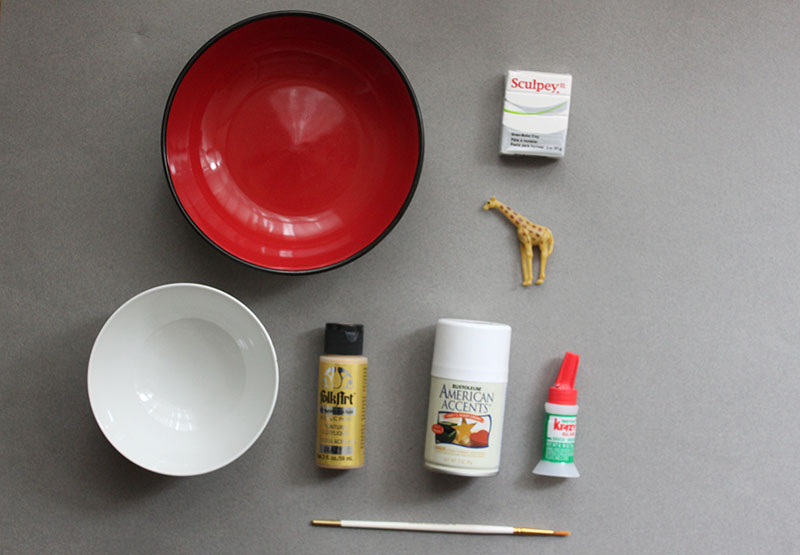
You will need:
– Oven bake Polymer Clay
– Plastic Giraffe
– Spray Paint
– Acrylic Paint
– Paint Brush
– Two different sized bowls
– Super glue
– Sand Paper
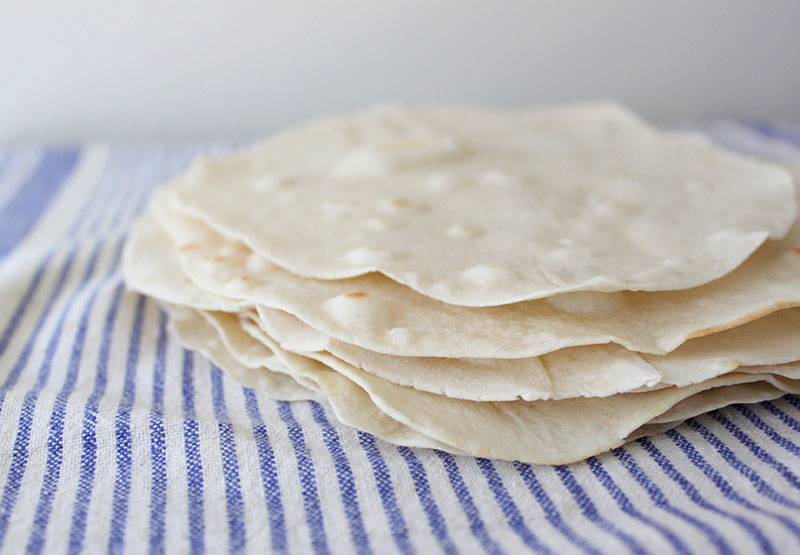
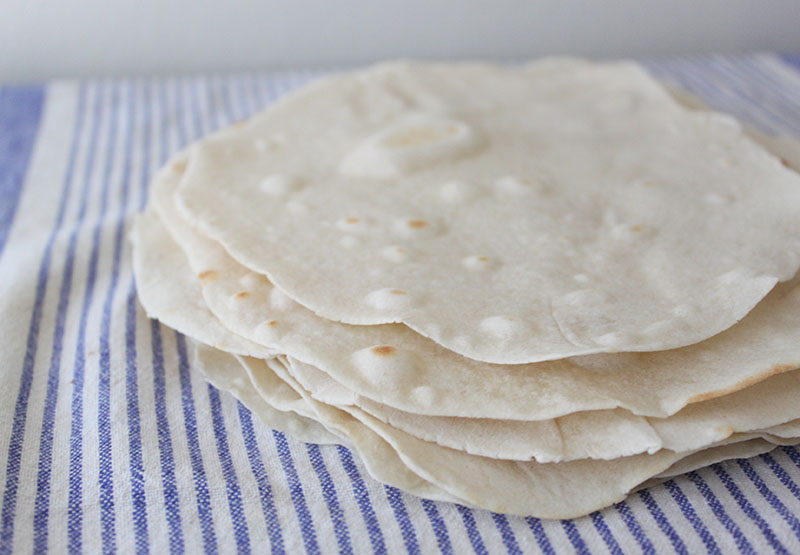
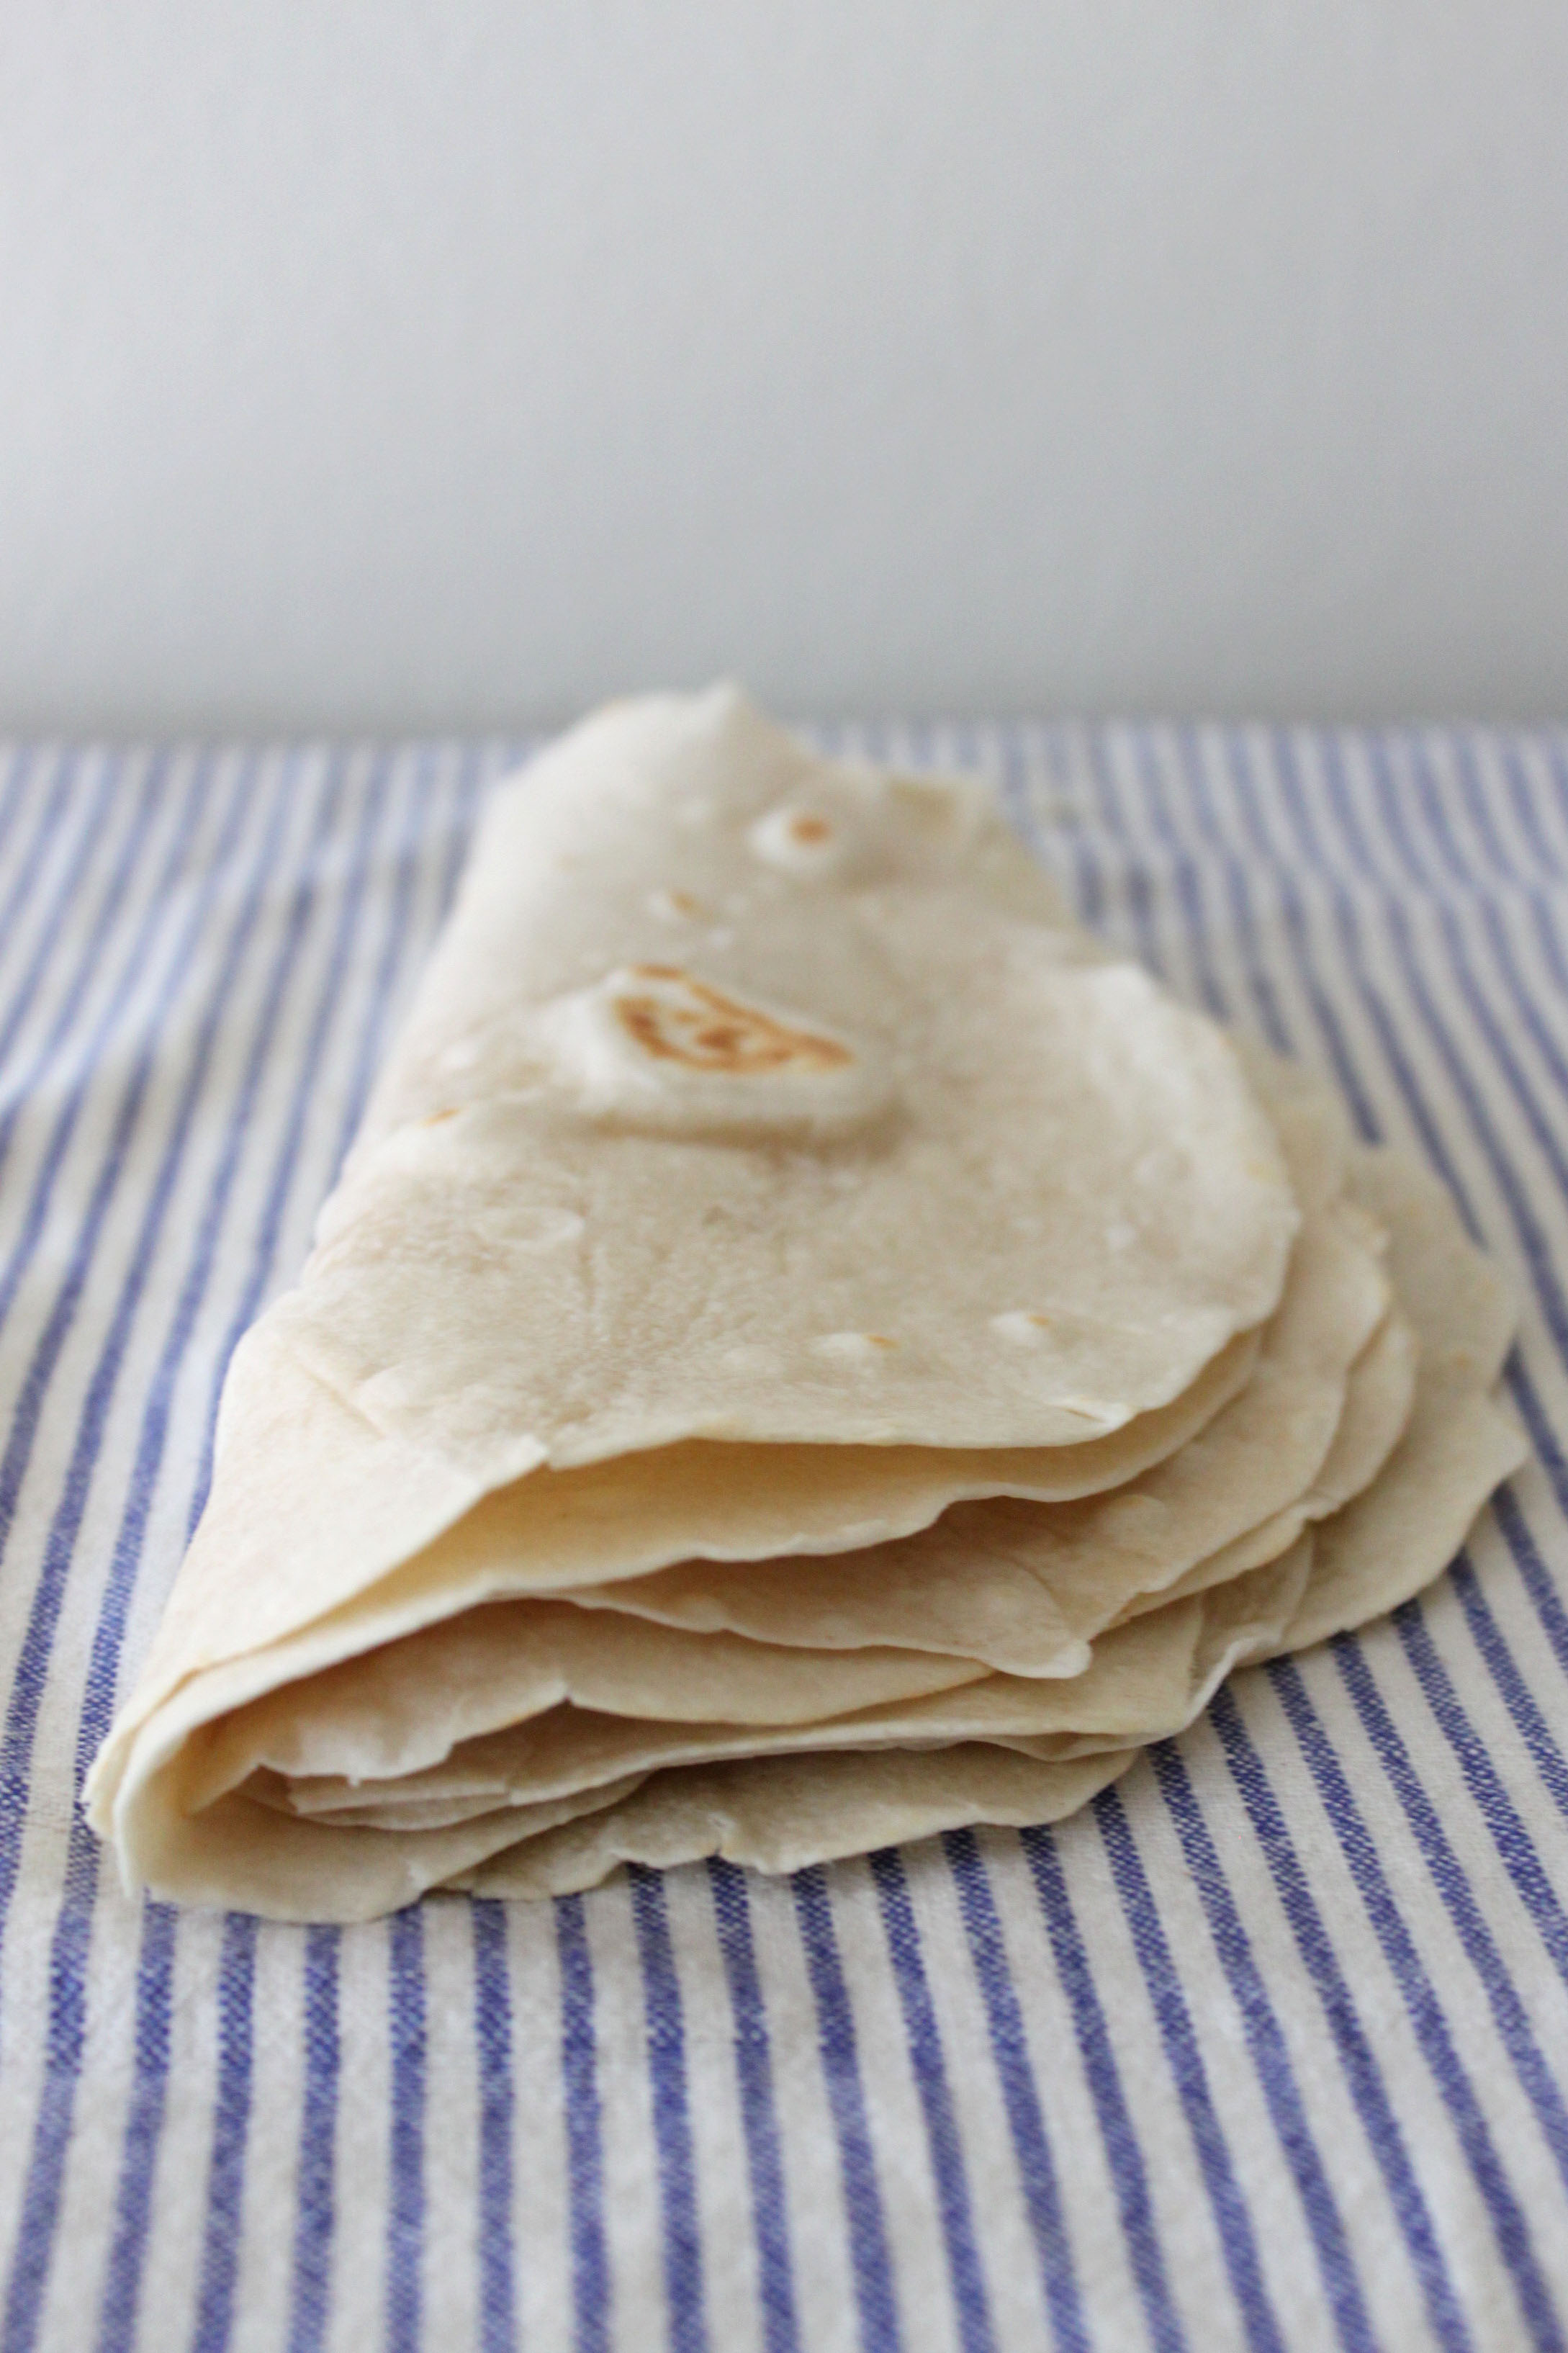
Cinco de Mayo is right around the corner! I wanted to cook something in the spirit of the holiday and settled on tortillas. Luckily, I had all the ingredients on hand as the recipe doesn’t call for much. These came out great! They were the perfect balance of soft and chewy on the inside and crispy on the out.
Ingredients:
1 3/4 cups all-purpose flour
1/4 teaspoon salt
1/2 teaspoon baking powder
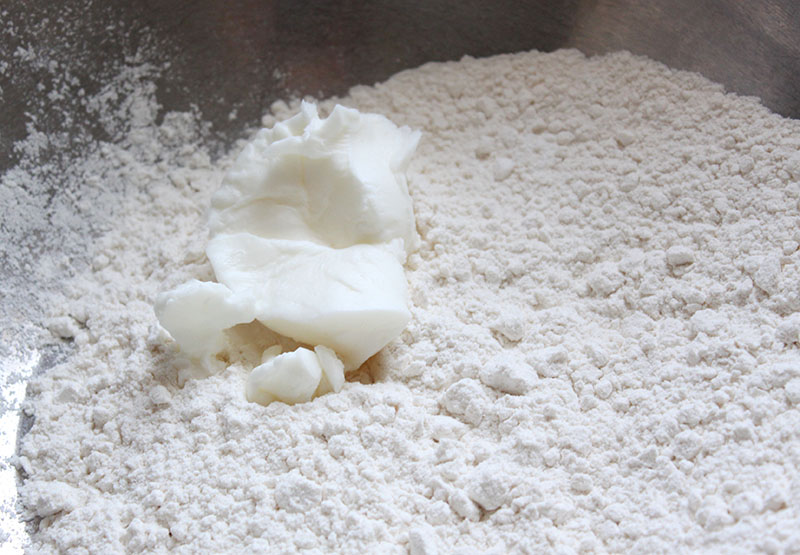
1/4 cup shortening
1/2 cup lukewarm water
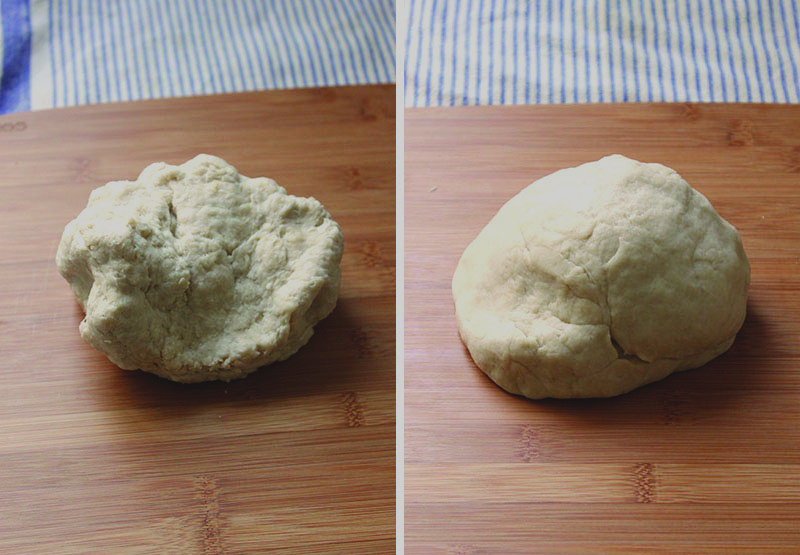
Using a fork, mix the flour, salt and baking powder. Using your hand or a pastry cutter, cut the shortening into the flour mixture until there are no big lumps of shortening. Slowly add the water, using more or less as you need it. Make sure the dough is not too sticky.
After you have finished adding the water, knead the dough for about three minutes. Put the kneaded dough back in your bowl and cover with a tea towel. Let the dough sit for about 10 minutes.
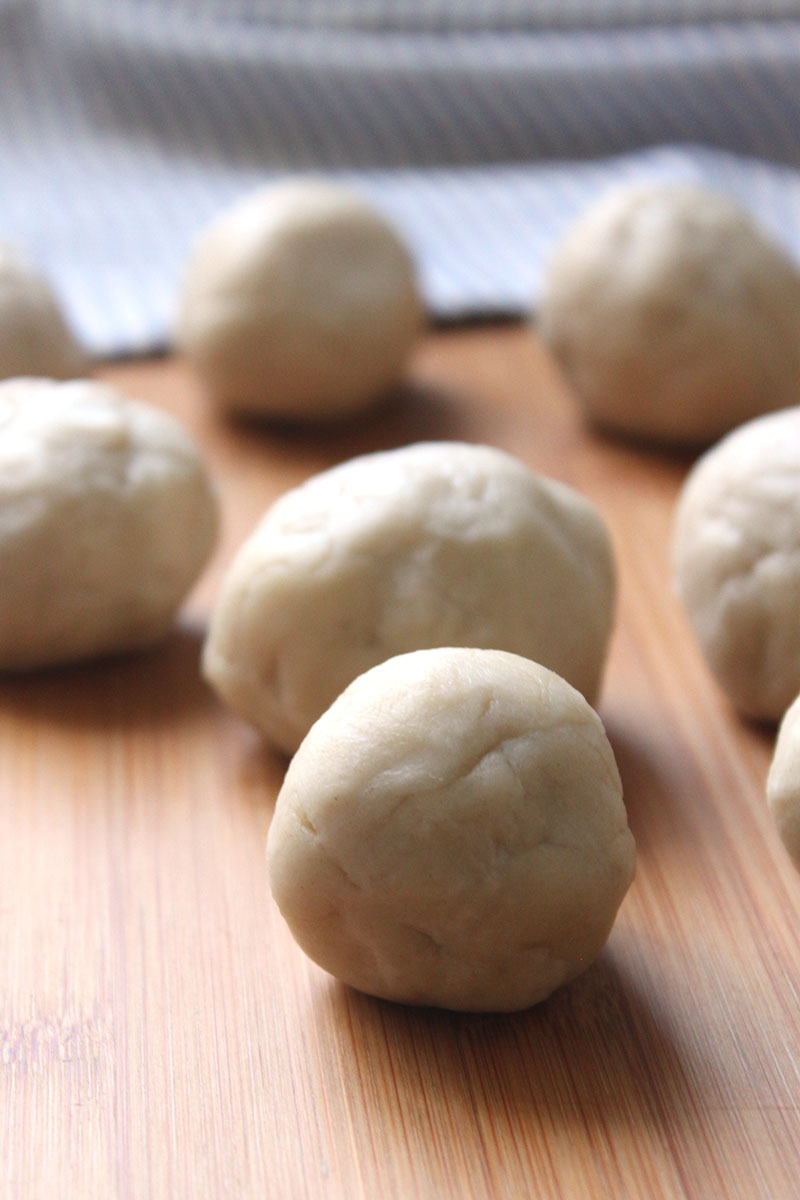
After the dough has sat for ten minutes, evenly separate it into balls.
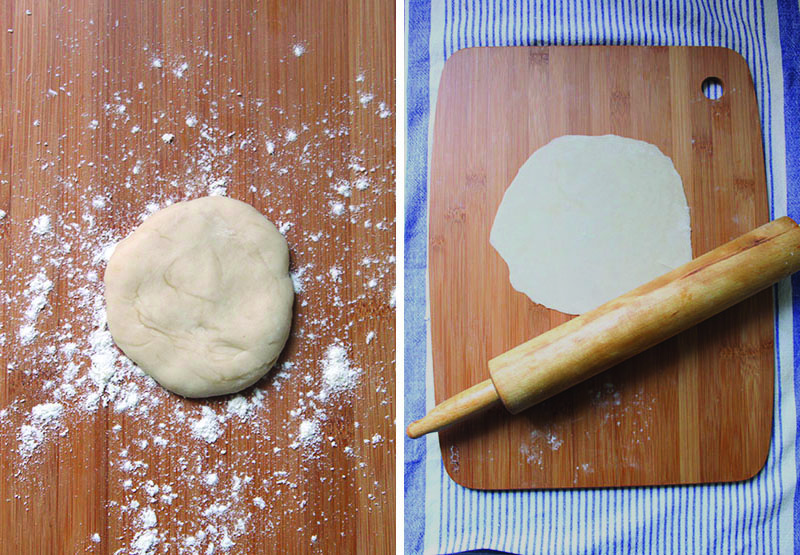
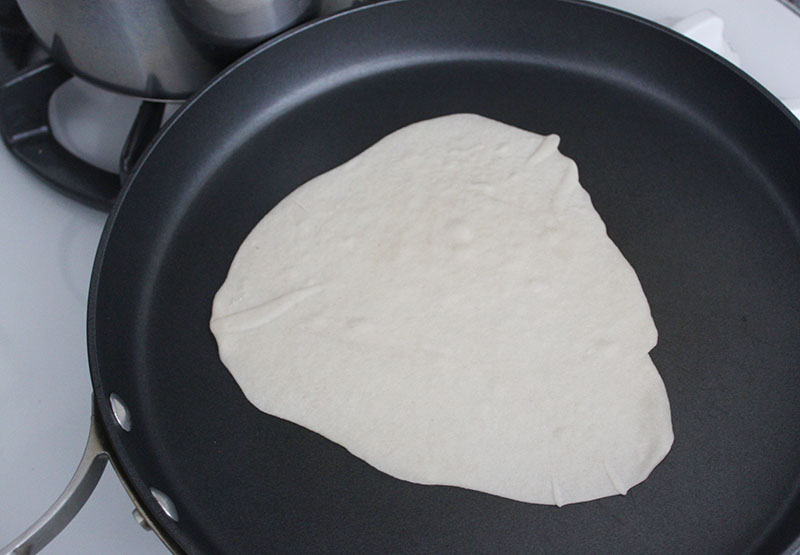
Flatten the ball with your hand and add flour to the work surface. Flatten the circle with a rolling pin to get a thin tortilla.
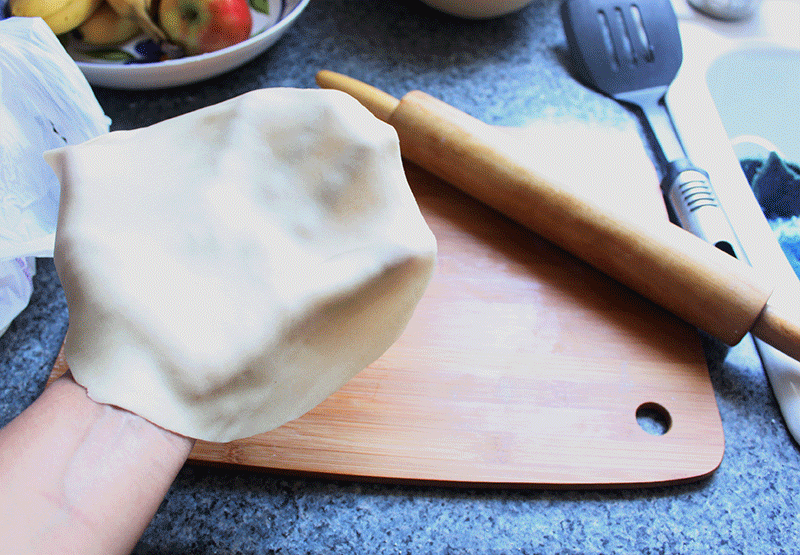
Slap the tortillas back and forth between your hands.
Heat a large pan on medium heat. Cook your tortillas for 15-20 seconds on each side.
Make some quesadillas, or do like I did and make some breakfast burritos!
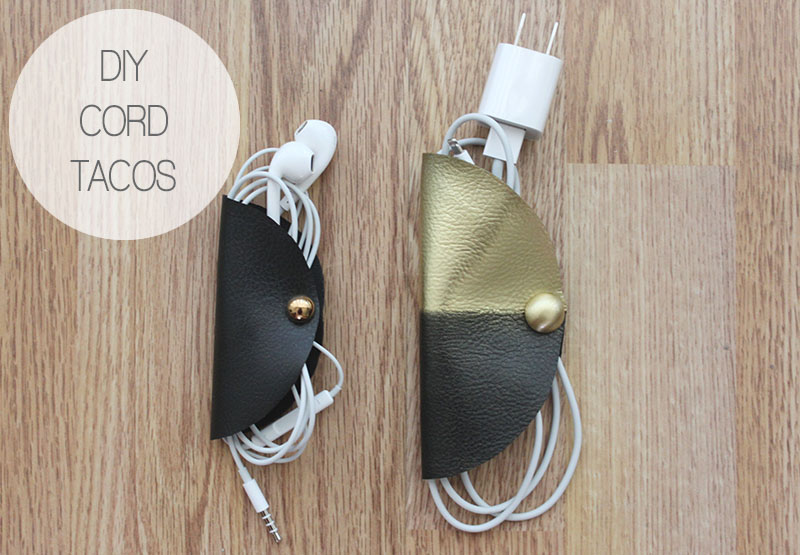
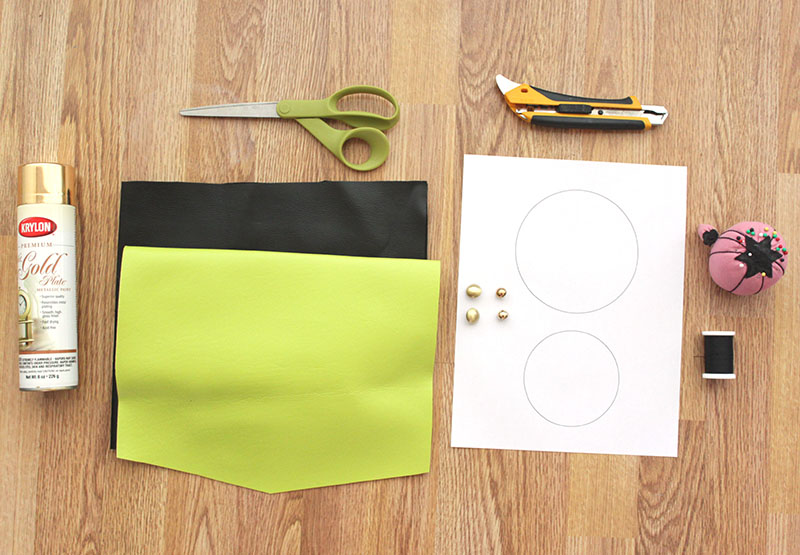
No matter how hard I try, my earbuds always end up tangled. I wanted something simple to carry them in, that would prevent the dreaded tangles problem. Hence, the cord taco. Super simple to make and customize. In a bigger size, it works for phone chargers too!
You will need:
– Faux leather in the color of your choice
– Circle Template (print at full scale)
– Buttons
– Scissors
– Xacto Knife
– Needle and matching thread
– Spray Paint (optional)
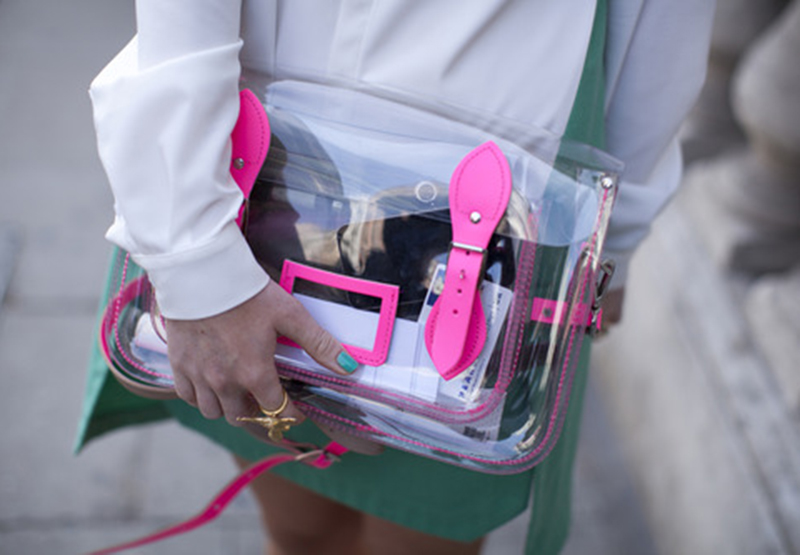
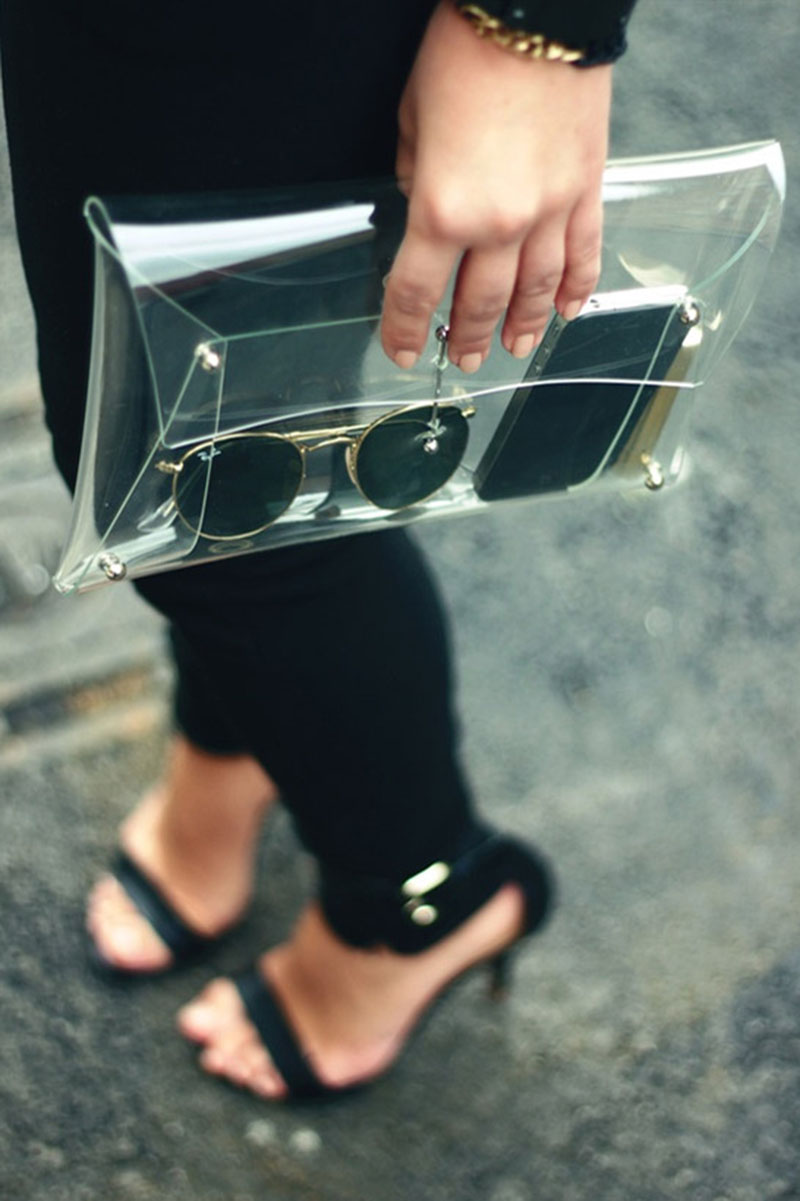
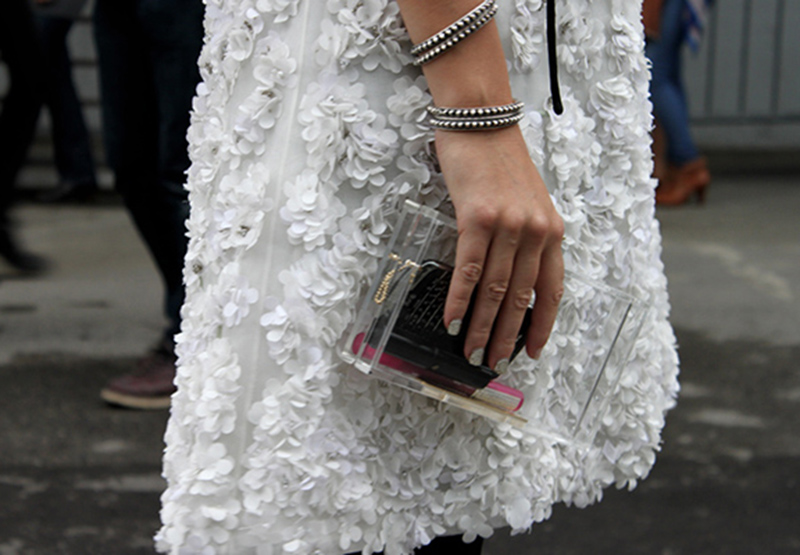
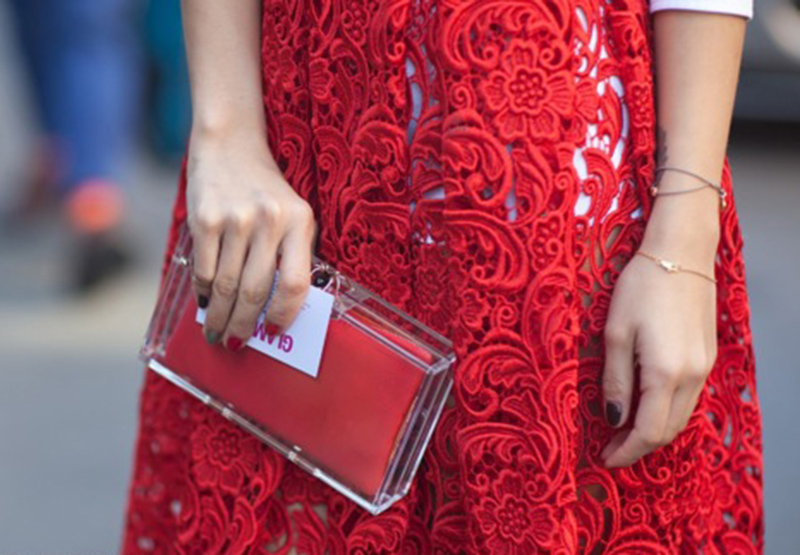
Lately, I’ve been obsessing over the clear clutch trend. On-one-hand, they’re fun, sleek and go with everything. On the other, they’re intrusive. It reminds me of the see-through backbacks people would carry in school. You could see everything! I usually never carry more than my wallet, phone and keys, so it wouldn’t be a big deal. It’s all about personal preference. There are different variations on the clear/transparent handbag trend. For example, the Christopher Kane Jelly Clutch that offers color and opacity. My personal favorite is the lucite clutch. You could easily change out the inner pouch for different looks, all while maintaining a sense of privacy.
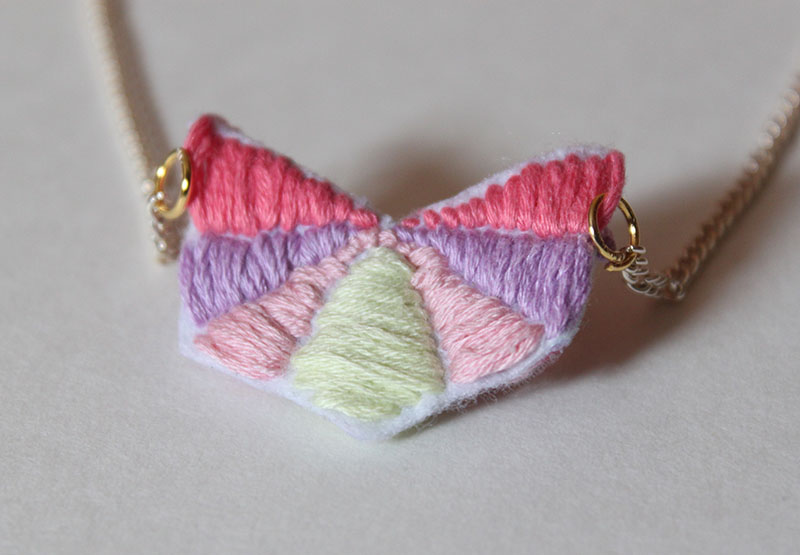
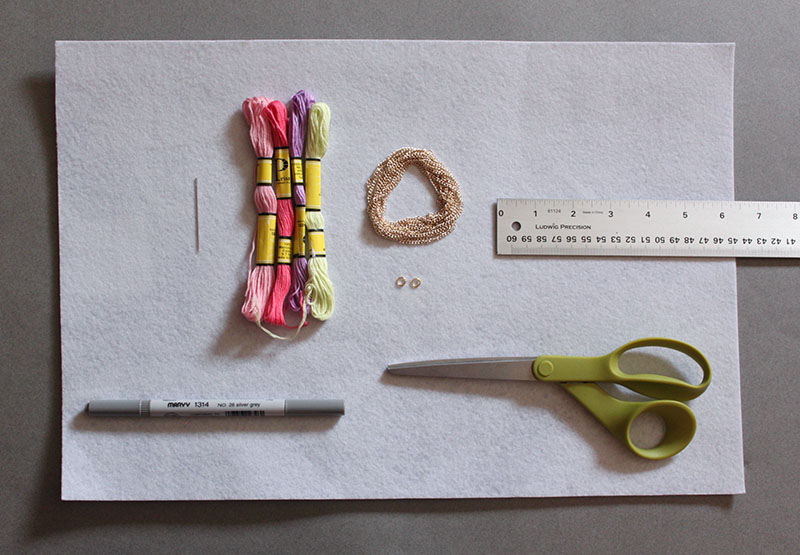
A few weeks ago I made a post about embroidered collars by the talented Lorena Marañón. Her work is incredibly intricate and colorful. She also makes beautiful pieces of jewelry which inspired me to try my hand at making an embroidered necklace. While nowhere close to the amazing work of Miss Marañón, I loved the way it turned out! Keep reading for the tutorial and see more of Marañón’s work here!


