Floral headpiece/crown/headband. Whatever you call them, they have been popping up all over the web. Alice + Olivia models wore them with the Fall 2013 collection. Vintage-inspired brides wear them to their whimsical and rustic weddings. No matter the occasion, floral headpieces are sure to add a touch of beauty and whimsy wherever you go!
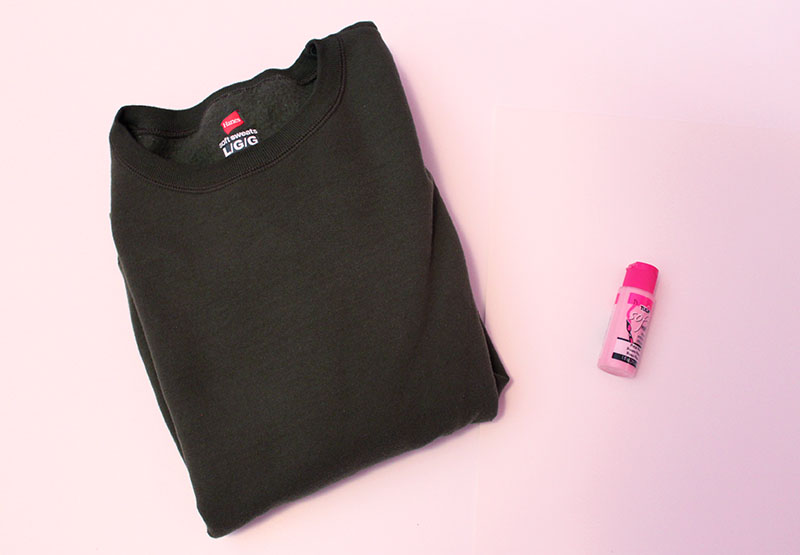
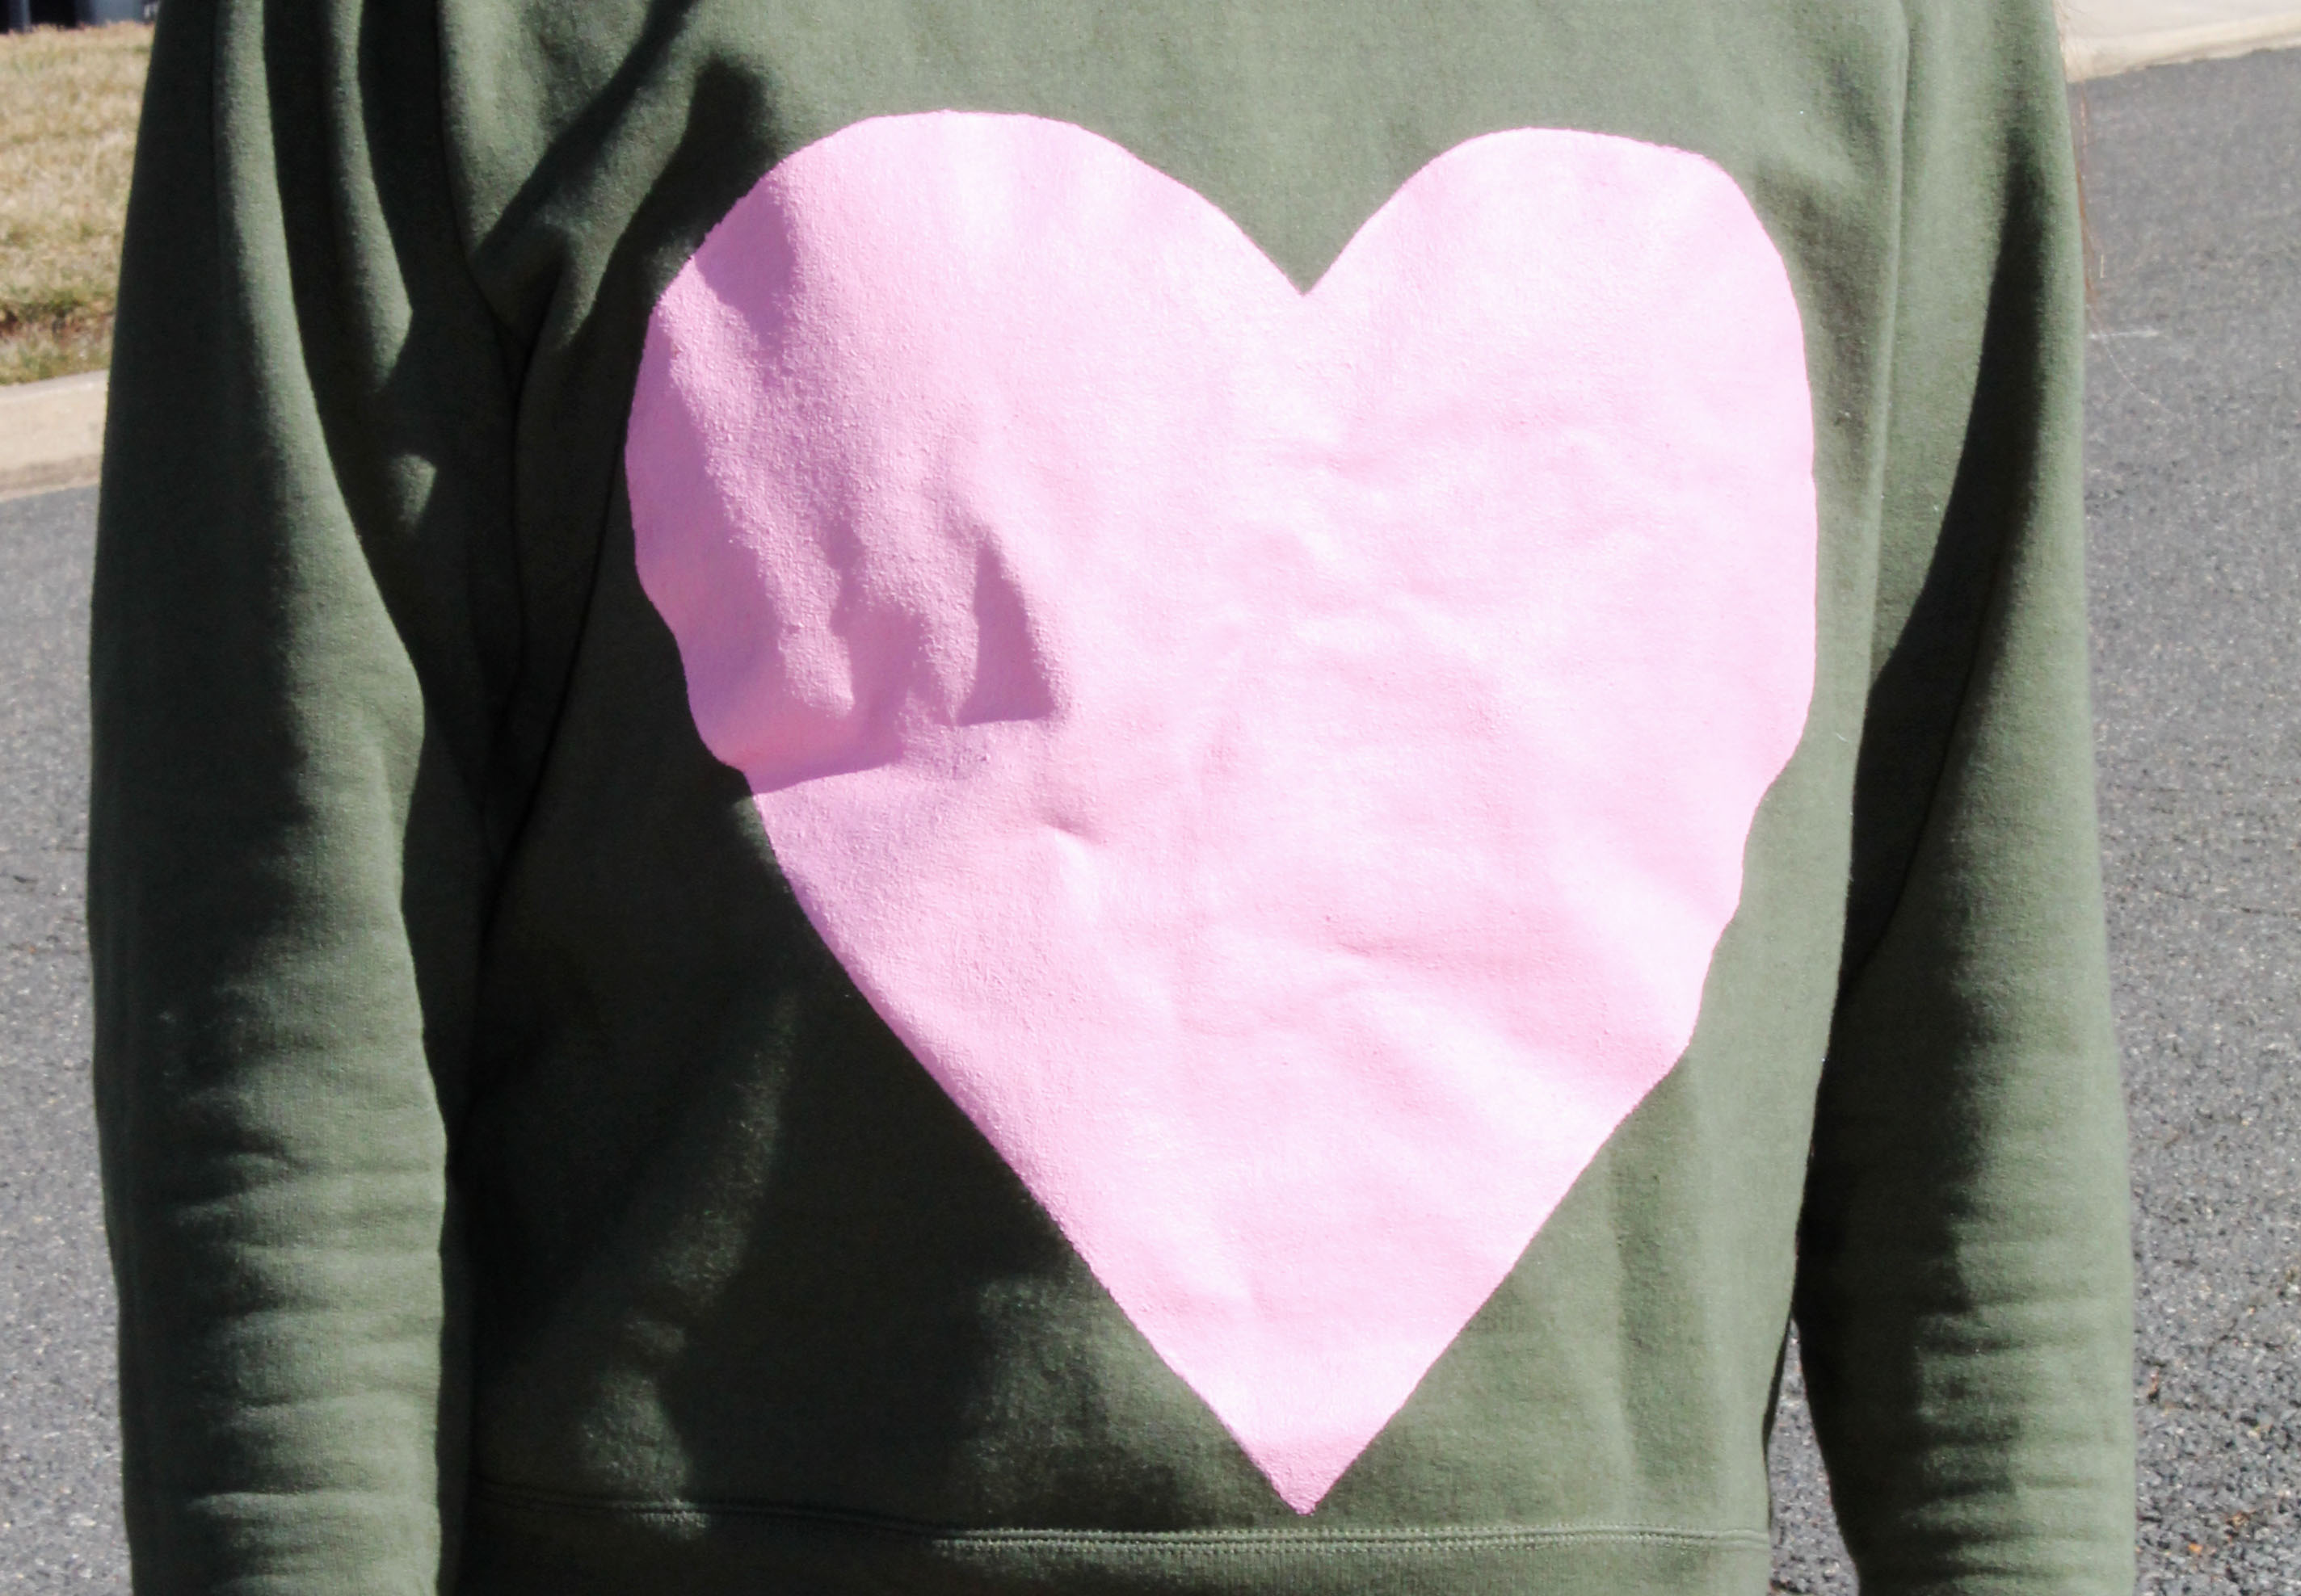
I bought this sweatshirt around Christmas time for another project that never got made. So, I decided to use it to mimic similar sweatshirts I had seen online. This was such a simple DIY! The longest part is waiting for the paint to dry. This heart sweatshirt is perfect for the month of February but I’ll definitely rock it all year long!
You will need:
– Sweatshirt
– Fabric Paint (I used Tulip Soft Matte in Petal Pink)
– Paintbrush
– Poster board
-Scissors
– Marker
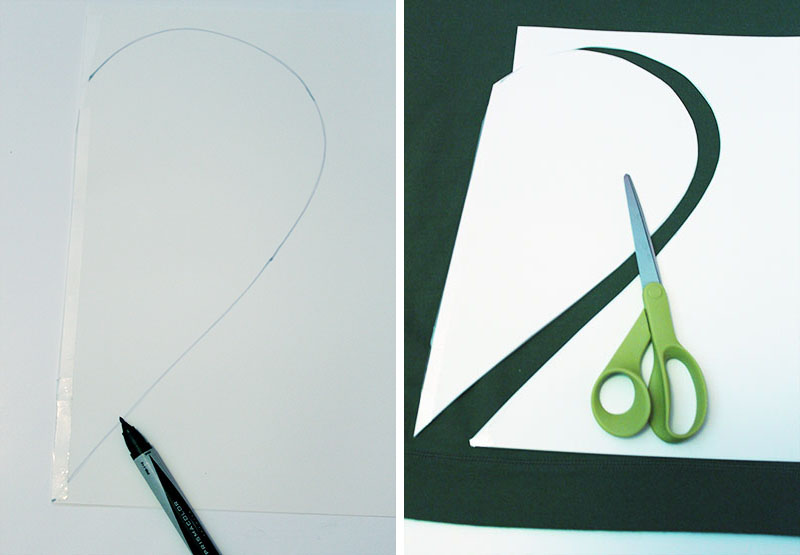
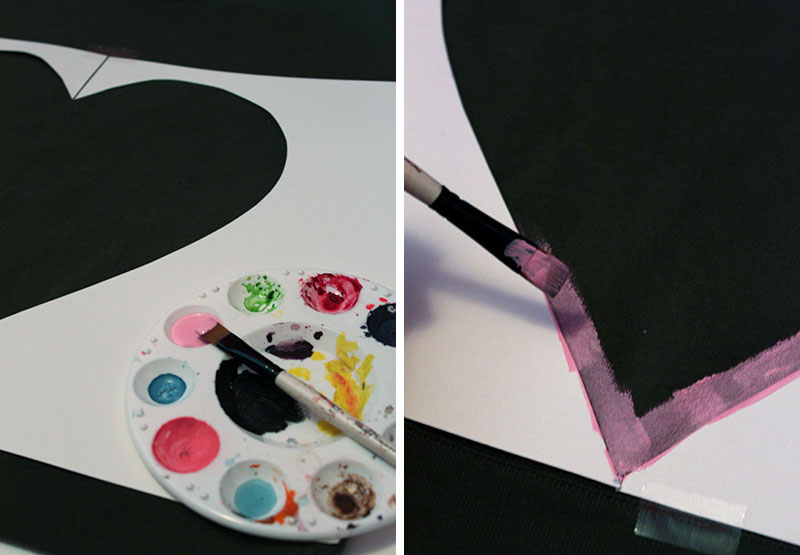
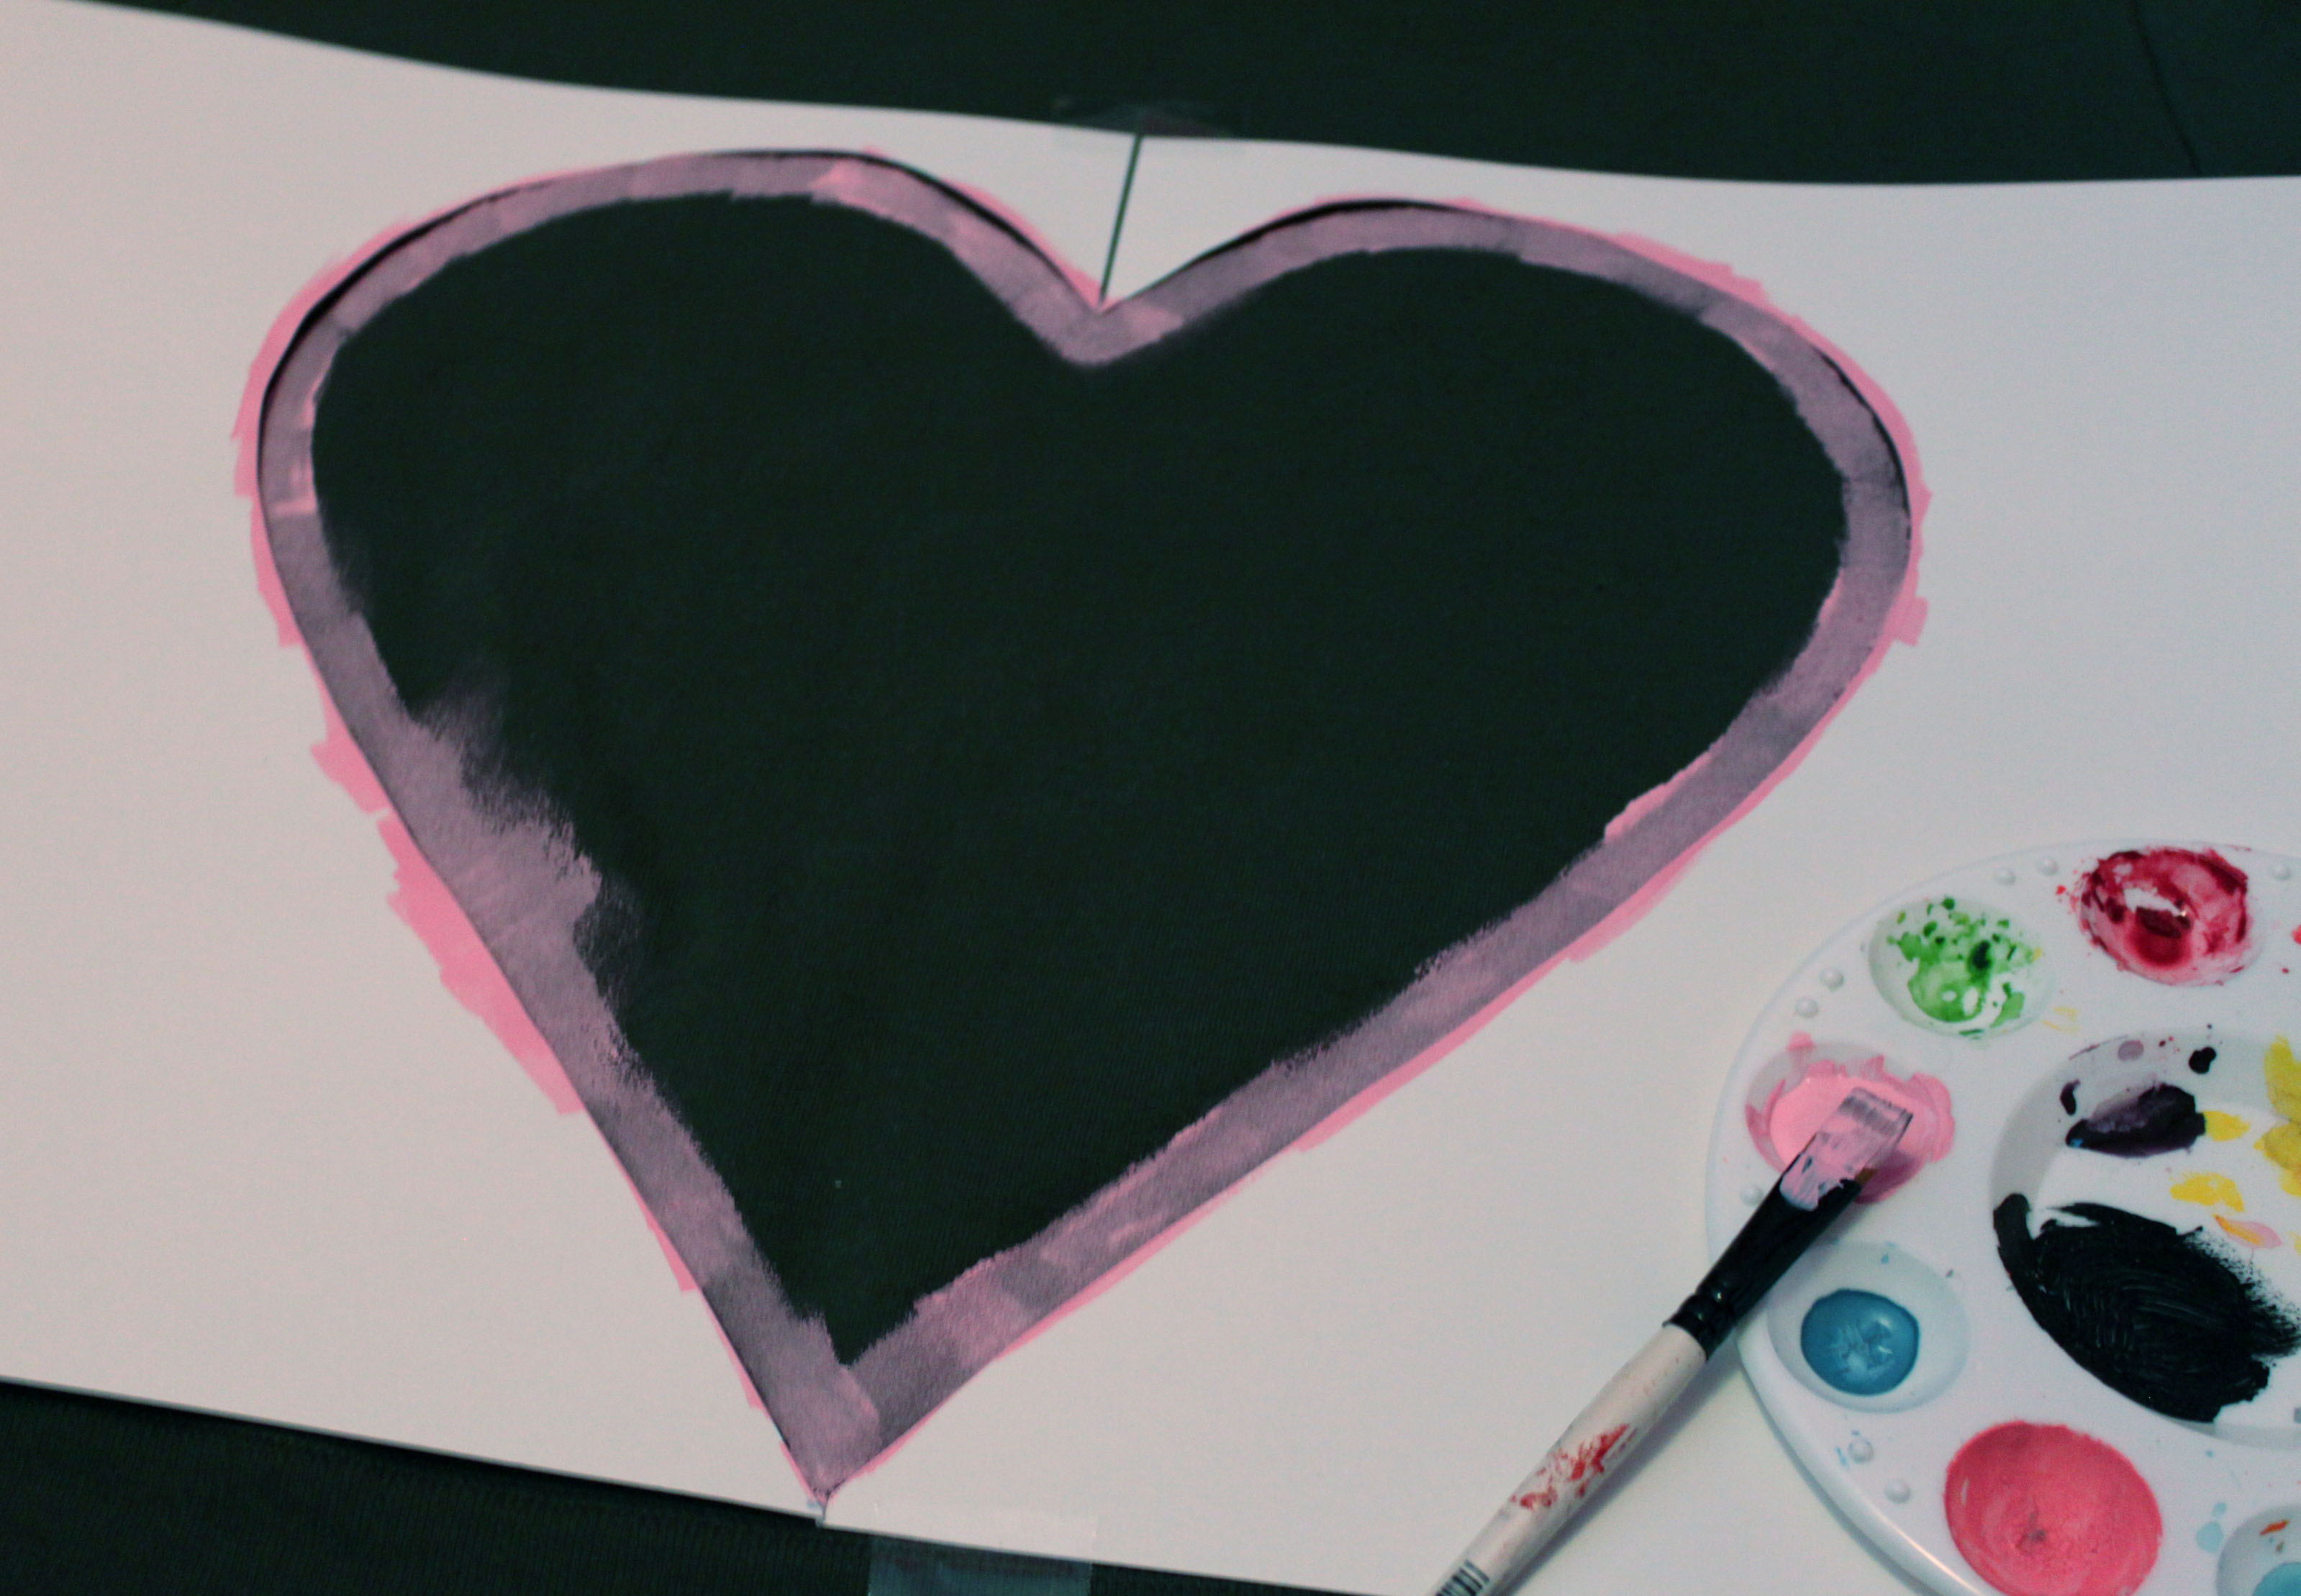
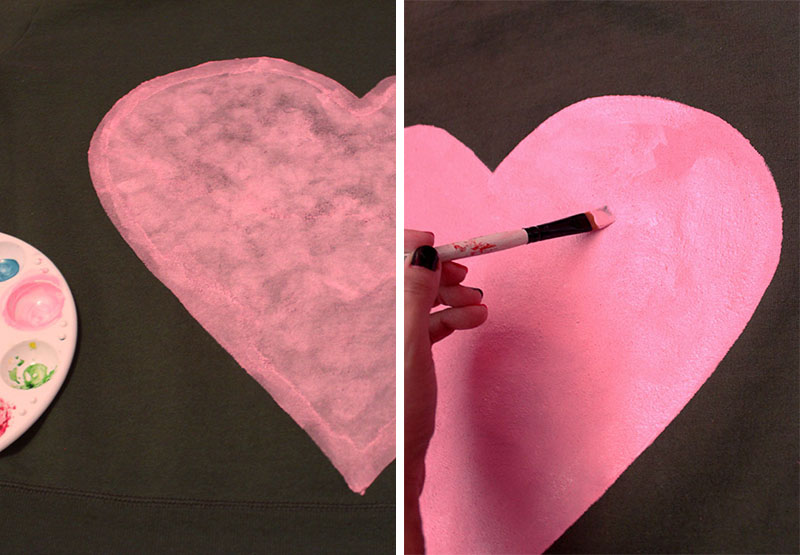
I wanted a big heart but didn’t have the right size paper. A simple fix is to tape pieces of paper together until you get the size you want. Then trace and cut out a heart shape with the fold in the center.Open your heart stencil and place it wherever you want the heart to be on your sweatshirt. Tape it in place so it doesn’t move while you paint. Begin by painting the outline of the heart.I found it easier to paint the entire outline of the heart. Remove the stencil and fix any mistakes. Fill in the rest of the heart. This will be the first layer of paint. Wait for the paint to dry (about an hour). Go back and add a second coat. I did two coats and a third round of touch-ups. Wait for the last coat to dry. I recommend washing your sweatshirt as it will smell of paint. Then it’s ready to wear!
I love the look of peplum and what it can do for the body. Depending on the fit, it can hide a belly, enhance slim hips, and even out the torso if you have broad shoulders. I’ve been reading up on how to make the trend work for you and it’s all about tailoring it to your shape. I’ve made circle skirts in the past and decided it was time to step it up a notch and try my hand at a peplum skirt. Wish me luck!
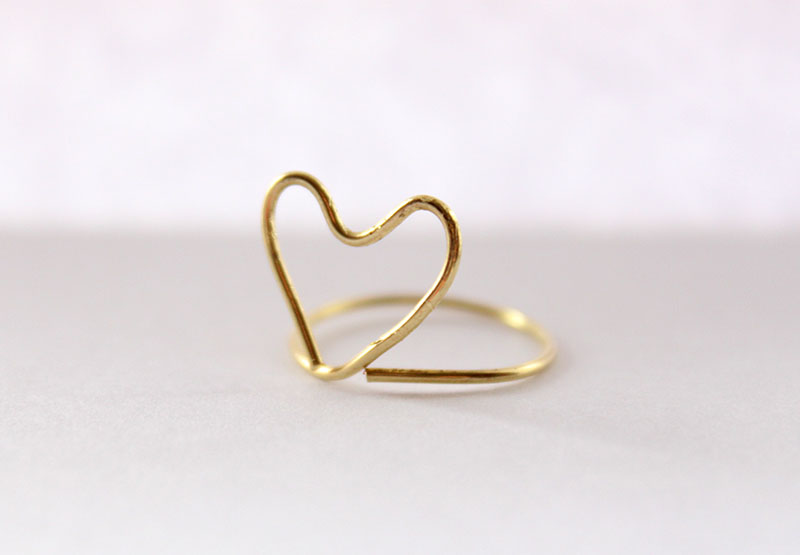
Valentine’s Day is just around the corner so I thought I’d share this DIY tutorial on how to make a wire ‘Love’ ring. A perfect gift for friends or loved ones, or keep it for yourself!
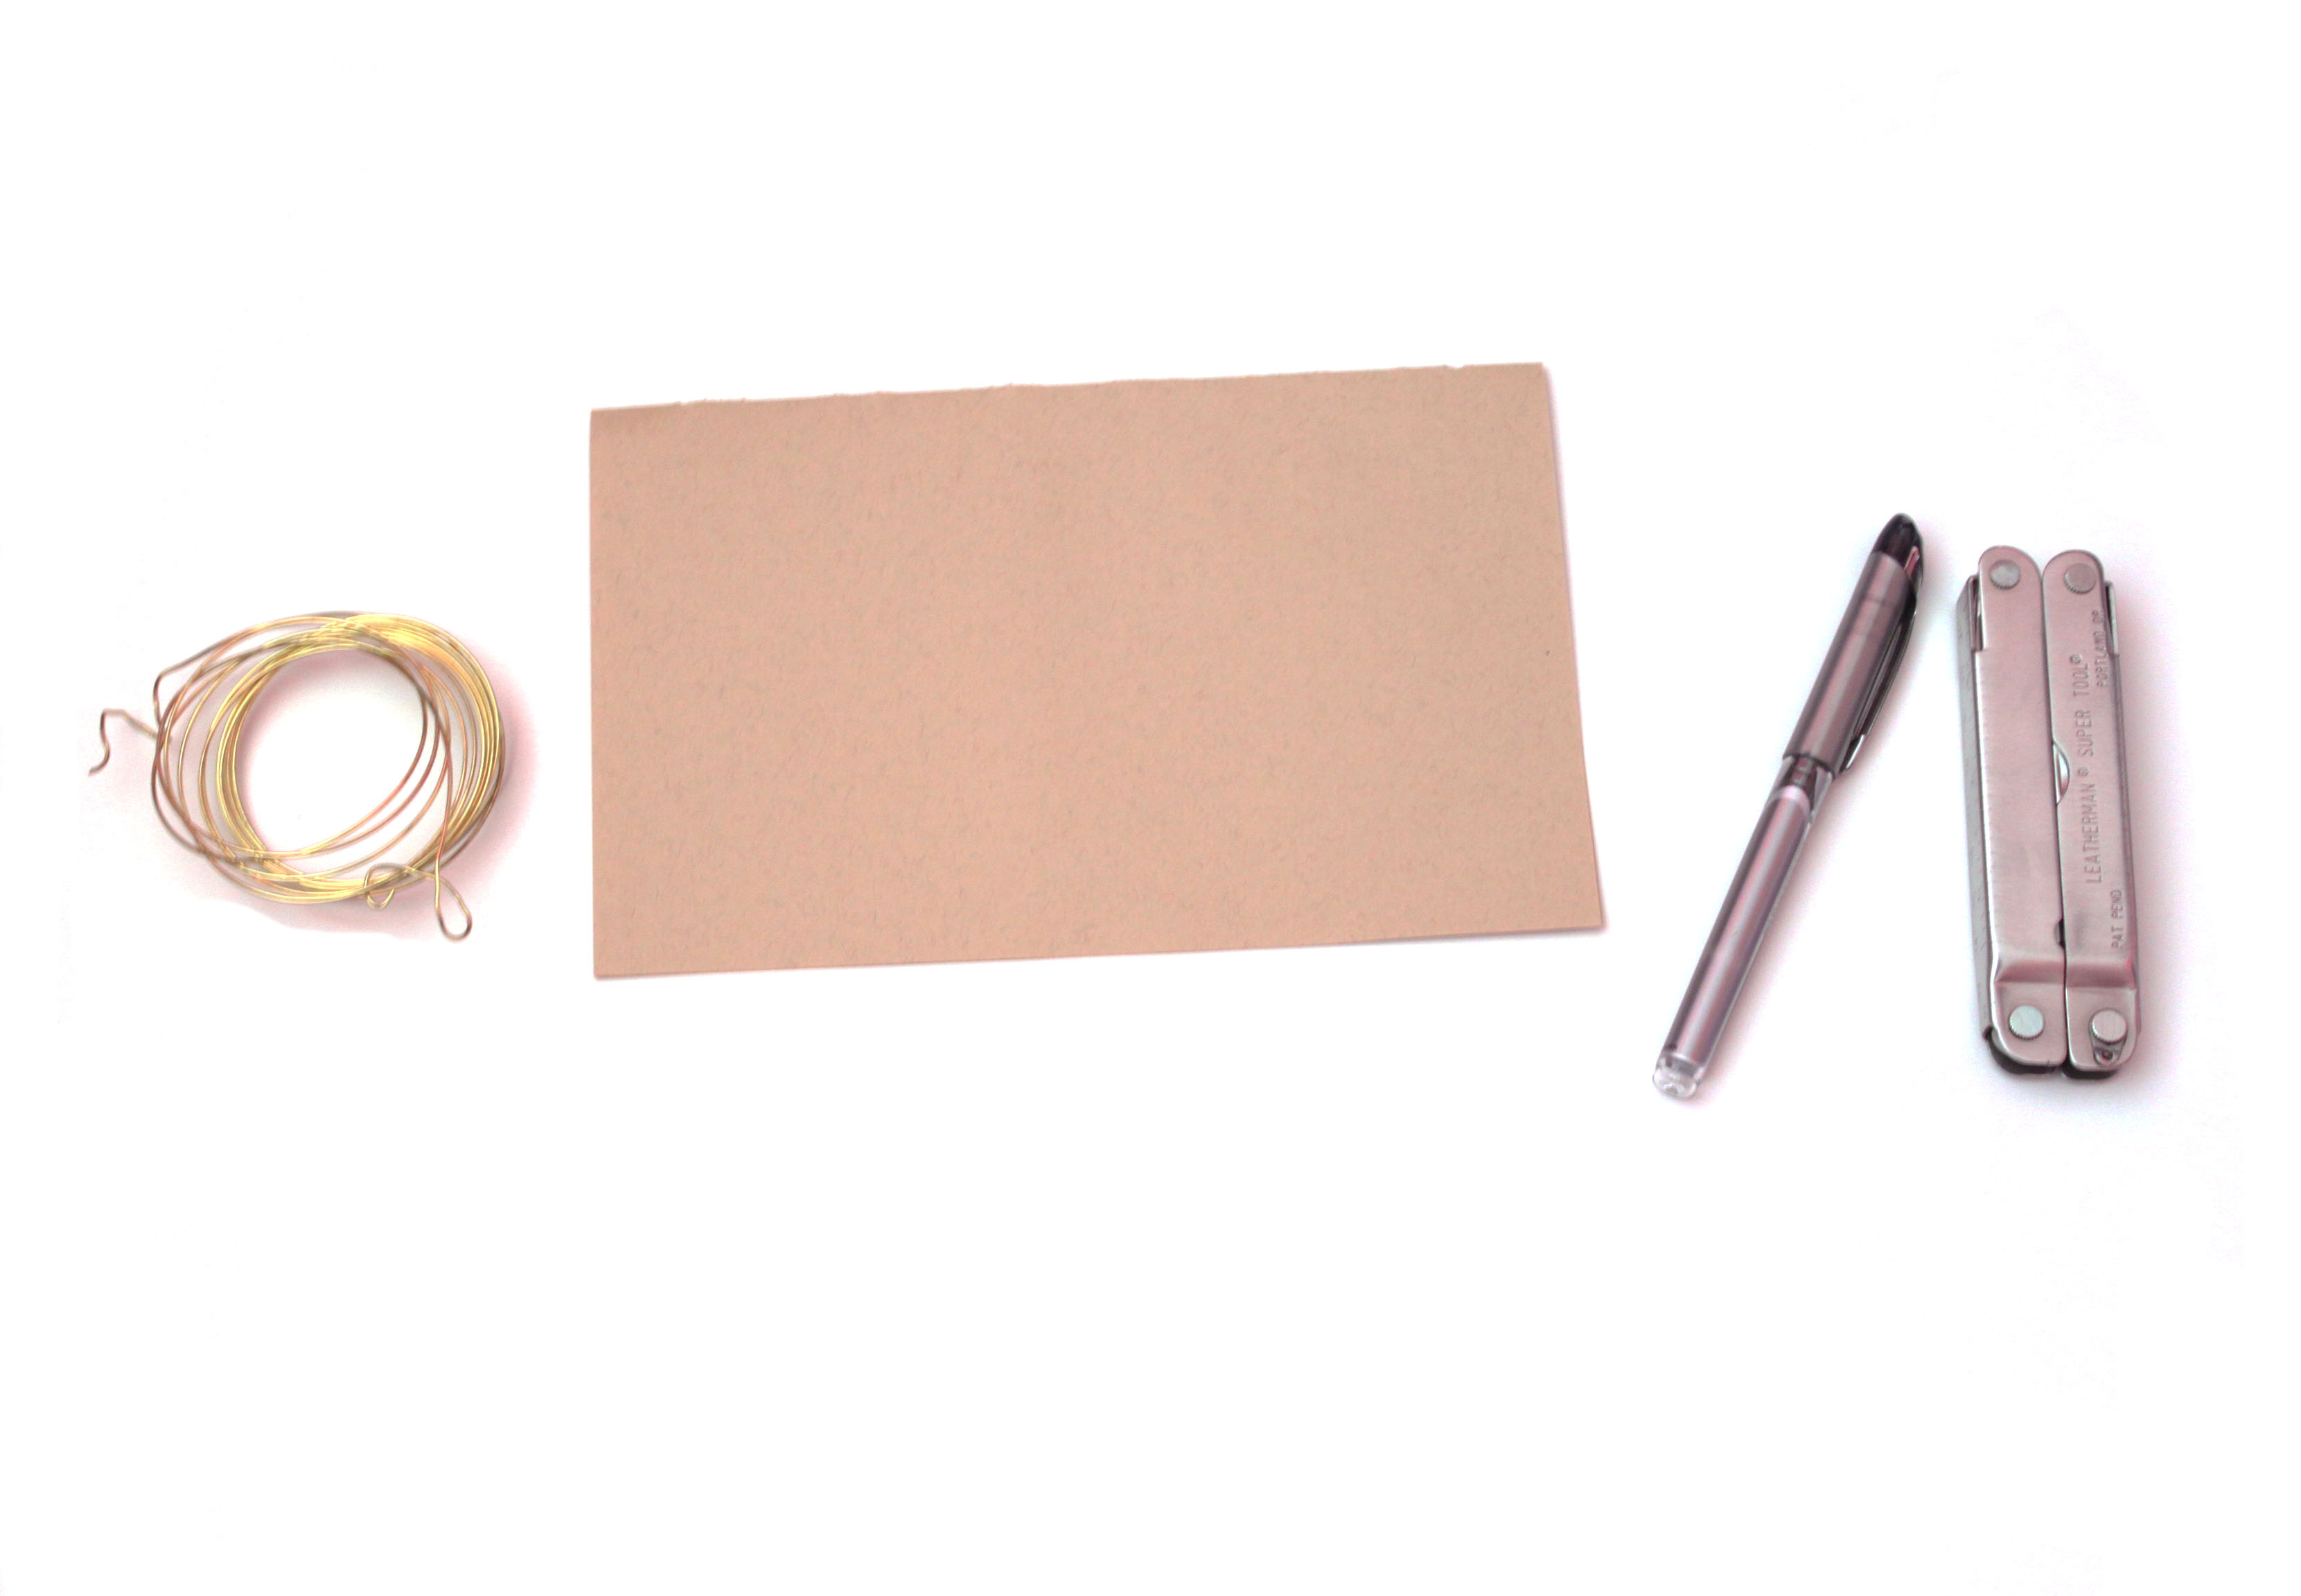
You’ll need:
-24 gauge wire
-Pen & Paper
-Round nose pliers
-Scissors or wire cutter
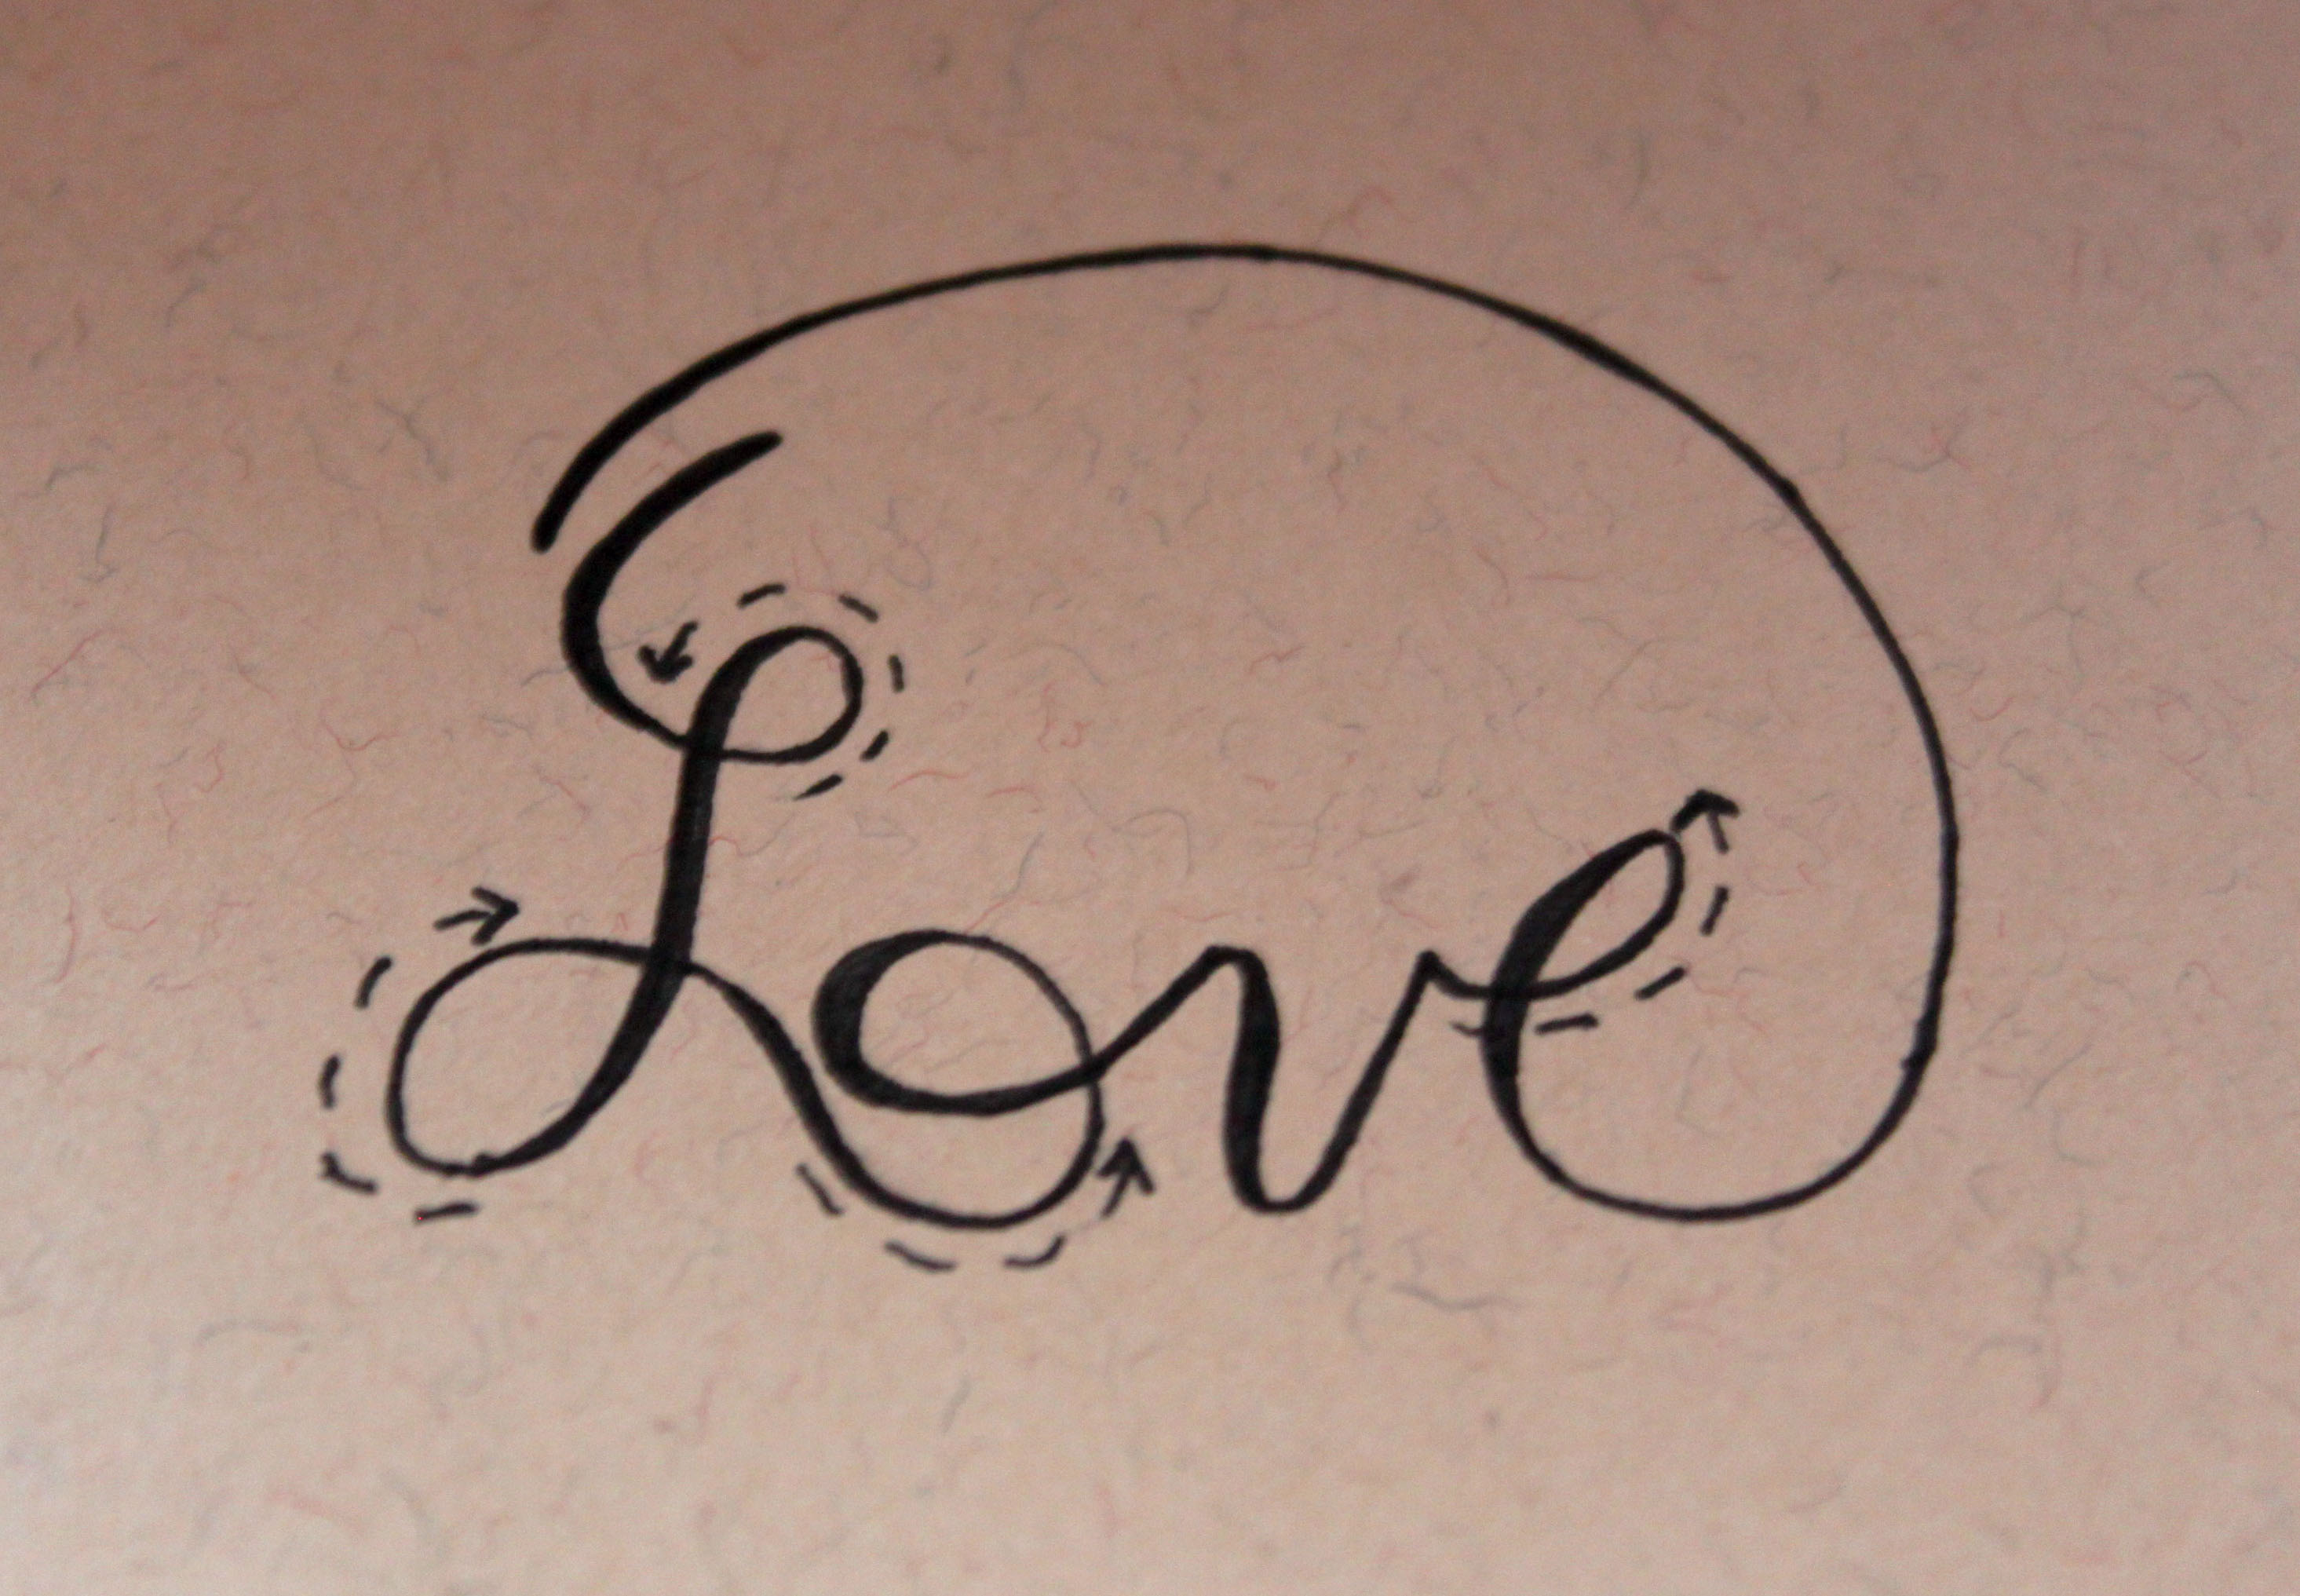
Write ‘love’ in cursive on a piece of paper about 1/4″ x 3/4″ without lifting your pen. Add any additional notes or arrows that will help you follow the lines.
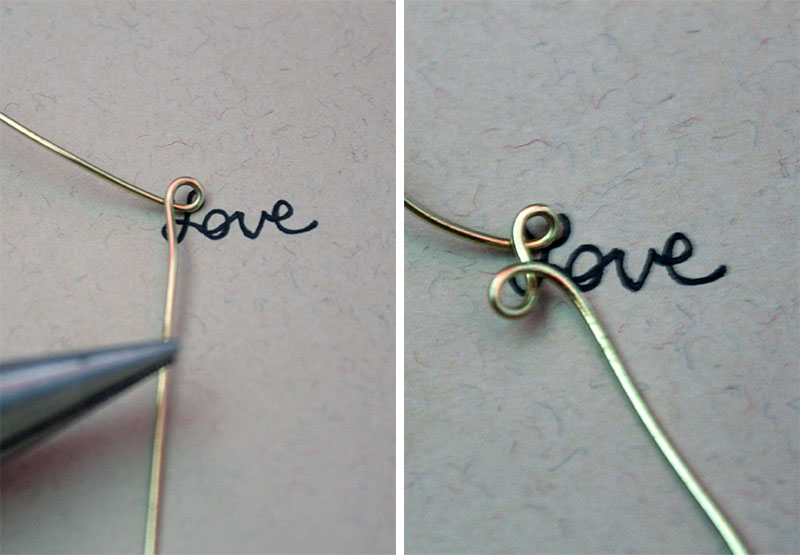
Leave about a 2″ allowance on one end of your wire. Begin with the letter ‘L’ by making two loops using the round nose pliers to bend the wire.
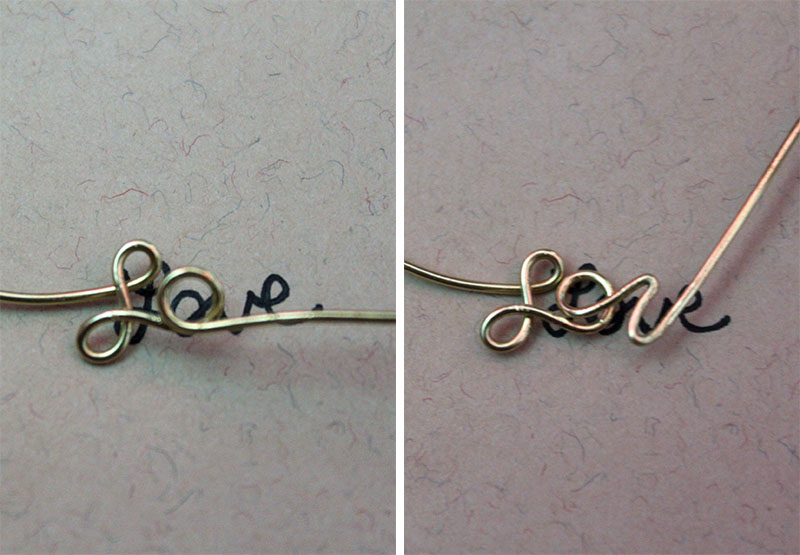
Following the curves of your written word, make the ‘O’. I made the right side of the ‘O’ first, then came back to loop and complete the letter. At the end of the ‘O’, bend the wire as much as possible and follow the lines to make your ‘V’.
Continue following the lines to create the letter ‘E’.
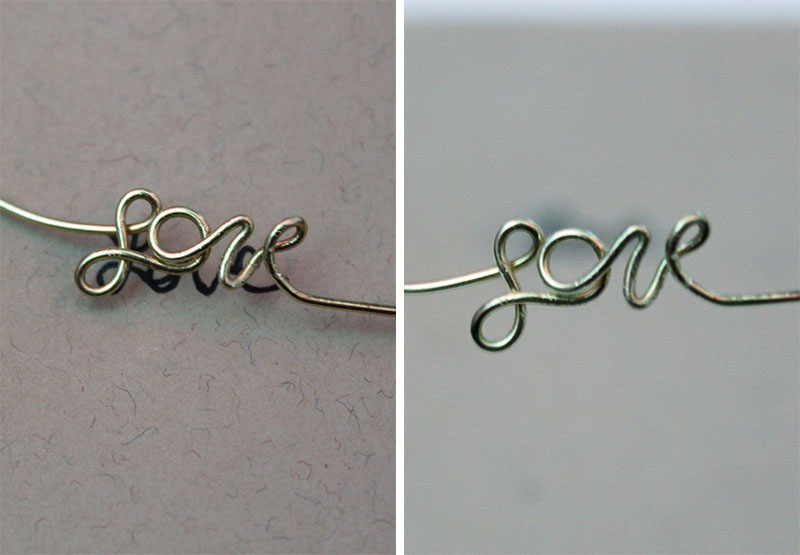
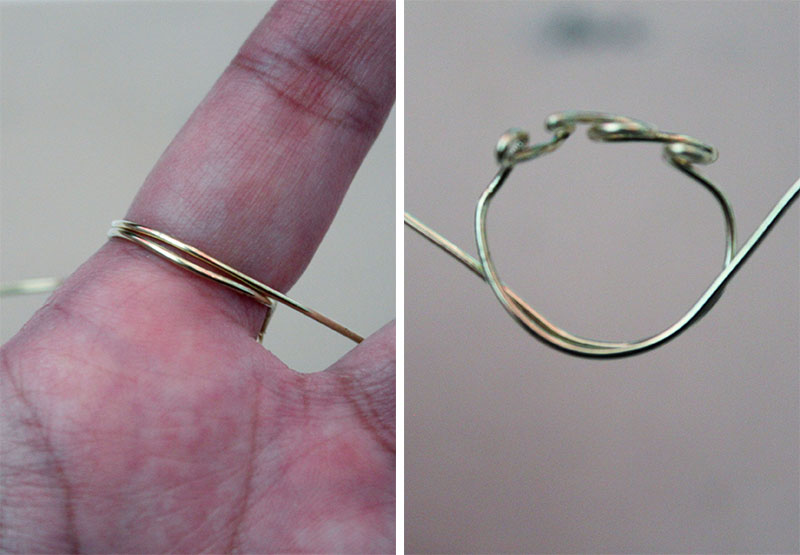
When you are finished creating your last letter, wrap the two ends of the wire around your finger to measure how big the ring will be. Take the ring off, and using scissors or wire cutters cut the two ends of wire. You can wrap the ends around each other, or just pinch them together with the pliers.
And you’re done! A Love ring just in time for Valentine’s Day celebrations!