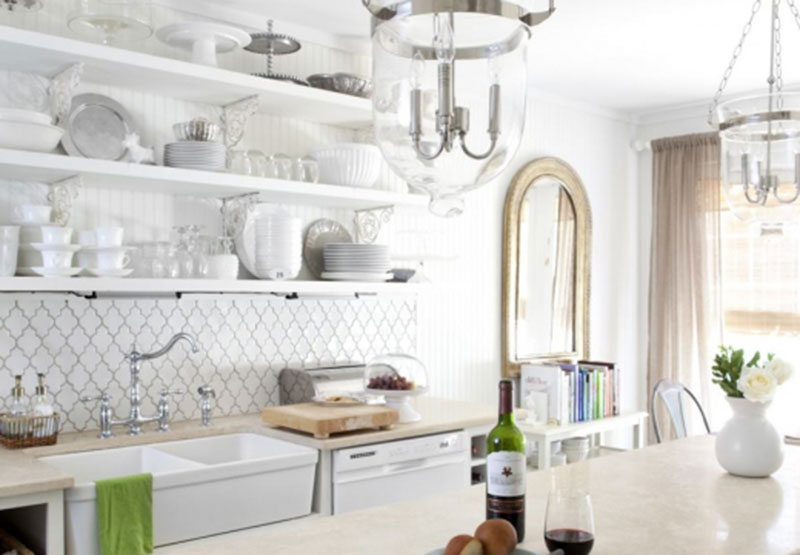
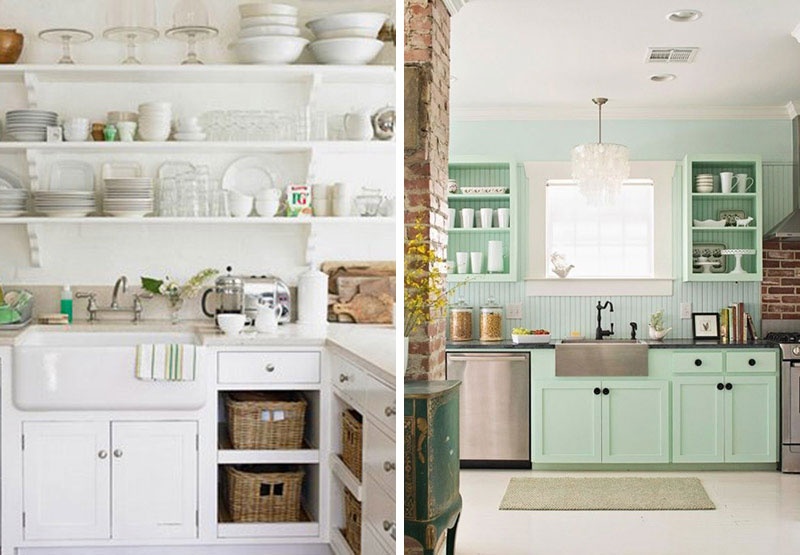
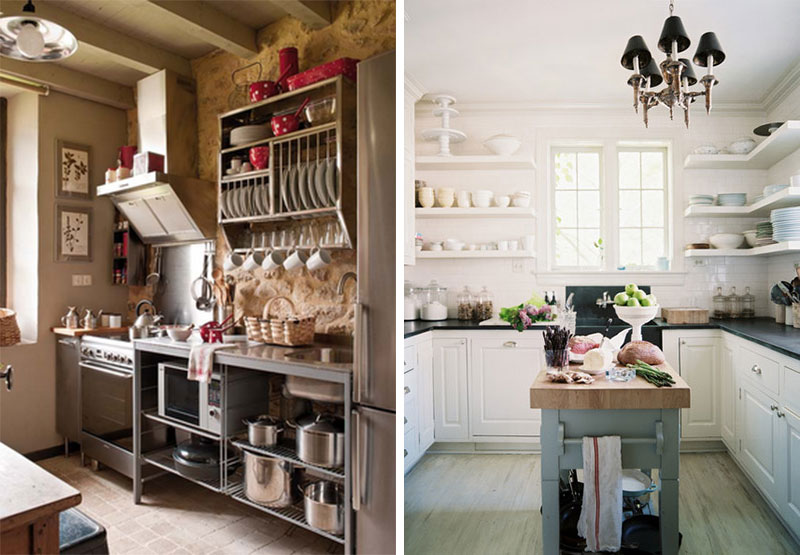
I love the look of exposed kitchen shelves. It forces you to keep your shelves nice and organized, which may not be the case in closed kitchen cabinets. I think the style looks best with matching dinnerware in a crisp white. Open shelves are also a great way to display a collection of kitchenware, like cake stands or mixing bowls. You can easily add color with some fun bowls or teapots.
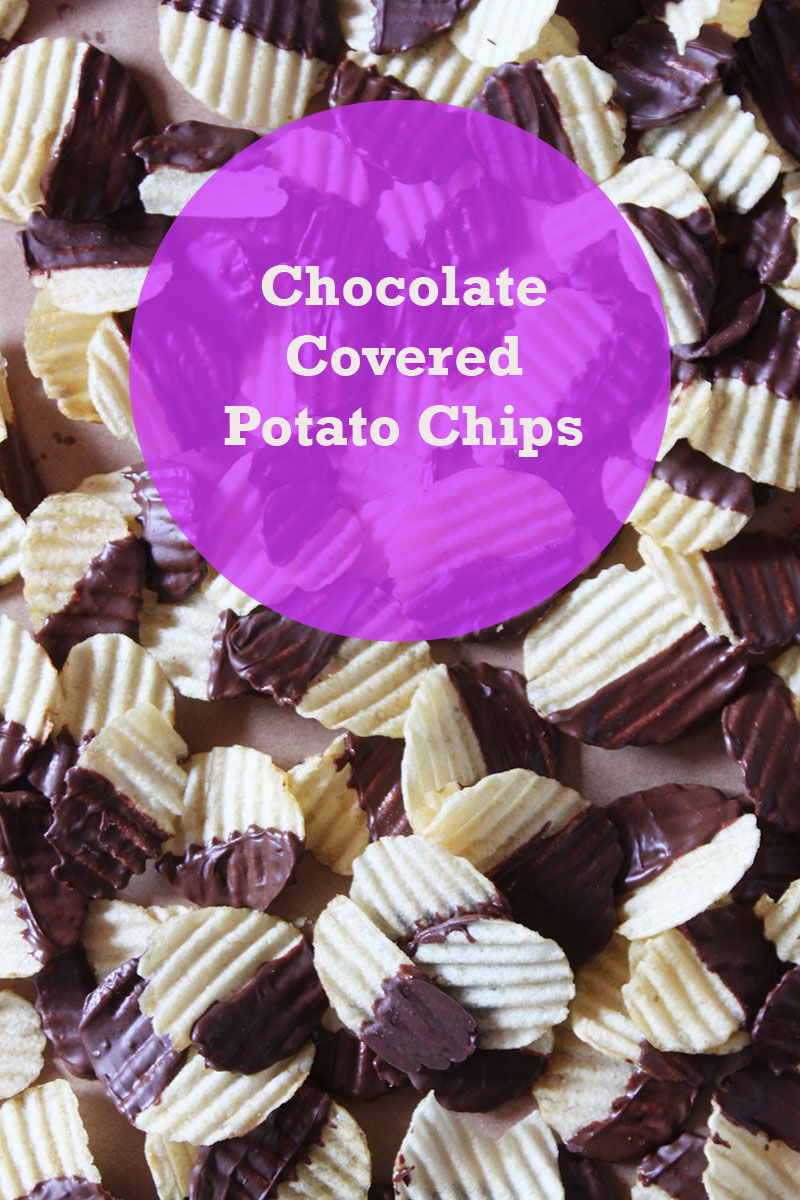
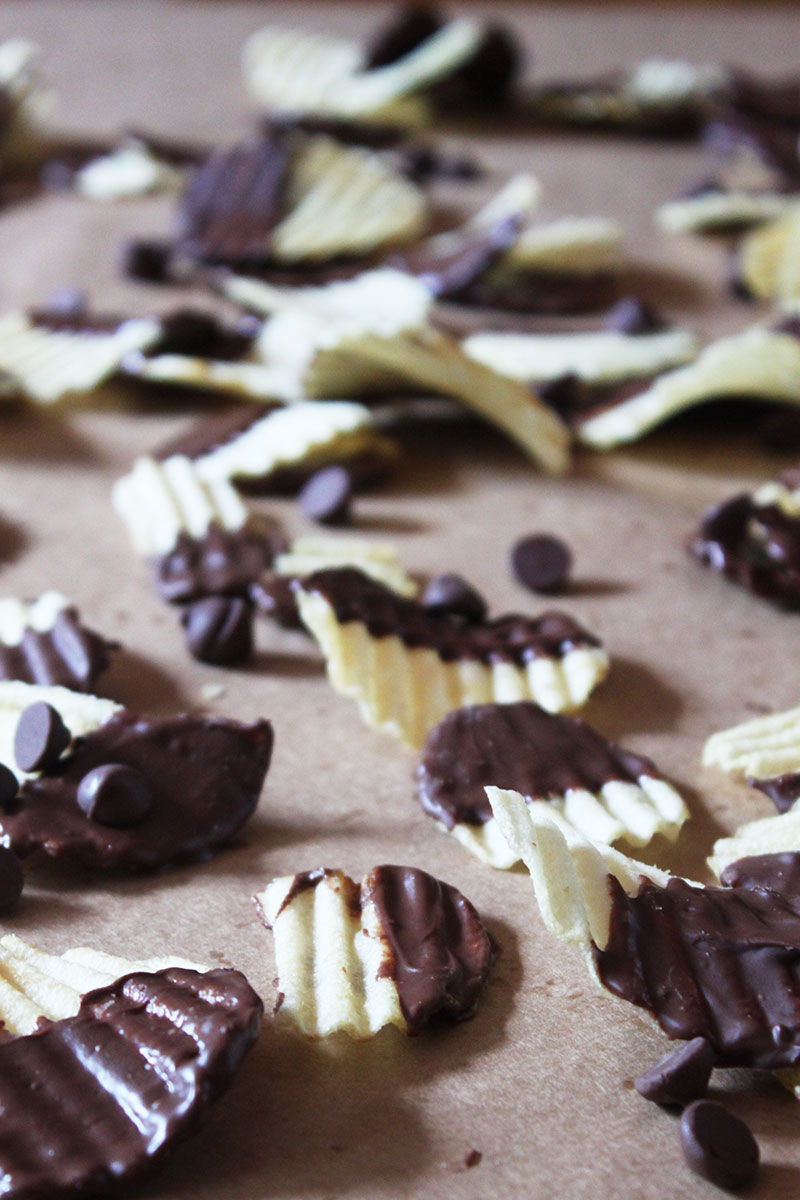
The combination of sweet and salty is one of my all time favorites. I remember when I first discovered the combo when a friend dumped Sno Caps into our bag of popcorn at the movie theater. I haven’t looked back since. Yesterday, I really wanted something to satisfy my craving for something chocolatey. I decided on these Chocolate Covered Potato Chips! I used a think ruffle chip because they don’t break as easily, and deliver an awesome crunch. I love that these are quick and easy to make!
Recipe:
Ingredients:
– 1 1/2 cups chocolate chips (I used milk chocolate, but dark or semi-sweet would be just as good)
– 1 bag wavy/ruffle potato chips
Instructions:
1. Place chocolate chips in a heat-resistant bowl and put over a pot of simmering water, making sure the bowl doesn’t touch the water.
2. Melt the chocolate until smooth.
3. Dip the chips in the chocolate until they are about 1/2 of the way covered.
4. Remove any excess chocolate. (I used a chopstick to help remove and even out the chocolate.)
5. Place chips onto a flat surface/cookie sheet lined with wax paper.
6. Let the chocolate cool completely. Or if you’re like me and can’t wait, put them in the refrigerator to cool.
7. If you don’t eat them all in one sitting, you can store them up to one week.
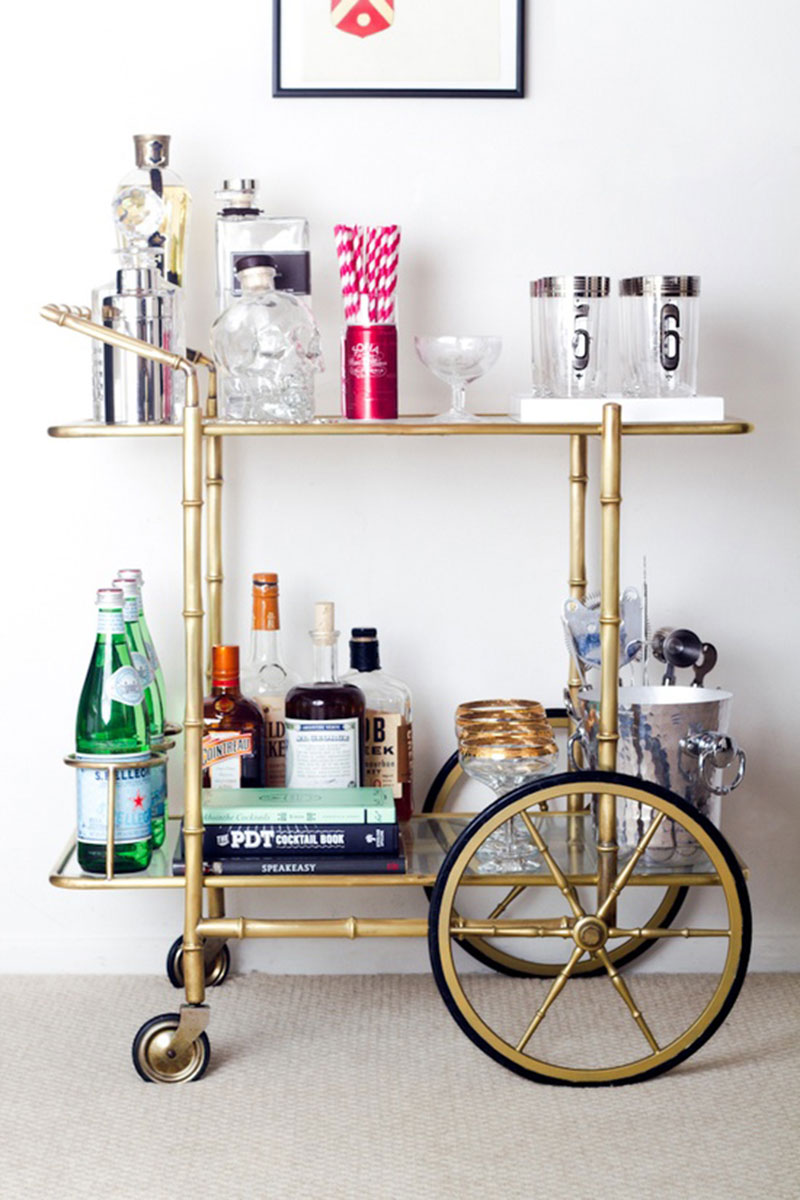
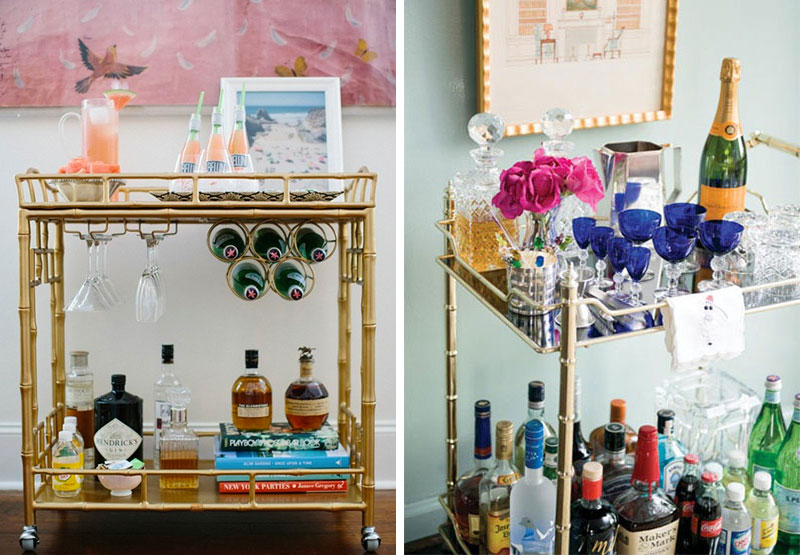
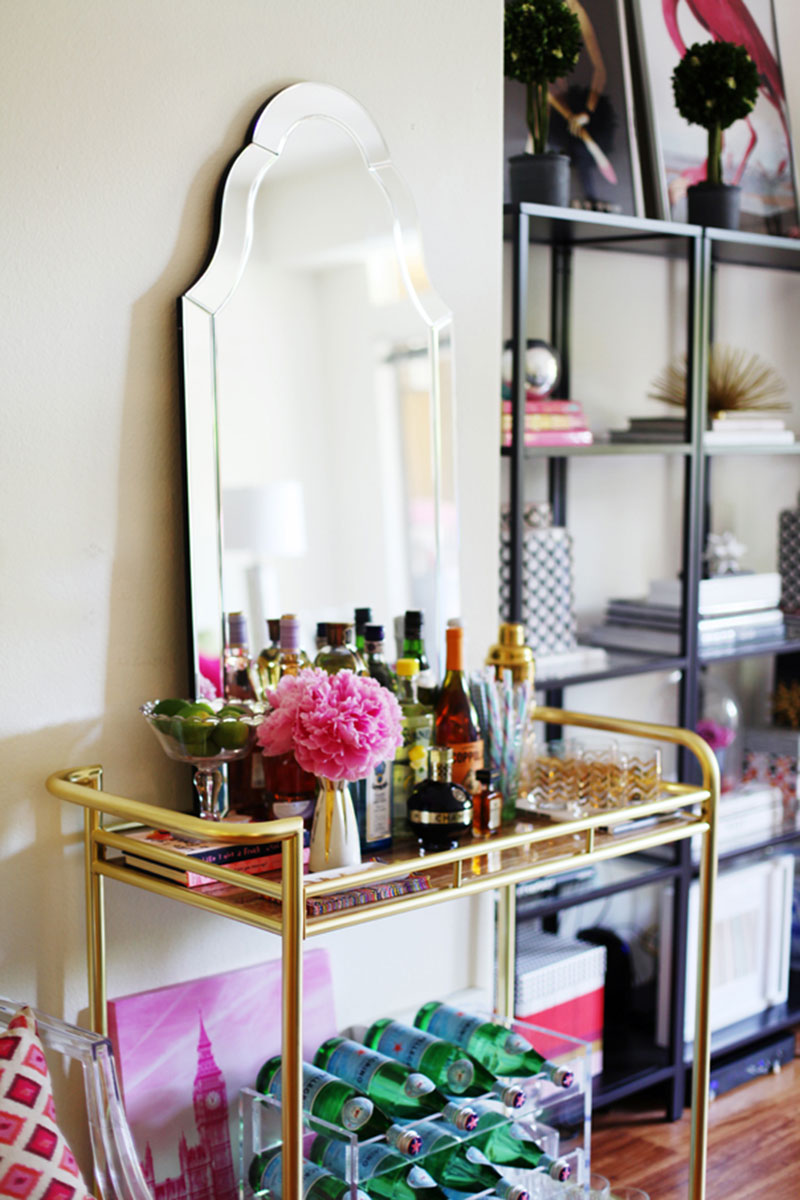
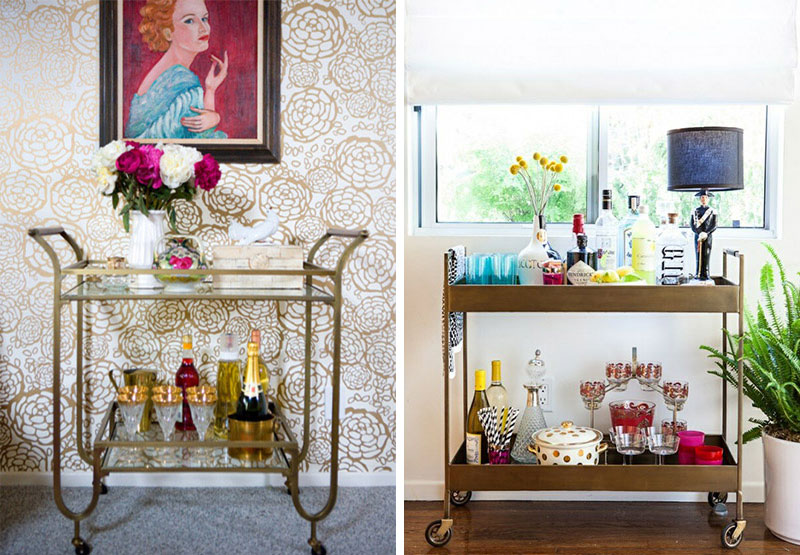
If you follow me on Pinterest, you may have noticed I’ve been enamored by Bar Carts. They are easily customizable to be a decorative piece in your home, yet remain fully functional. I’m partial to gold bar carts as evidenced by these photos. (I didn’t even notice most of them were gold until I uploaded them!) I especially love the oversized wheel on the bar cart above. A good bar cart should have different types of glasses, mixology tools, recipe books, and of course your favorite spirits and mixers!
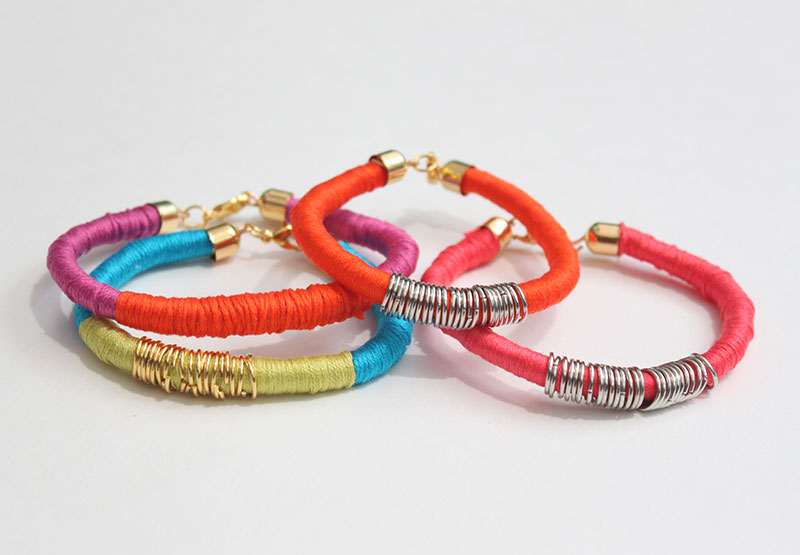
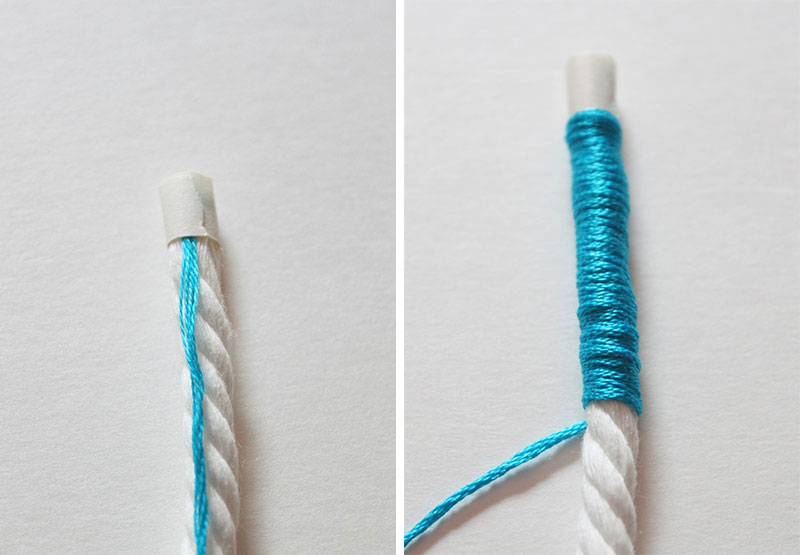
I recently made a trip to Hobby Lobby, my newest obsession since my first visit to one in Chicago. They had the perfect sized rope trim for thread-wrapped bracelets. I decided to add jump rings for a more updated look. I love the way they turned out! They’re perfect for stacking, or on their own.
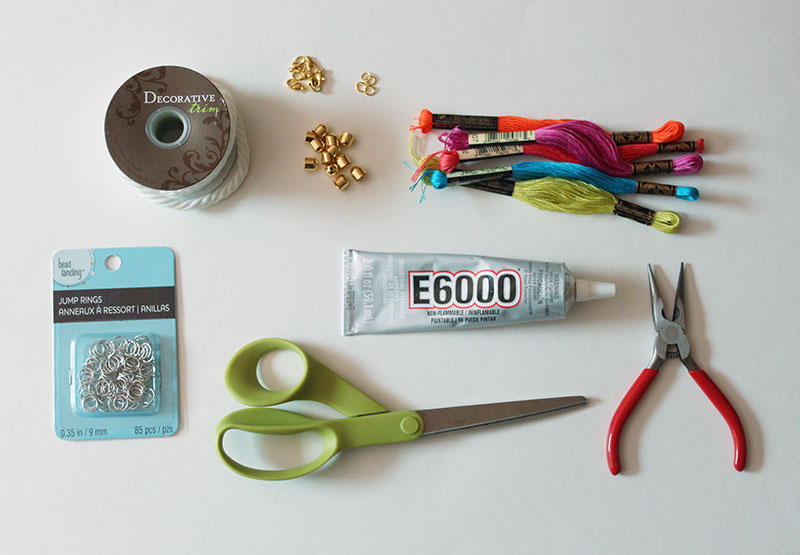
You’ll need:
– Rope Trim
– Embroidery thread
– 9mm Jump Rings
– Jump rings and fasteners
– Glue
– Pliers
– Scissors
– End Caps (similar)
1. Start by cutting a 6″ piece of trim, or long enough to wrap around your wrist. Tape one end of embroidery thread to one end of the trim. Wrap the embroidery thread around the rope trim.
I was recently contacted by the amazing people at Buzzfeed asking if I would create a travel photo inspired DIY for them. Of course, I jumped at the chance and immediately started brainstorming ideas. We decided on 3D Photo Shapes! I created the shapes my first year of college and kept them until my last year when I threw them away because I didn’t know what to do with them. They were always one of my favorite projects from school, so I love the new repurposed shapes. They look great on a desk or bookcase, and will keep your travel memories in plain sight!